How to: Use SOLIDWORKS PDM and SOLIDWORKS Design together
16 February 2026
SOLIDWORKS is available to buy with 2 different licencing types; SOLIDWORKS Design with Cloud services (the classic SOLIDWORKS package with machine-based activation) and now SOLIDWORKS Design, which can take advantage of “Named user” licencing.
Named user licencing comes with added flexibility for users. The software is assigned to a user’s individual email address, rather than a device or serial number. Meaning users are free to log in and securely access their software and data on multiple devices. Unlike machine-based activation, there’s no need to deactivate to move machines. Which minimises risk and downtime.
As SOLIDWORKS Design licences are managed by 3DEXPERIENCE, traditionally the default data management system is the 3DEXPERIENCE Platform. The built-in collaboration tools and secure cloud revision management came connected to a 3DEXPERIENCE vault only. Previously, it has never been possible to load the SOLIDWORKS PDM add-in within the named user SOLIDWORKS Design products. This meant that the named user licencing model was unattainable for users who use SOLIDWORKS PDM.
However, now SOLIDWORKS Design comes with the ability to connect with a PDM Vault instead of a Collaborative Space!
Benefits of using SOLIDWORKS PDM & SOLIDWORKS Design
Dedicated SOLIDWORKS PDM users are now able to take advantage of SOLIDWORKS Design with named user licencing. Which gives the option of more flexibility across their devices. In addition, named user licencing enables users to save money with lower upfront IT costs, while simplifying software access, administration and deployment.
Being able to deactivate 3DEXPERIENCE integrations from SOLIDWORKS Design can also be a benefit for PDM users, removing potential conflicts or distractions.
How to use SOLIDWORKS PDM & SOLIDWORKS Design
To use the SOLIDWORKS PDM data management system within SOLIDWORKS Design follow the steps below:
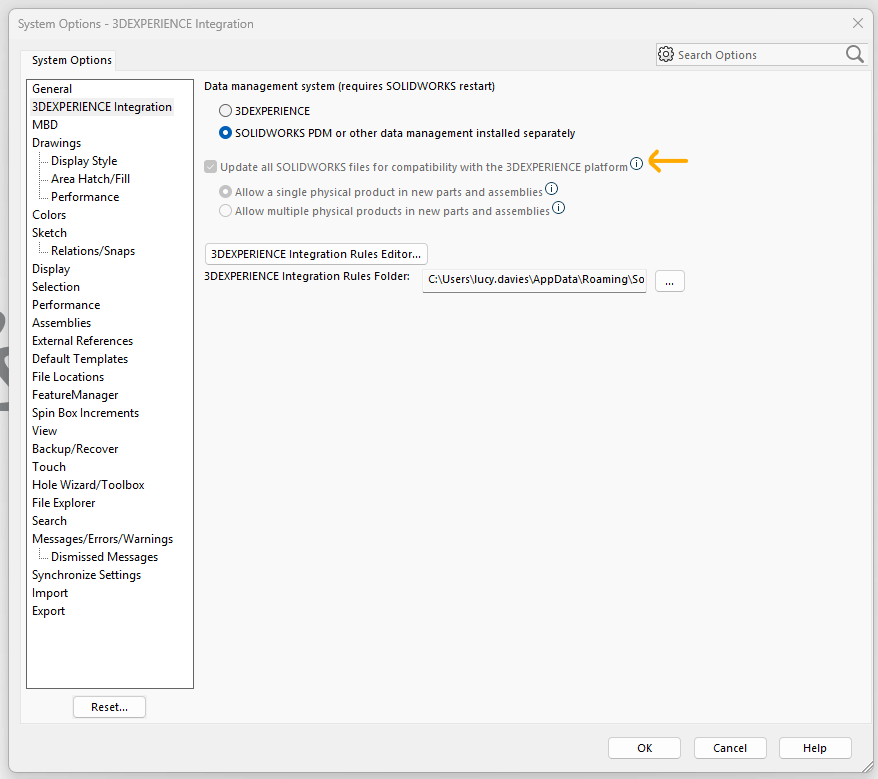
1. Within SOLIDWORKS Design, click Tools > Options > 3DEXPERIENCE Integration. The default data management system will show as 3DEXPERIENCE.
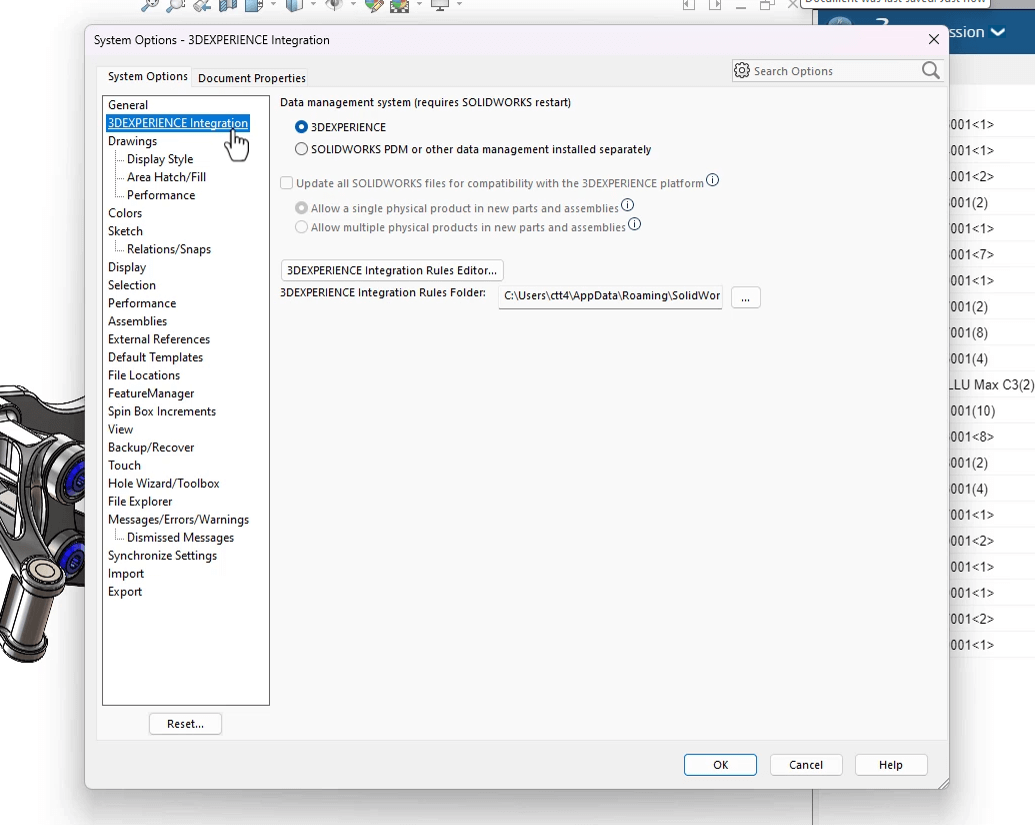
2. Select “SOLIDWORKS PDM or other data management installed separately”.
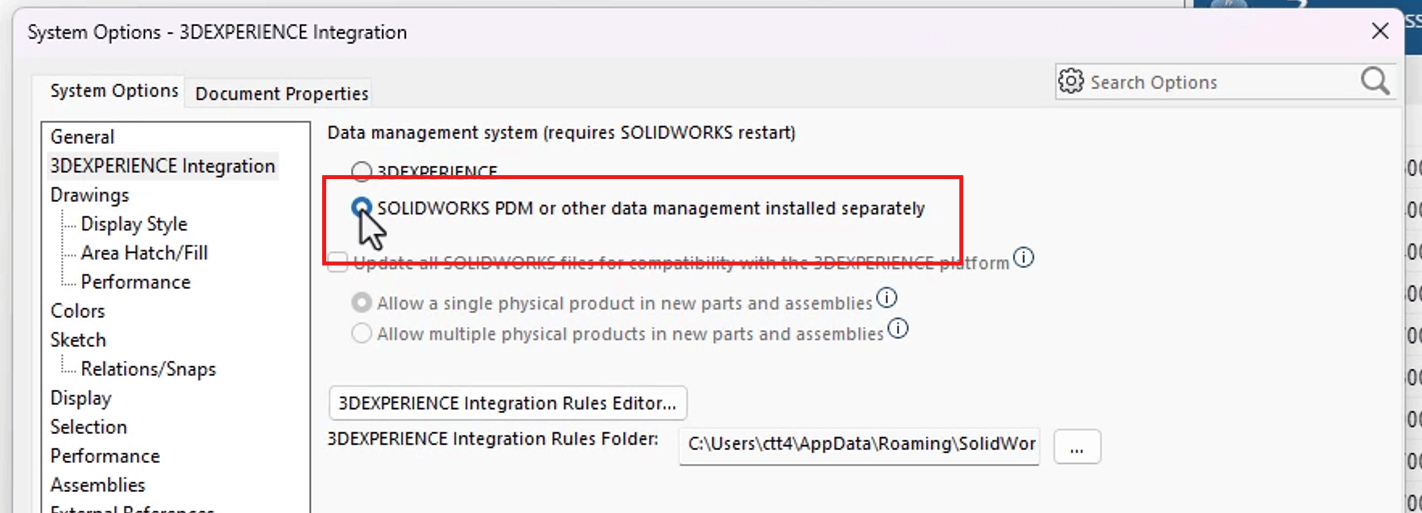
3. Click “OK”.
4. IMPORTANT: Restart SOLIDWORKS!
5. When SOLIDWORKS is reopened, the PDM add-in can be activated from Tools > Add-ins. (Note: it must be installed separately).
Selecting another data management system removes the 3DEXPERIENCE platform elements responsible for managing documents in collaborative spaces:
- “MySession” doesn’t appear in the 3DEXPERIENCE Task Pane
- “Lifecycle” and “Collaboration” tools are not available in the CommandManager and menus
- Open and Save operations cannot access the 3DEXPERIENCE platform
- The 3DEXPERIENCE Files on “This PC” tab doesn’t appear
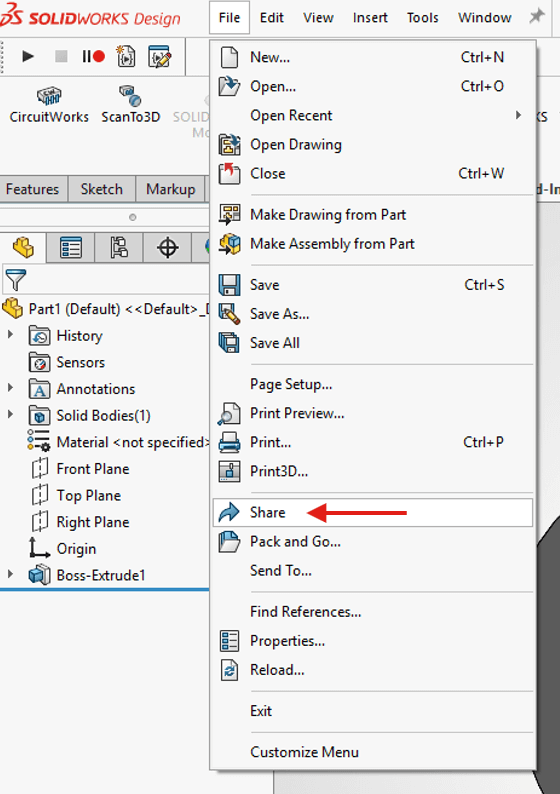
However, users can share files with Share & Markup regardless of the data management system.
Important Considerations When using SOLIDWORKS PDM
If choosing to use SOLIDWORKS PDM as your data management system of choice there are some important things to consider:
1. SOLIDWORKS Toolbox Settings
The user settings for any “Toolbox” defined within the 3DEXPERIENCE SOLIDWORKS Design product will be the same. “Create Parts” always runs and stores files in the local “ENOUSWC” cache folder.
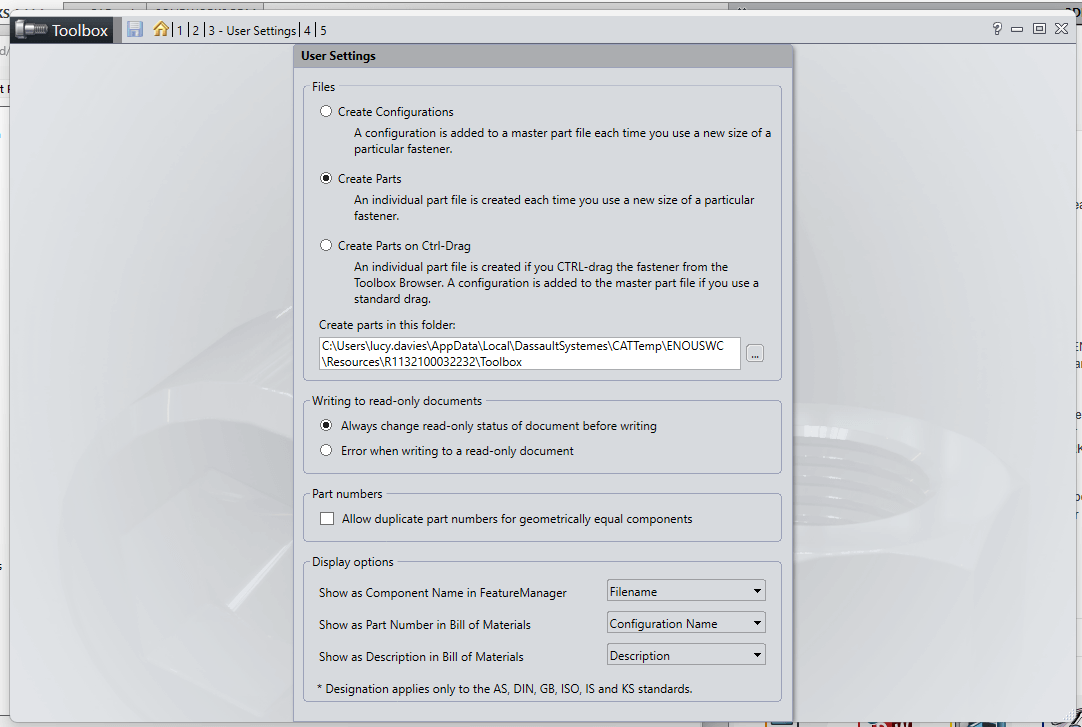
This takes precedence over any PDM settings defined in the PDM vault. If the vault settings do differ, it may cause issues for the toolbox users of that vault. The 3DEXPERIENCE data management system defines these Toolbox settings and they cannot be changed – even if you disable the system as described above.
2. 3DEXPERIENCE Compatibility Settings
Always check if users have enabled the “Update all SOLIDWORKS files for compatibility with the 3DEXPERIENCE platform” setting. It can stay active even if the 3DEXPERIENCE data management system is disabled. This will change the configuration format of the data, which can potentially cause issues for PDM vault users.
For more information on updating files for 3DEXPERIENCE compatibility, check out our blog here.
Visiativ UK & Ireland customers requiring assistance with set up can contact our technical support team here.