

How to create a Library Feature in SOLIDWORKS
10 February 2026
If you use the same set of features to create your geometry on a regular basis, you know how time-consuming it is, especially if you do it manually. The Library Feature in SOLIDWORKS lets you quickly and easily place saved features anywhere on your design. You save individual or grouped features for reuse by dragging and dropping them onto your model.
The trick to creating library features is to keep external references to a minimum. By “external references,” we mean geometry or sketches that you don’t create with the features you save. When you add a library feature to a new part file, SOLIDWORKS prompts you to specify the location of these references. The more references you include, the longer it takes to position and fully define the library feature.
Creating a Configurable Library Feature
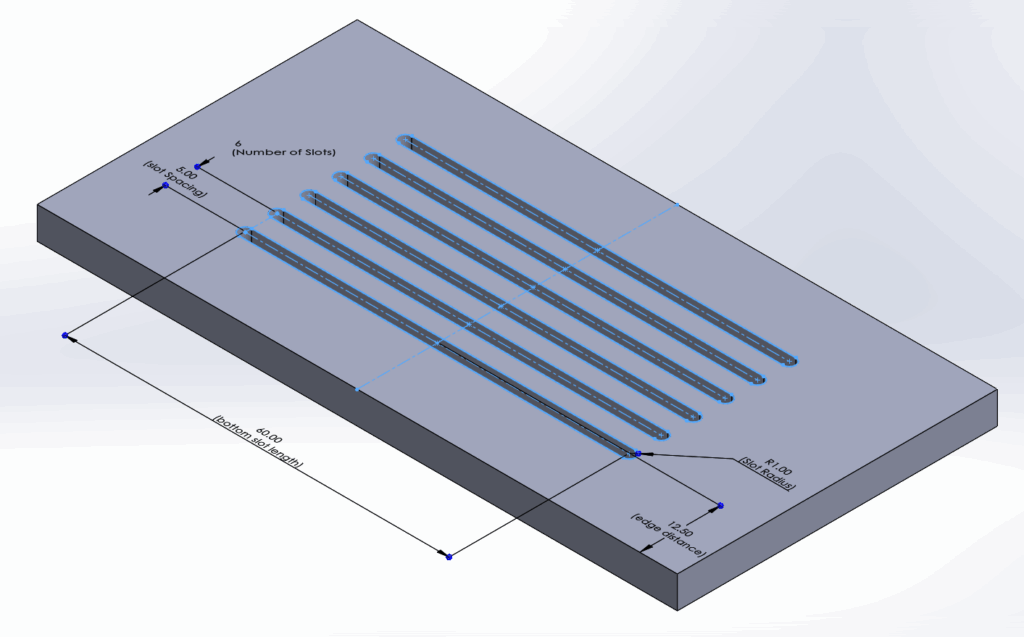
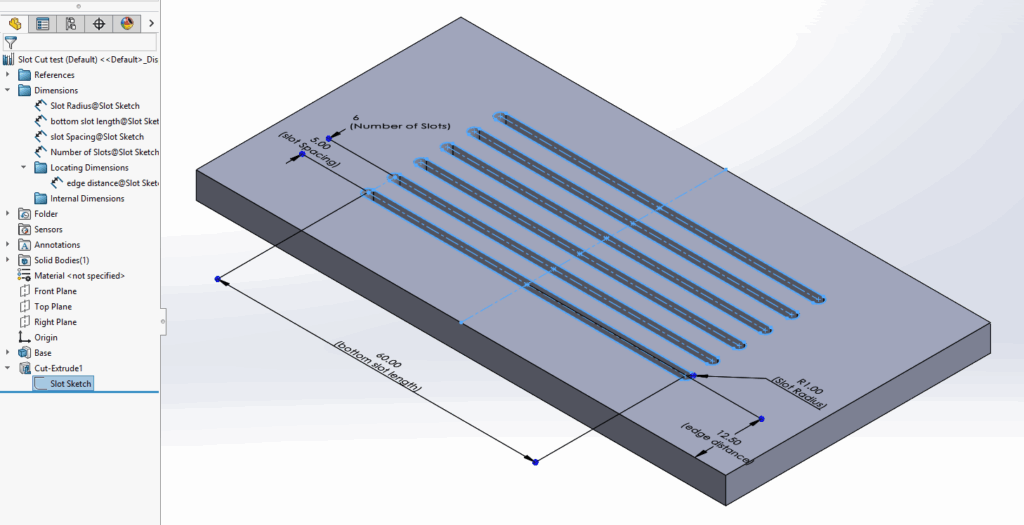
In the example above, we create a configurable Slot cut feature using the capabilities of SOLIDWORKS Library Feature creation. We name the dimensions we want to control so we can easily recognise them.
Using three external references in total:
-
The top face of the block, which drives the cut extrude sketch and the chamfer command
-
The lower edge for vertical placement
-
A centreline to centre along an edge
We place the 2D sketch on a plane or face so it functions correctly. When we drag the library feature onto a face of the part we design, SOLIDWORKS recognises that face as the placement face or plane.
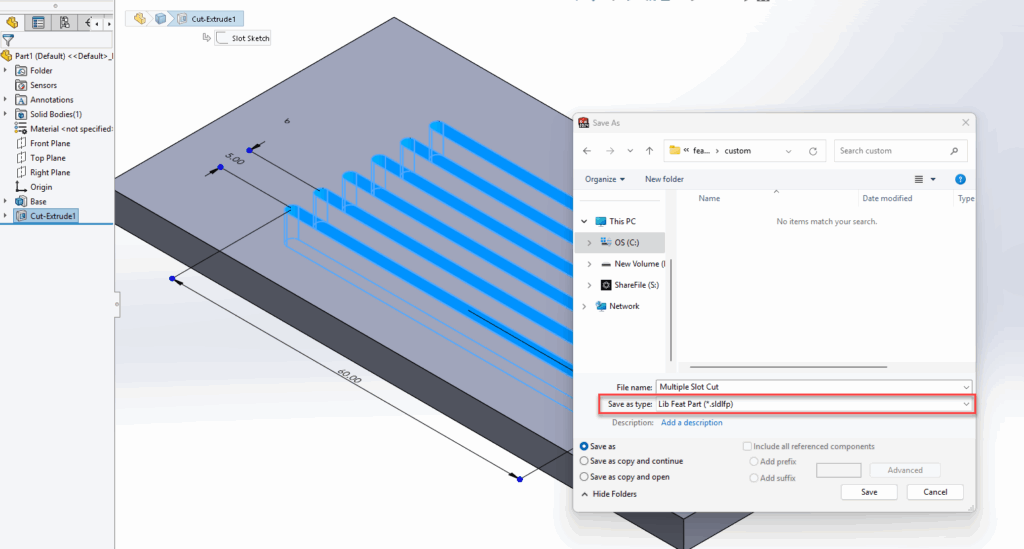
Once we create our features, we select them in the Feature Manager Design Tree. In this case, we select only “Cut-Extrude1”, then go to File > Save As. We select the save as type “Lib Feat Part”.
Choosing the save as type “Lib Feat Part” is critical to creating a Library Feature.
Saving the Feature as a Library Part
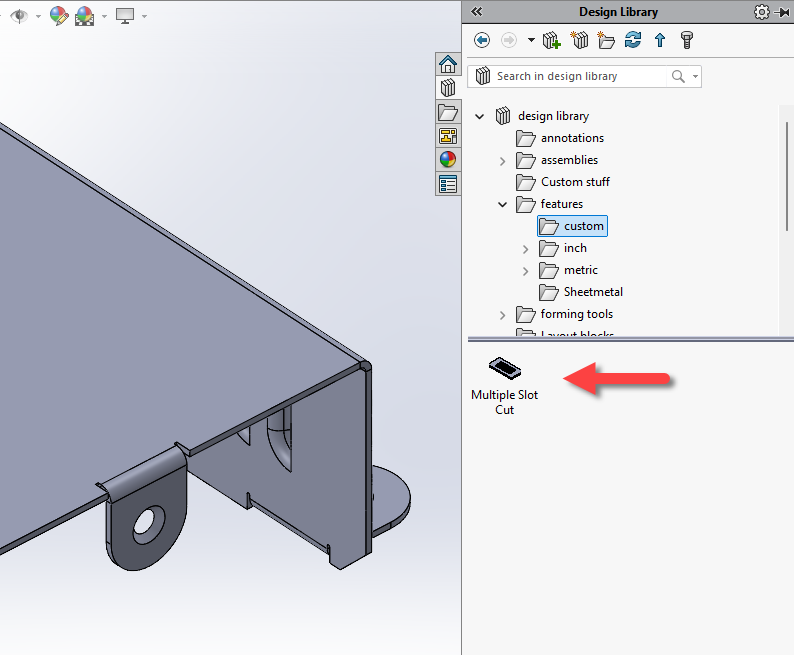
Next, we browse to the Design Library where we see the saved Library Feature we just created.
When we drag and drop it onto a new design, SOLIDWORKS asks us to define the external references to locate the part. Once we specify them, we can add the Library Feature successfully.
Adding Locating Dimensions to a Library Feature
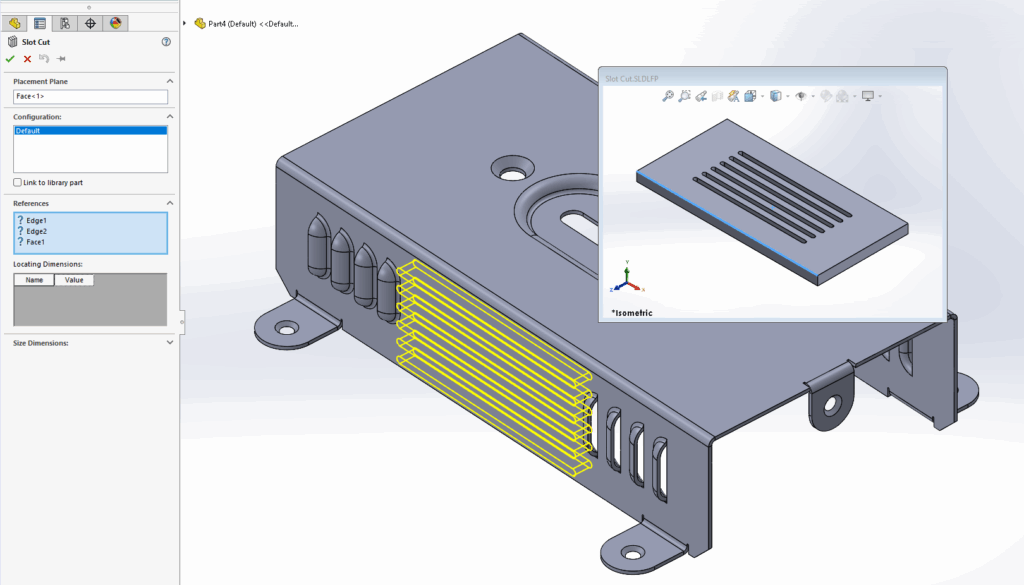
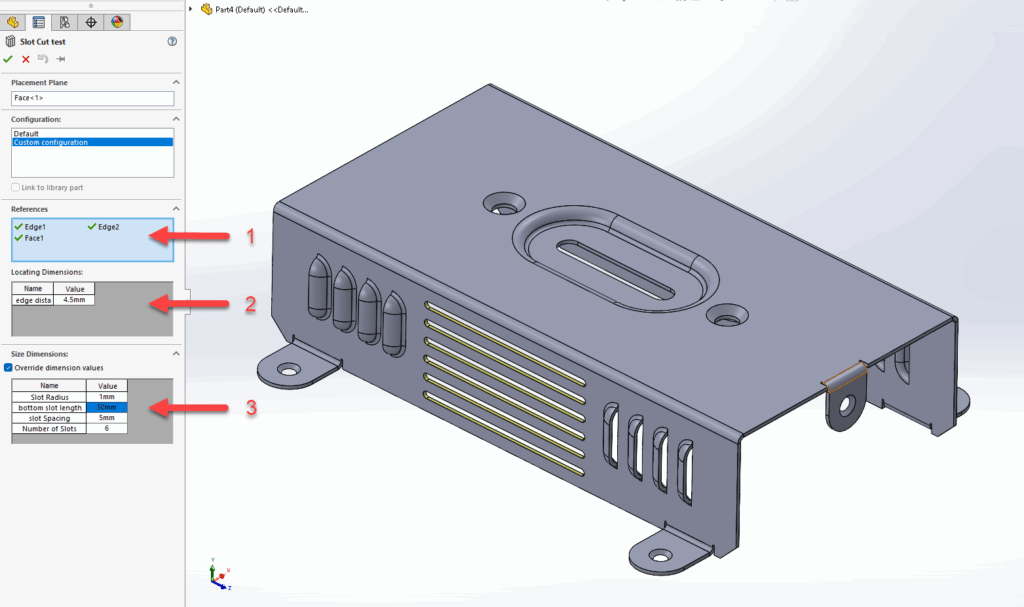
To do this, we navigate to the Design Library and right-click the Library Feature. We choose to open the Library Feature section. Once it loads, we configure the locating dimension on the left-hand side, under the “Locating Dimensions” folder in the design tree. Then select the dimension that controls the distance from the edge of the part, drag it into the Locating Dimensions folder, and save the file.
When complete, we have a handy box section (2) available to edit these dimensions whenever we drag in and configure our Library Feature.
The References box (1) lets us specify our locating edges and face.
The Size Dimensions box (3) lets us override the dimension values from the original slot sketch, giving us complete control of our geometry. The names of those dimensions carry through to this property manager, making it easy for us to recognise the items we need to configure. Putting in the detail at the start pays off here.
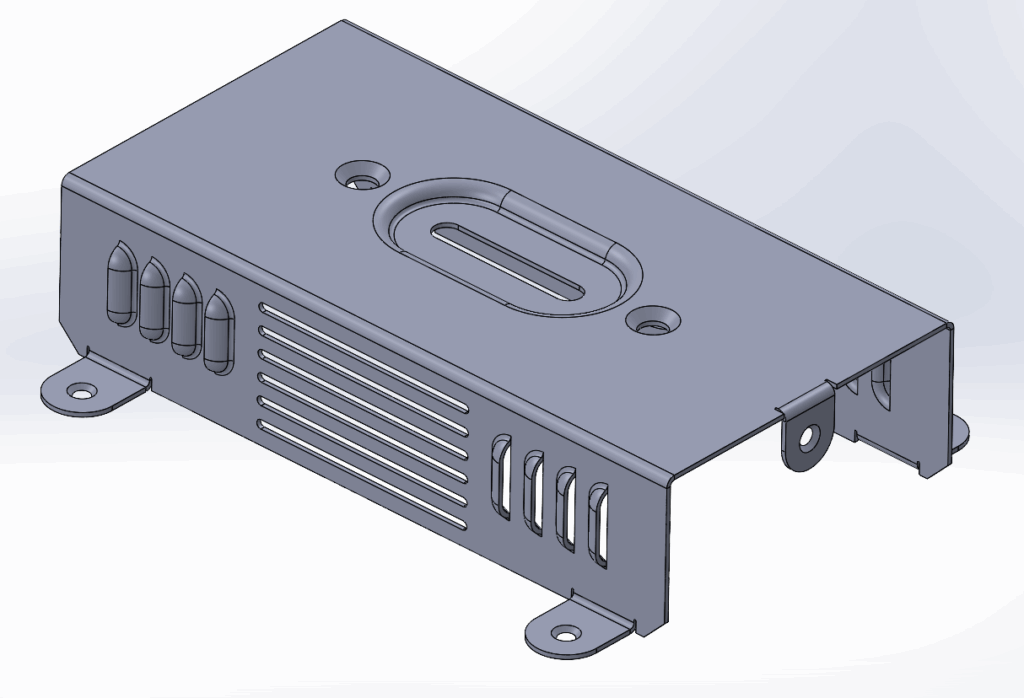
Final Result
Here is the finished example: we add two Library Features to our power extension lead in no time at all.
|
|
If you liked this tutorial and would like to check out our other SOLIDWORKS tips, tricks and guides, click here!

|
About the Author: This tutorial was written by SOLIDWORKS Applications Engineer, Cameron Piper. Cameron has been with the Visiativ Technical Support Team since 2021. |
|||
|
|
View Cameron Piper’s LinkedIn Profile here.
|
|||