


How to upgrade SOLIDWORKS
21 July 2023
To ensure that you keep up with the latest performance improvements and bug fixes, we recommend that you upgrade SOLIDWORKS multiple times throughout the year. Each year’s version of SOLIDWORKS typically receives a total of 5 service pack releases. We have prepared a comprehensive guide on how to upgrade SOLIDWORKS to help you through the process.
Please note: This guide is intended for SOLIDWORKS Desktop users only. If you’re using SOLIDWORKS Connected, please see the final paragraph below.
Before starting: Ensure you are logged onto your PC as a Local Administrator.
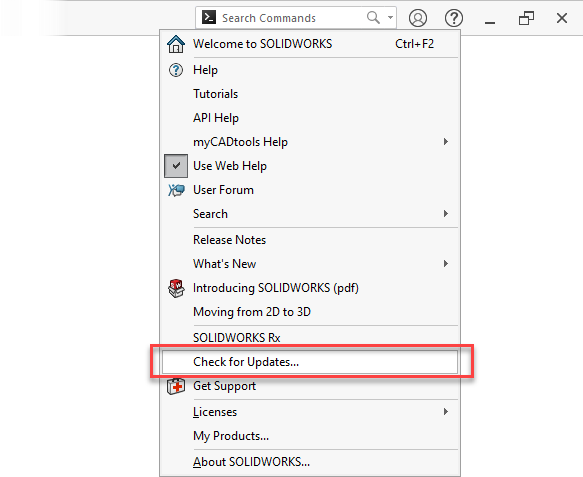
Step 1:
Go to the Help menu in SOLIDWORKS and choose ‘Check for Updates’. This will launch the SOLIDWORKS installation manager.
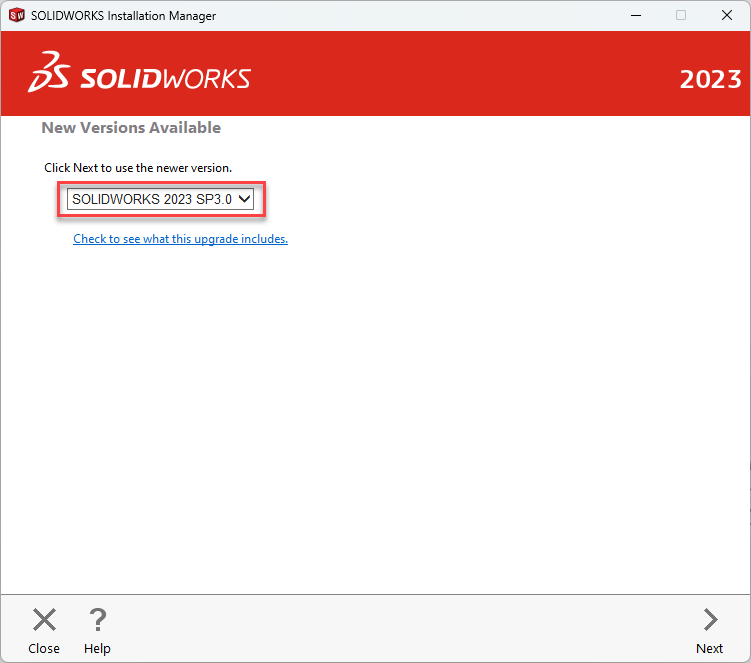
Step 2:
After the Installation Manager loads, you will be presented with options for updating. If you are a few releases behind, you may have a couple of options here.
It is worth updating to the latest Service Pack (SP) available. However, before updating to a new major year version, check with your company first. Additionally, if you see any Beta releases available, avoid using them for production as they are not designed for that purpose.
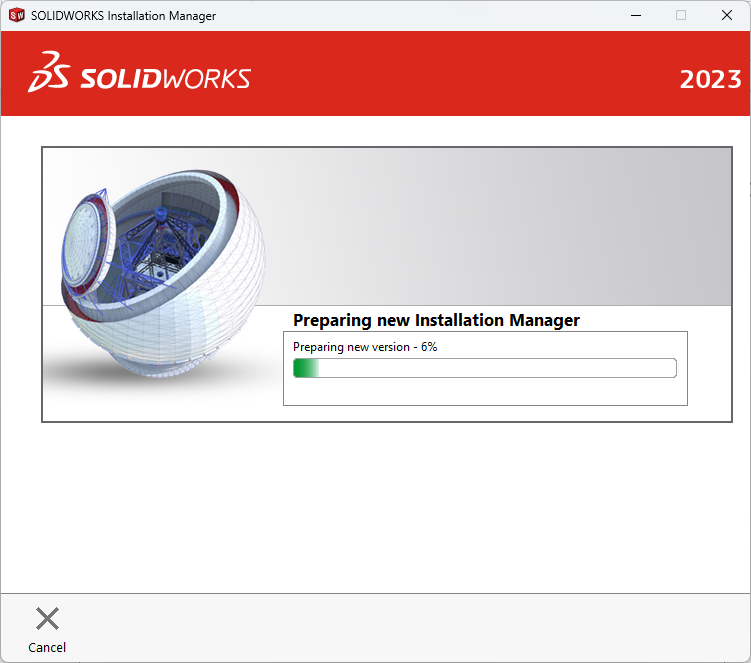
Step 3:
The installer will then prepare the new install. It may switch to a different install manager at this point if you are updating to a new Major year version.
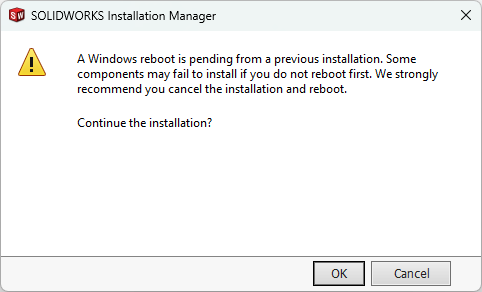
You might be presented with the message in the image below. If this happens, restart your PC (if you can). If the same message pops up a second time, click ‘OK’ to continue the install.
Step 4:
If SOLIDWORKS is still open in the background, please close it.
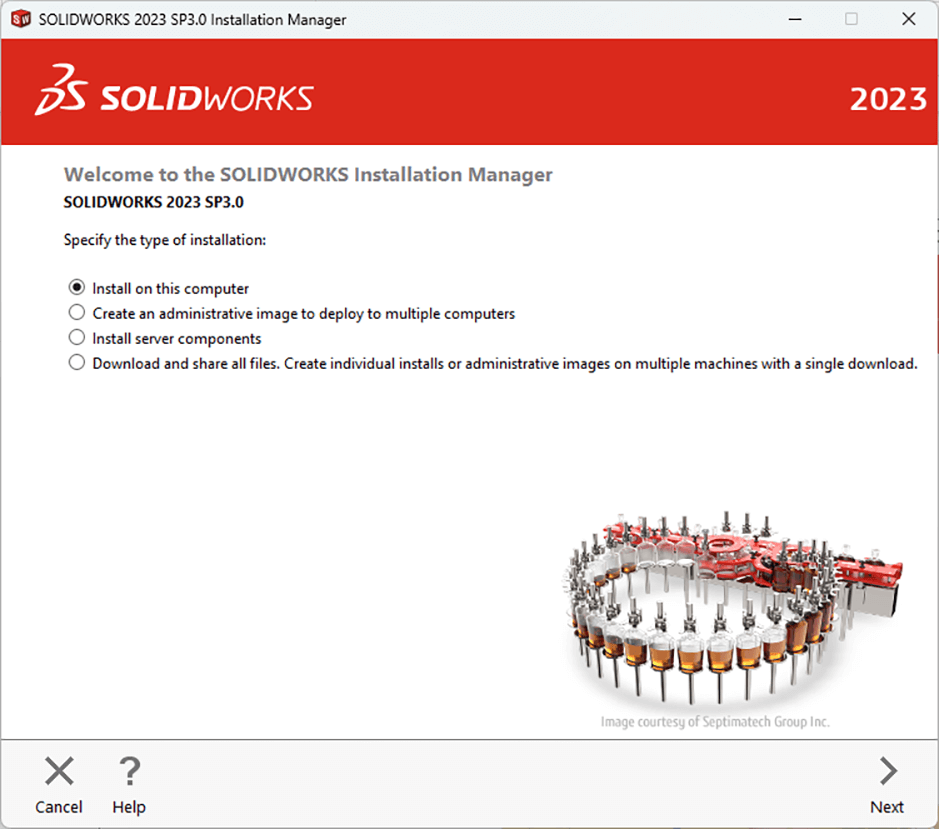
The next screen (as shown in the image below) will present you with options regarding the type of installation you want to perform. There are several choices available here:
• Install on this computer – This option will download any files required for the installation on your PC and install the selected service pack.
• Download and share all files – This option will create a full download of the SOLIDWORKS suite, which you could use if upgrading service packs on multiple PCs. This can be handy if you want to reinstall the software later.
In this case, as we are only updating one computer, we have selected “Install on this computer.”
Step 5:
On the next screen, you will see a summary of the installation. If you are updating to a new major year version, there are a few things to consider:
- If you use SOLIDWORKS PDM – when updating to the next major year version of SOLIDWORKS, make sure you keep SOLIDWORKS PDM at the same release as your server. Untick “PDM client” in the Product selection page by clicking the Change Option.
- If you use SNL licensing (your serial number will have number 1 as the 3rd digit) – ensure the SOLIDNetWork license manager is updated on the server as well.
- If multiple people use the same toolbox OR if you have more than one version of SOLIDWORKS installed – ensure you click Change on the toolbox options. SOLIDWORKS will need a toolbox specific to each year’s release of the software.
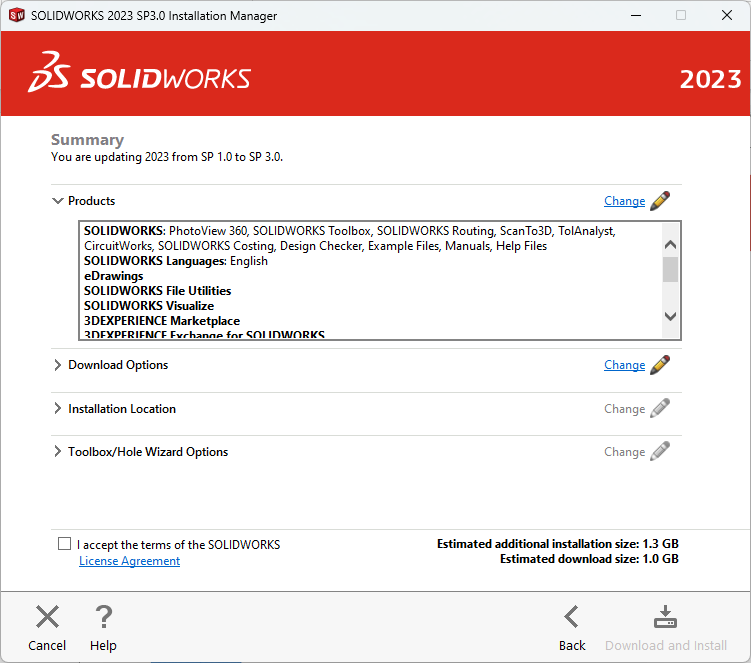
Please note: It is recommended to perform a backup of the SOLIDWORKS Electrical environment before upgrading. To do this, follow these steps:
- From within SOLIDWORKS Electrical Schematic, select File > Archive environment. OR From within SOLIDWORKS Electrical 3D, select SOLIDWORKS Electrical > Tools > Archive environment.
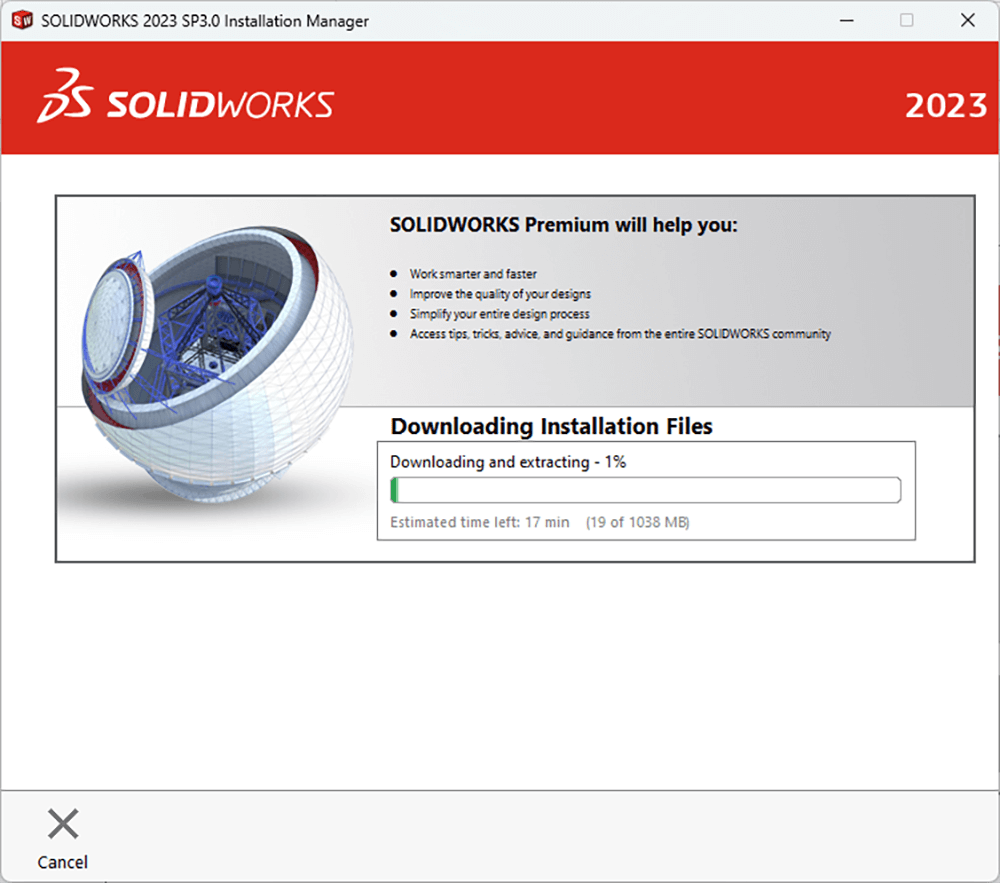
Step 6:
Once you’re happy, tick the checkbox to accept the terms, and click “Download and Install” or “Install Now.” SOLIDWORKS will then start downloading (if applicable) and installing.
Once you have upgraded SOLIDWORKS, we recommend joining the Customer Experience Improvement Program. This program will help capture performance logs and contribute to the improvement of SOLIDWORKS through later service packs.
How to update SOLIDWORKS Connected
In the Compass, when an update is available, a colored arrow appears in the list menu for SOLIDWORKS Connected.
To update SOLIDWORKS Connected:
- Log in to the 3DEXPERIENCE platform.
- On the top bar of the 3DDashboard, click the blue Compass.
- Under ‘Me’, go to SOLIDWORKS and expand the list for the app. Then do one of the following:
- An orange arrow indicates that a new version is available, but not yet required. Click the download arrow to install a new version, or click the app to start the version that is installed.
- A red arrow indicates that a required version update is available. Click the download arrow to run the app update.
- Follow the prompts to download and install the update.
Please see the official SOLIDWORKS Connected installation guide here: https://help.solidworks.com/2023/english/SWConnected/swdotworks/t_install_sw_connected.htm