


How To: Update your SOLIDWORKS Service Pack
20 August 2024
In order to stay in line with the latest performance improvements and bug fixes you should make sure to update your SOLIDWORKS service pack – several times a year.
In total there are 5 service packs released, for each year version of SOLIDWORKS – read on to find out how to download one!
Before starting – Ensure you are logged onto your PC as a ‘Local Administrator’.
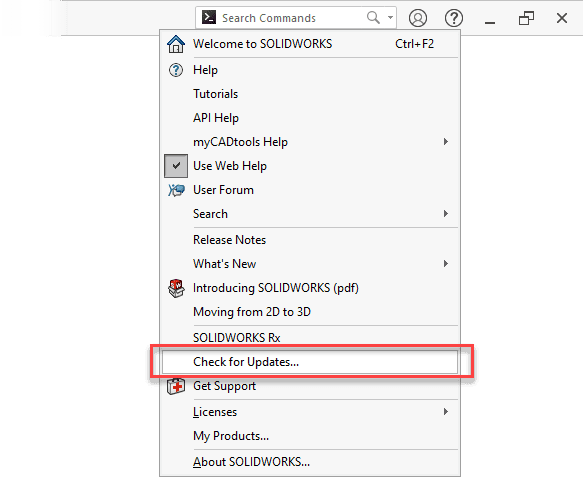
The first thing to do, is go to the Help menu in SOLIDWORKS and choose Check for Updates. This will launch the SOLIDWORKS installation manager.
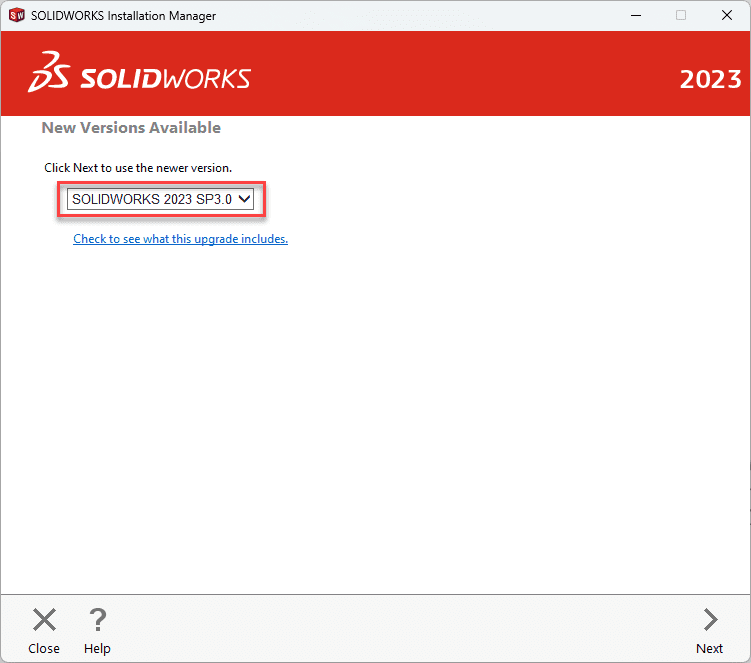
After the Installation manager loads, you will be presented with options for updating. You may have a couple of options here if you are a few releases behind. It is worth updating to the latest Service Pack (SP) you can. Although check with your company first before updating to a new major year version. Avoid beta releases if you see them available here – they aren’t designed to be used for production.

The installer will then prepare the new install. It may switch to a different install manager at this point, if you are updating to a new major year version.
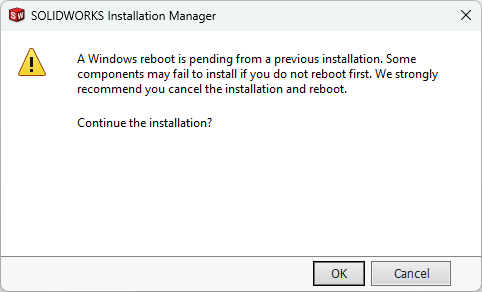
You may be presented with this message. Restart your PC if you can – although this is a sensitive message – so don’t worry too much if it pops up a second time. Click OK to continue the install.
At this point, close your SOLIDWORKS, if it’s still open in the background.
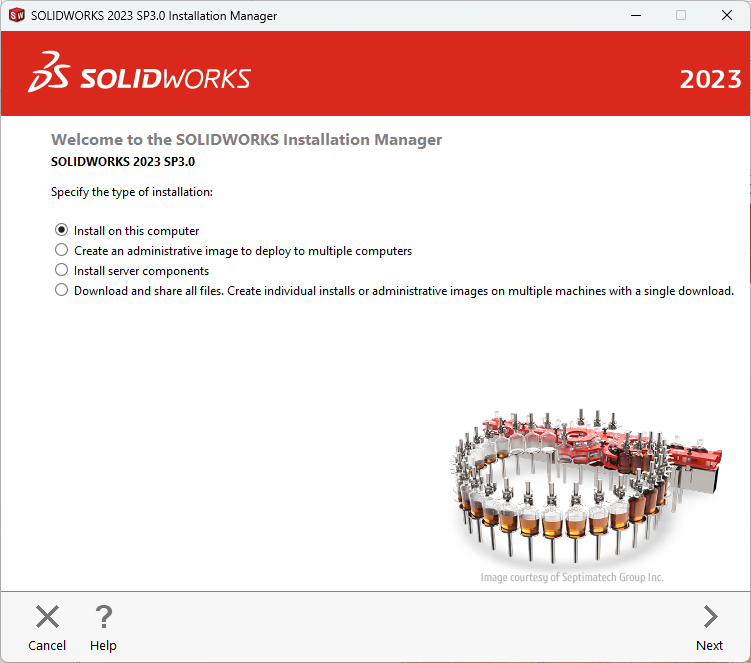
The next screen will present you with options about what type of install you want to do. There are a number of choices here:
- Install on this computer – This will download any files required, for the installation on your PC and install the service pack you selected
- Download and share all files – This will create a full download of the SOLIDWORKS suite, which you could use if upgrading service packs on multiple PCs. This can be handy If you want to reinstall the software later.
In this case, as we are only updating one computer the option selected is Install on this computer.
Major version Considerations (Skip for Service pack updates)
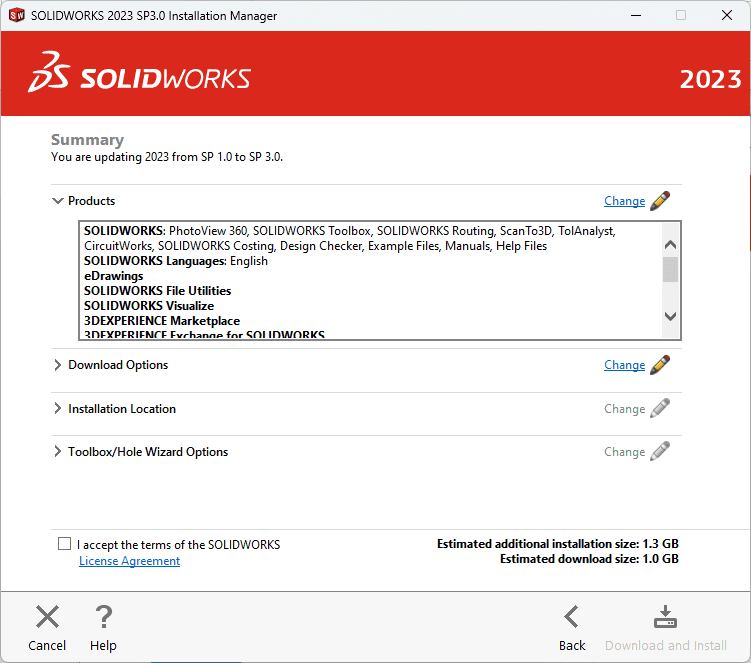
On the next screen, you will see a summary of the install. If you are updating to a new major year version, there are a few things to consider here:
If you use SOLIDWORKS PDM – if you are updating to the next major year version of SOLIDWORKS, ensure you keep SOLIDWORKS PDM at the same release as your server. Untick PDM client in the Product selection page, by clicking the Change Option
If you use SNL licensing (your serial number will have number 1 as the 3rd digit) – ensure the SOLIDNetWork license manager is updated on the server too.
If multiple people use the same toolbox OR if you have more than one version of SOLIDWORKS installed – ensure you click Change on the toolbox options. SOLIDWORKS will need a toolbox specific to each year release of the software.
If you use SOLIDWORKS Electrical – It is recommended that a backup of the SOLIDWORKS Electrical environment is performed before upgrading. From within SOLIDWORKS Electrical Schematic select File > Archive environment. or from within SOLIDWORKS Electrical 3D select SOLIDWORKS Electrical > Tools > Archive environment
Once your happy, tick the tick box to accept the terms, and click Download and Install/Install Now.
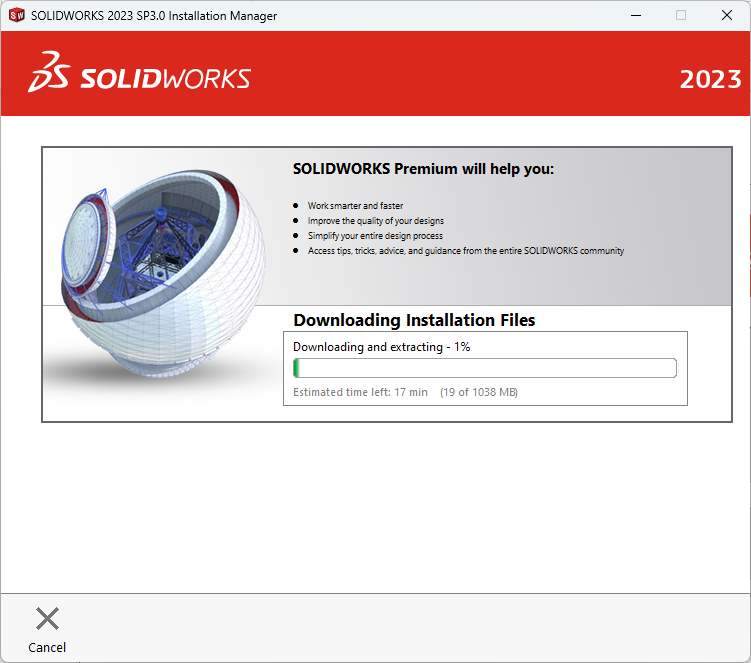
SOLIDWORKS will then start downloading (if applicable) and installing.
Thanks for reading this guide to updating SOLIDWORKS service packs! For any help with SOLIDWORKS or if you want to open a support ticket – click here for our support page.