


How to: Move the SOLIDNETWORK License Manager to a New Server
27 August 2024
This step-by-step guide will walk you through the process of moving the SOLIDNETWORK License Manager from your old server ‘Server A’ to your new server ‘Server B’. Read on for another handy ‘How To’ guide from Visiativ surrounding SOLIDWORKS.
Install on the new server
-
- Install the SOLIDNETWORK License Manager on Server B.
Do not activate the SNL Manager yet.
Client Machines – Add new server information
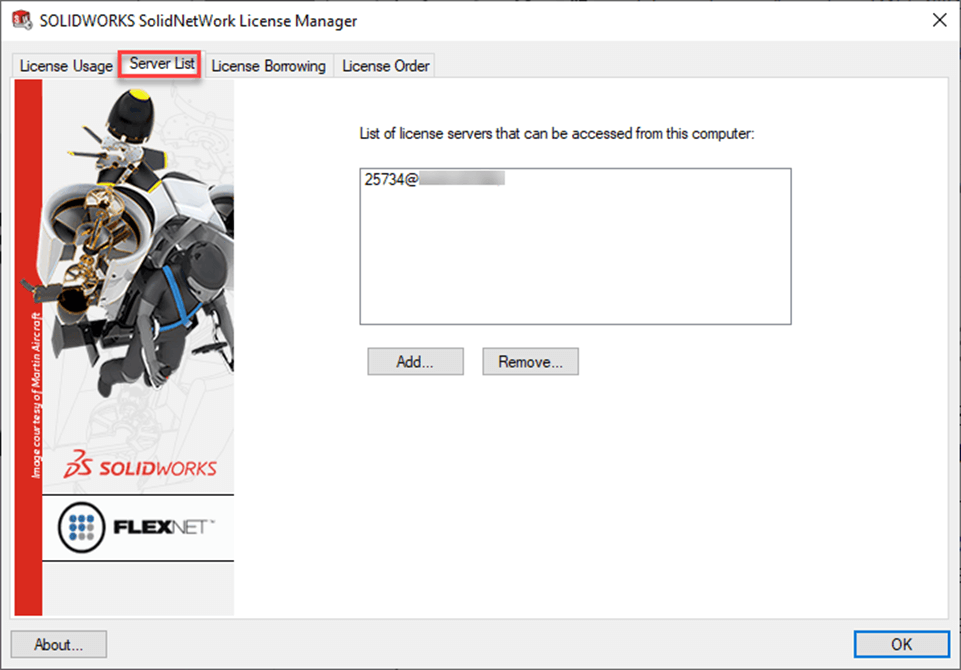
- On the Client Machines launch the Client tool and go to the Server List tab.
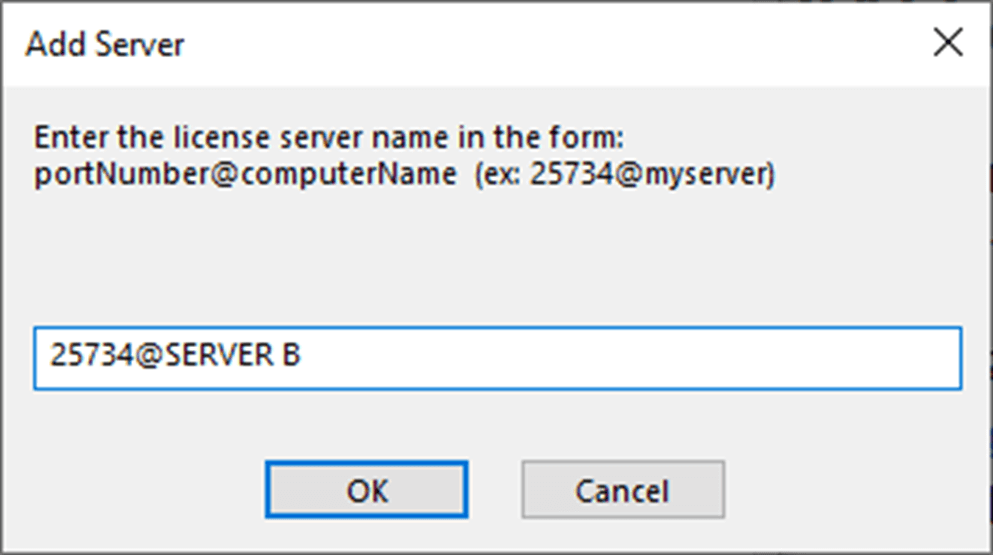
3. Add server B to the list. To do this click ‘Add’ and enter portnumber@servername. The port number by default is 25734. So in this example we would enter ‘25734@SERVER B’
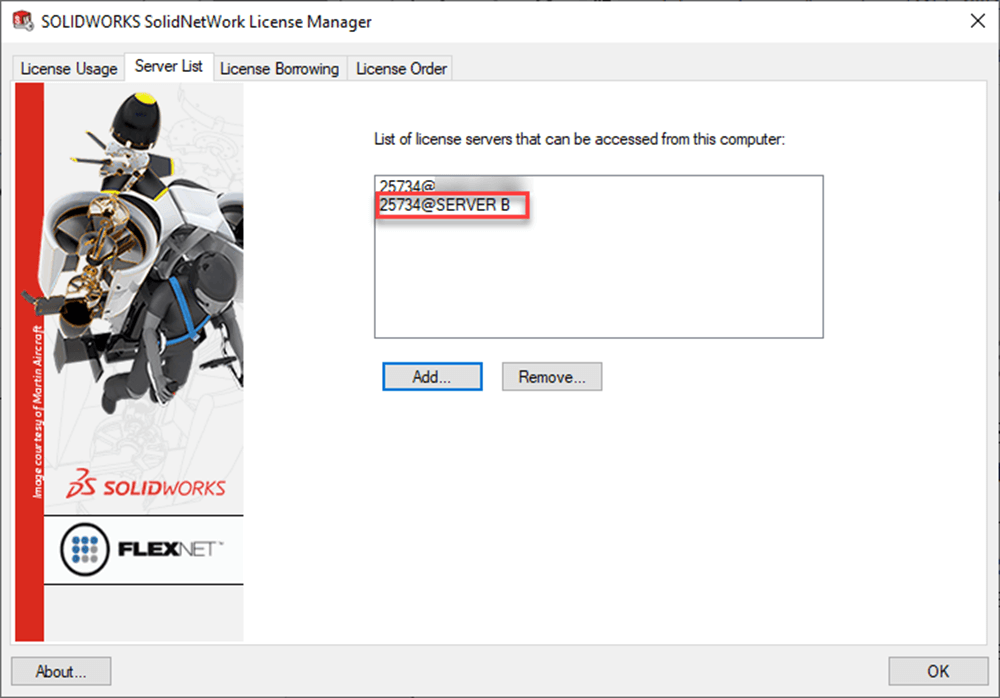
Press Ok and you will see Server B added to the list
- If you have a large number of users, its possible to push out this change via updates to these registry keys:
- HKEY_LOCAL_MACHINE\SOFTWARE\FLEXlm License Manager\SW_D_LICENSE_FILE
- HKEY_LOCAL_MACHINE\SOFTWARE\WOW6432Node\FLEXlm License Manager\ SW_D_LICENSE_FILE
Note – separate additional addresses with semi colons (;).
- If you have any licenses borrowed from server A, ensure they are returned.
**Optional** You can also remove Server A from the list of licenses in the client tool at this point, but please note the client will not be able to use SOLIDWORKS License from Server B till step 13 is complete.
Deactivating the SOLIDNETWORK License Manager from the old server
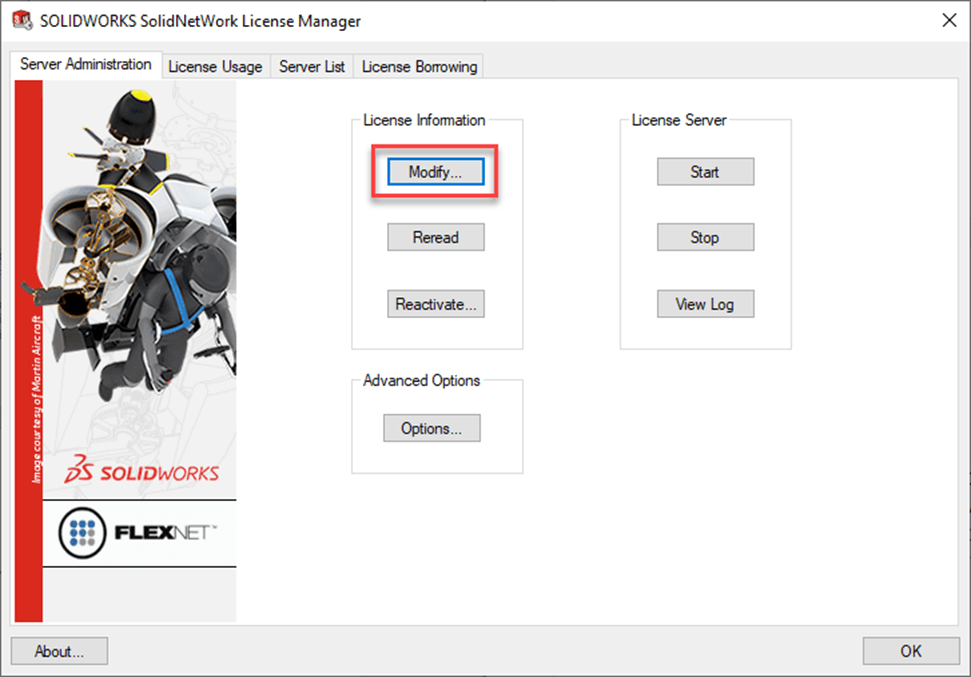
- On Server A, open the SOLIDNETWORK License Manager and click the Server Administration tab, then select ‘Modify’.
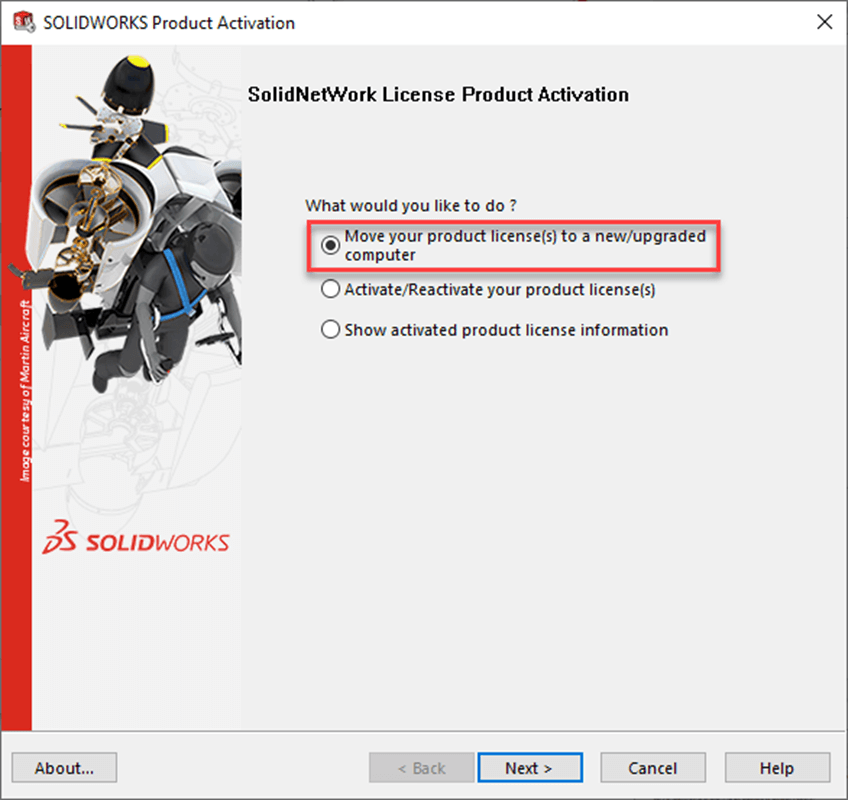
- From the SOLIDWORKS Product Activation window select ‘Move your product license(s) to a new/upgraded computer’.
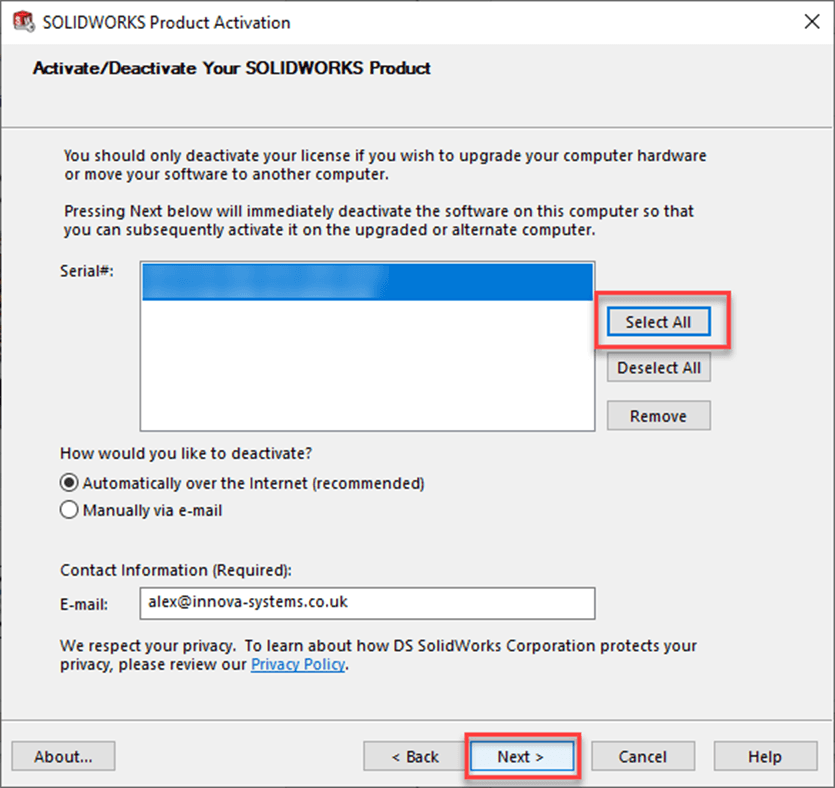
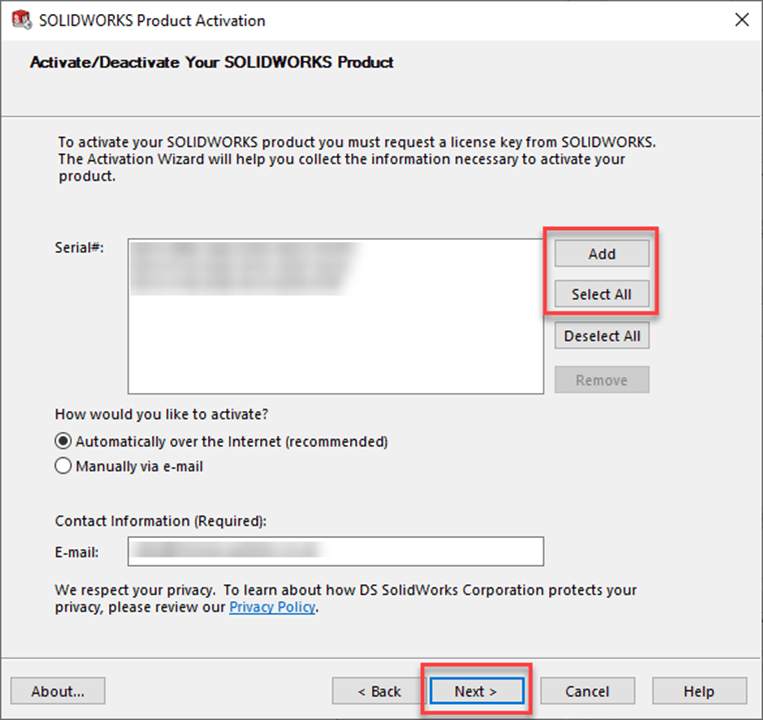
- From the Activate/Deactivate your SOLIDWORKS Product window, click ‘Select All’ (to select all your serial numbers and then click ‘Next’.
- From the deactivation successful window click ‘Finish’.

Activating the SOLIDNETWORK License Manager on the new server.
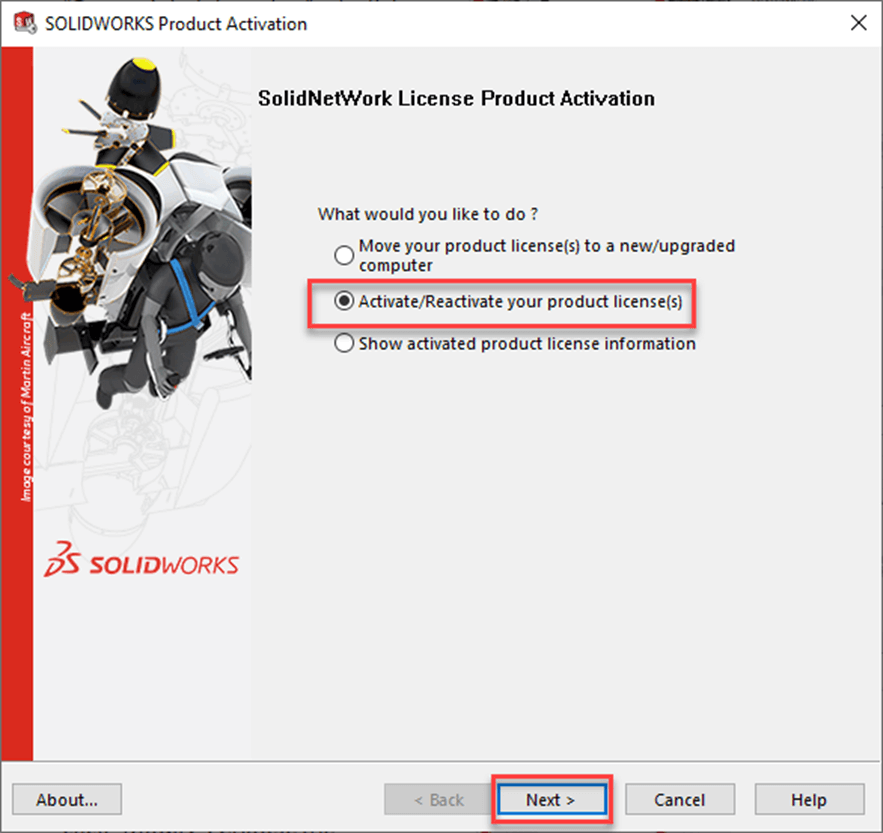
- The licenses now need to be activated on Server B. On Server B launch the SOLIDNETWORK License manager – then on the Server Administration tab click ‘Activate/Reactivate your product license(s)’ and click ‘Next’.
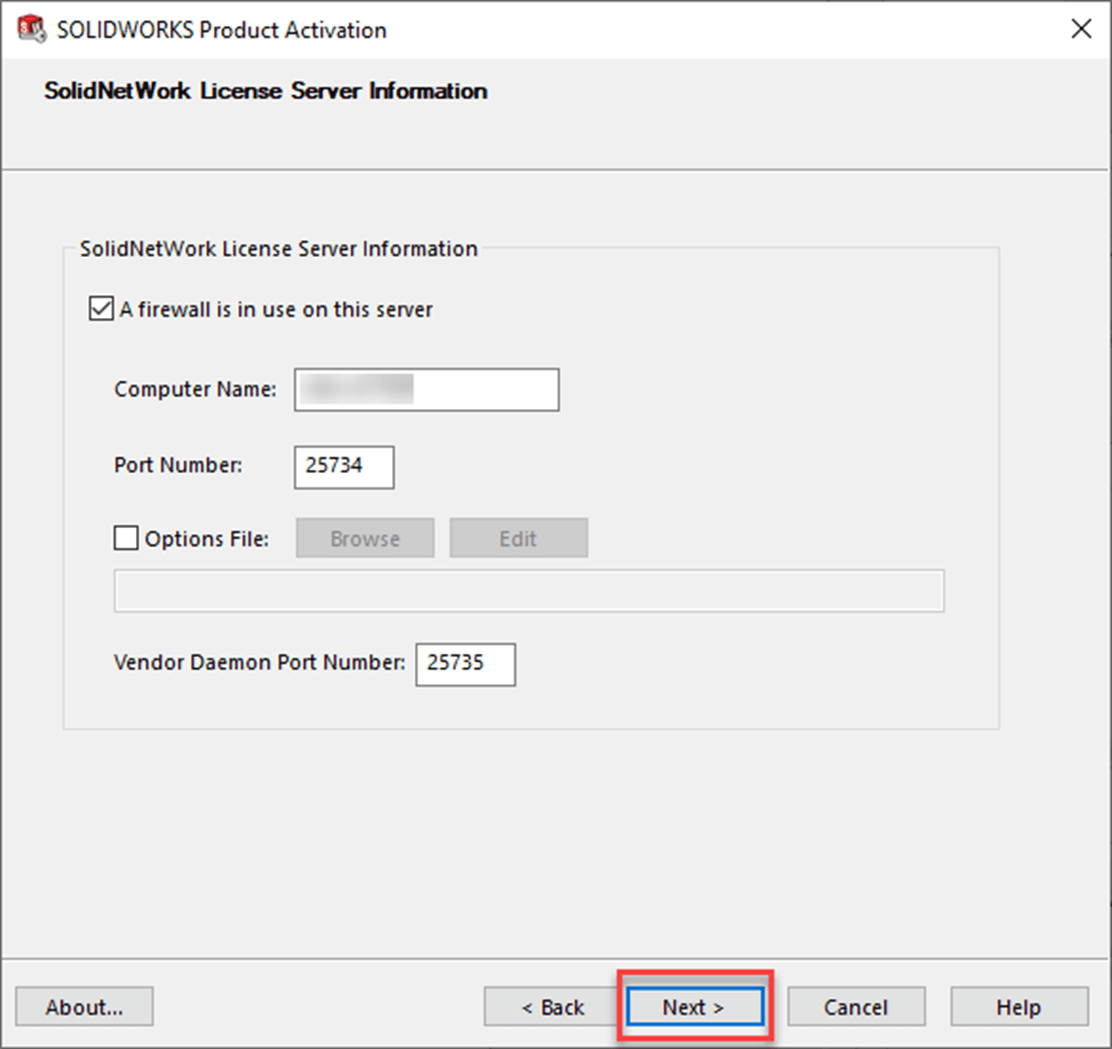
10. Fill in SOLIDNETWORK License server information and click ‘Next’.
- On the Activate/Deactivate your SOLIDWORKS Product window click ‘Select All’ and click ‘Next’ – you may need to click ‘Add’ to add your SOLIDWORKS serial numbers if they do not already appear in the list (SOLIDWORKS 2023 onwards).
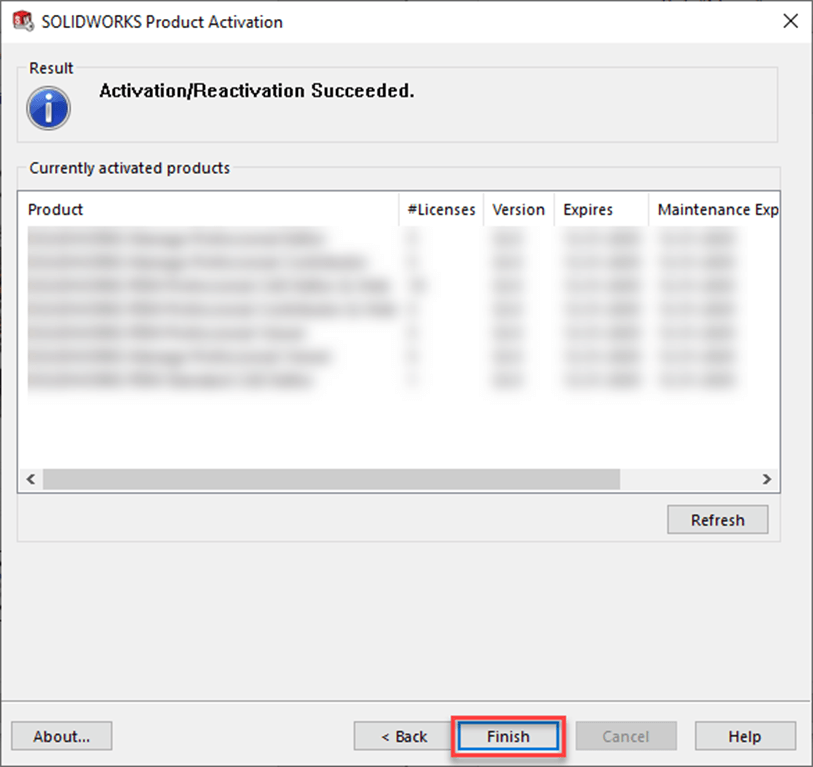
12. From the Activation/Reactivation succeeded window click ‘Finish’.
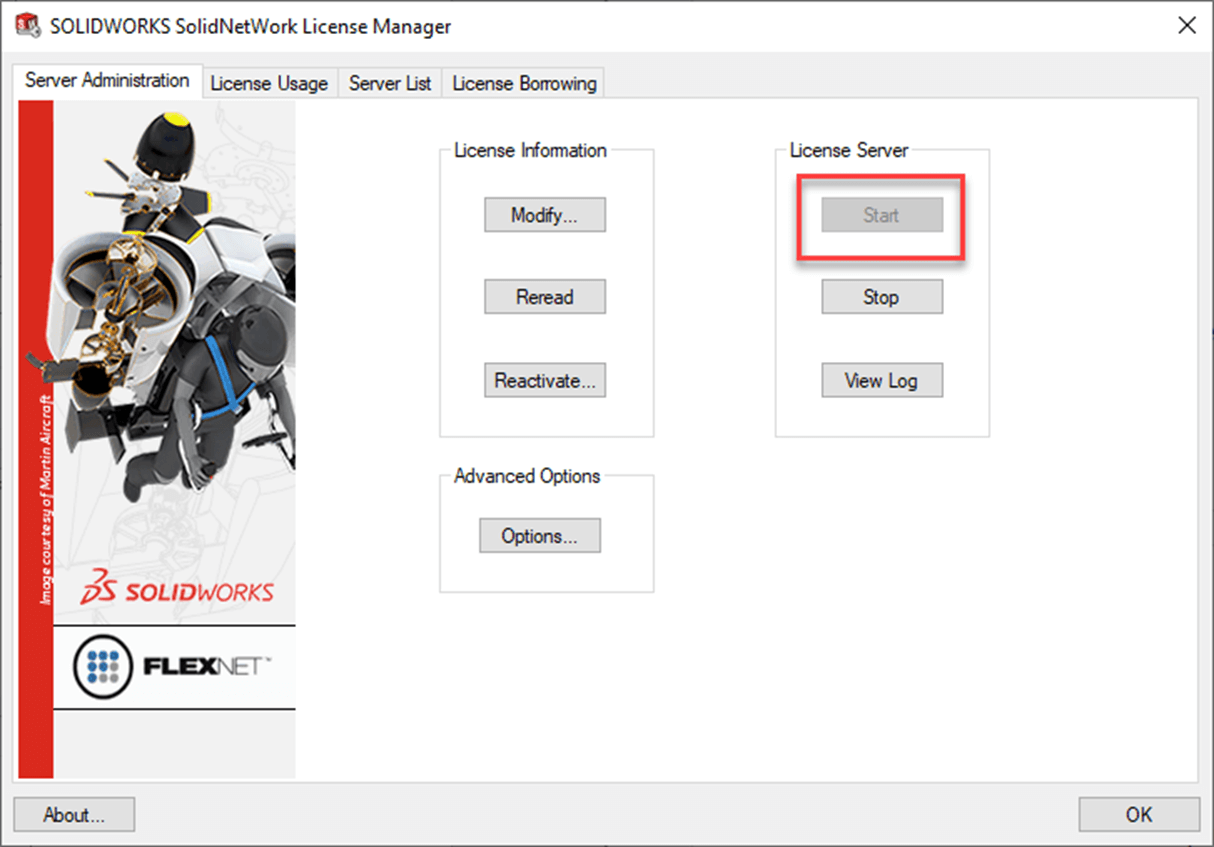
- Ensure the service is running. On the Server Administration tab ensure the start button is Depressed/greyed out.
That’s the process complete! If you have any further questions about the SOLIDNETWORK License Manager – or any other technical queries – Visiativ customers can contact us here.