
How to: Use the SOLIDWORKS Split feature
01 September 2026
What is the SOLIDWORKS split feature? Put simply, split feature is a tool in SOLIDWORKS designed to cut parts into multiple bodies. Think of it as the “cheese wire” of the CAD world. Why is this useful? Well, you may want to cut off a part of an imported body or dice up your extruded bodies so that you may use some multi-body design techniques. These are two ways you can make use of this helpful tool – let’s take a look at how to use it.
How to use the SOLIDWORKS Split feature
Let’s take this single-body SOLIDWORKS part below. The split tool can be found here: Insert > Features > Split, as shown in the SOLIDWORKS HELP GUIDE: SPLIT FEATURE. A trim tool will be needed to act as the body between the two or more bodies you would like to split. A plane, sketch line or surface can be used for this purpose. I will be using the front plane.
In the Split feature properties, we can select the tool we wish to use to split the part, it this case, the front plane. Click on Cut Part Now. In the resulting bodies box, we get two bodies to choose from.
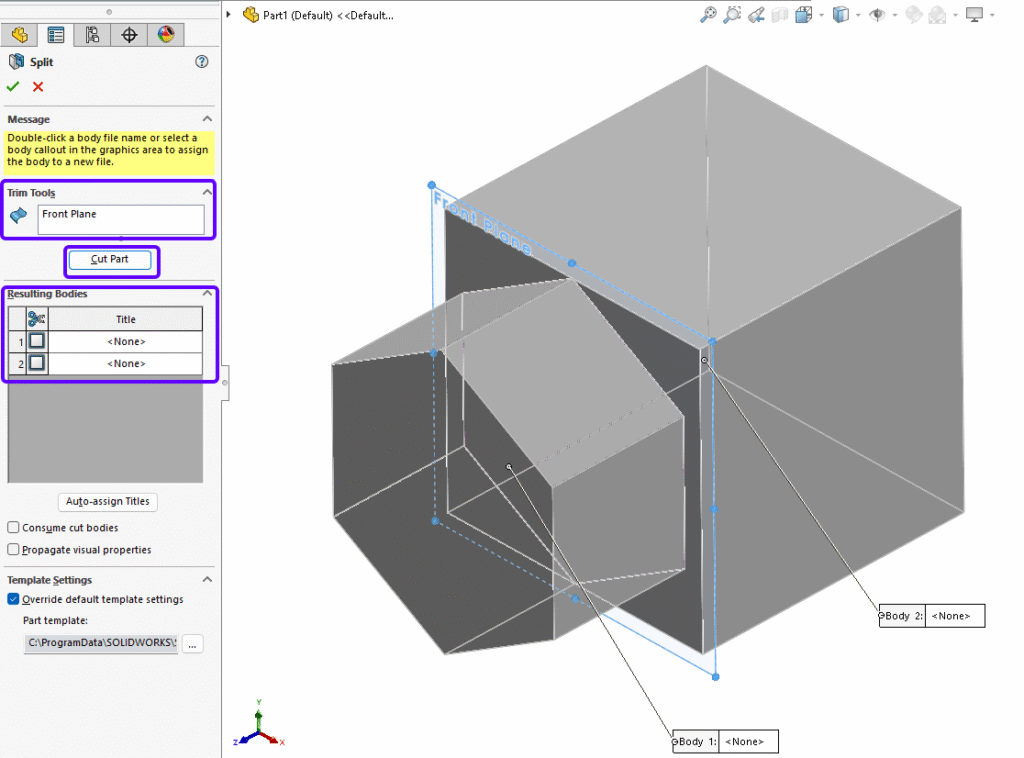
How to use the Split feature property manager.
If we tick both boxes, both bodies will be kept, and the part will contain two solid bodies. When only one tick box is selected, the other body will be discarded. By double-clicking in the file box to the right of the tick boxes, you can save the individual body out as a derived part file. Any feature that has happened to the body before the split will be propagated to the new part file, but on that body. This file will be linked, so any changes made before the split feature in the original file will affect the derived file. Anything after the split in the original file will not affect the derived file. I will save the bodies out but not consume them, as Hex and Cube. I will tick both boxes to keep both bodies in the original file.
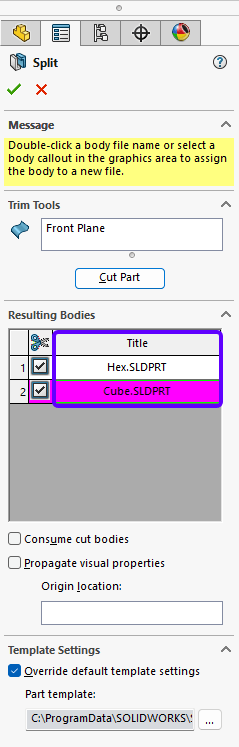
Split feature property manager
Clicking on the green tick confirms these changes. We now have three SOLIDWORKS part files: the original body, Hex, and Cube.
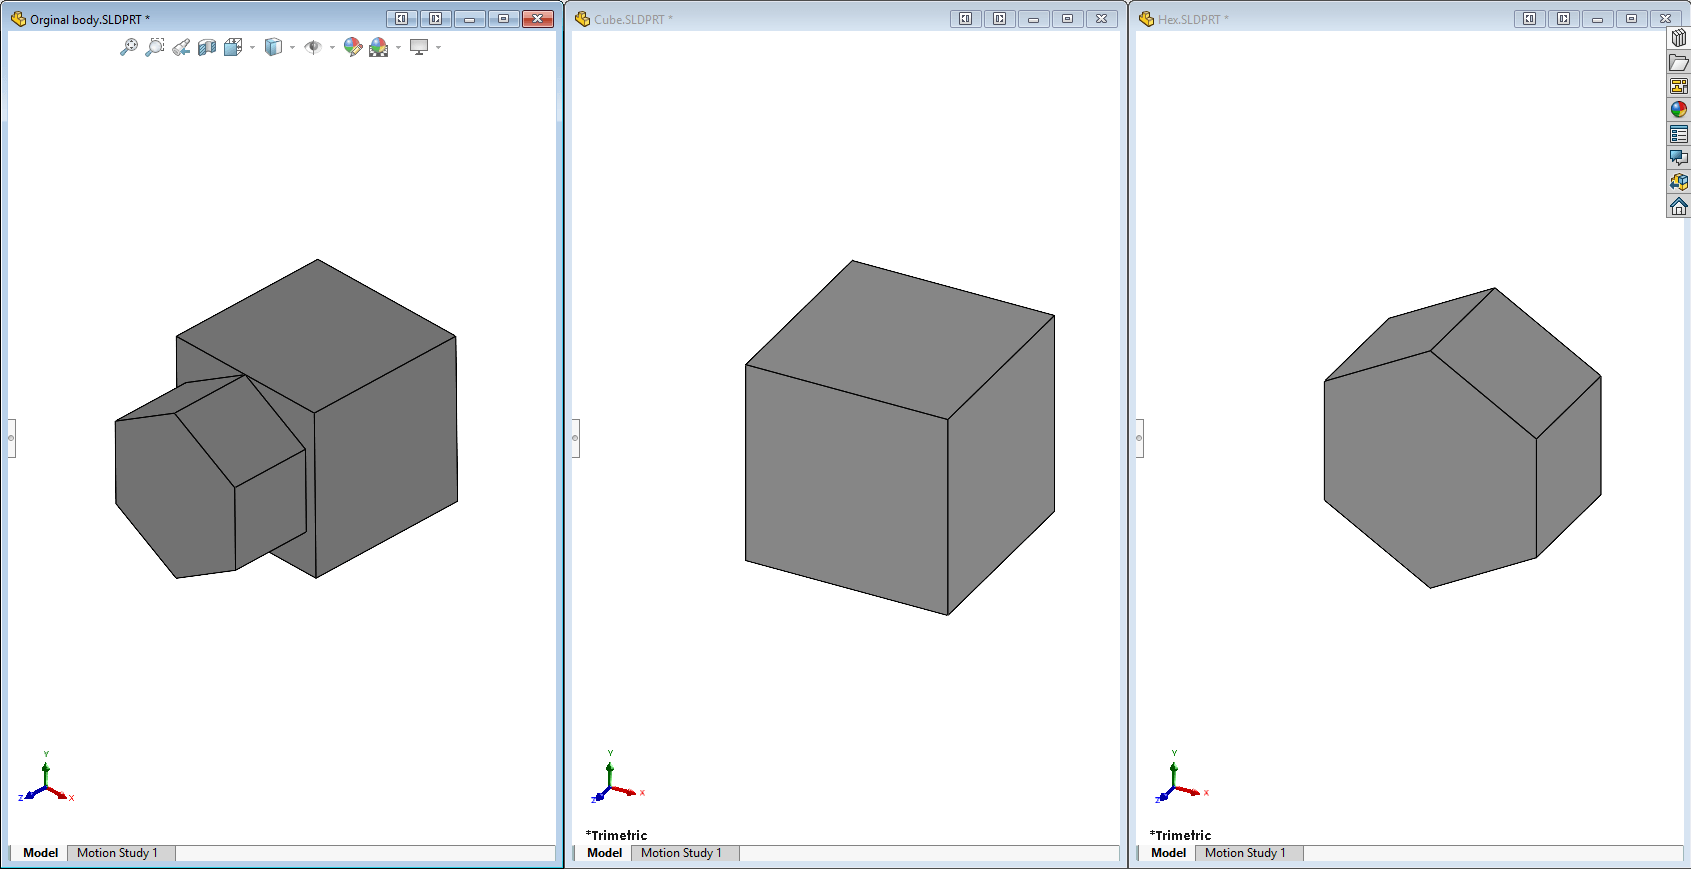
The result from the split body command showing the derived bodies in their own part files.
How does editing the original file affect the split files?
If I now add a fillet to each edge of the hex part of the model in the original file before the split, the feature will propagate to the Hex file, and if I add fillets to the cub part in the original file but after the split, the feature will not propagate.
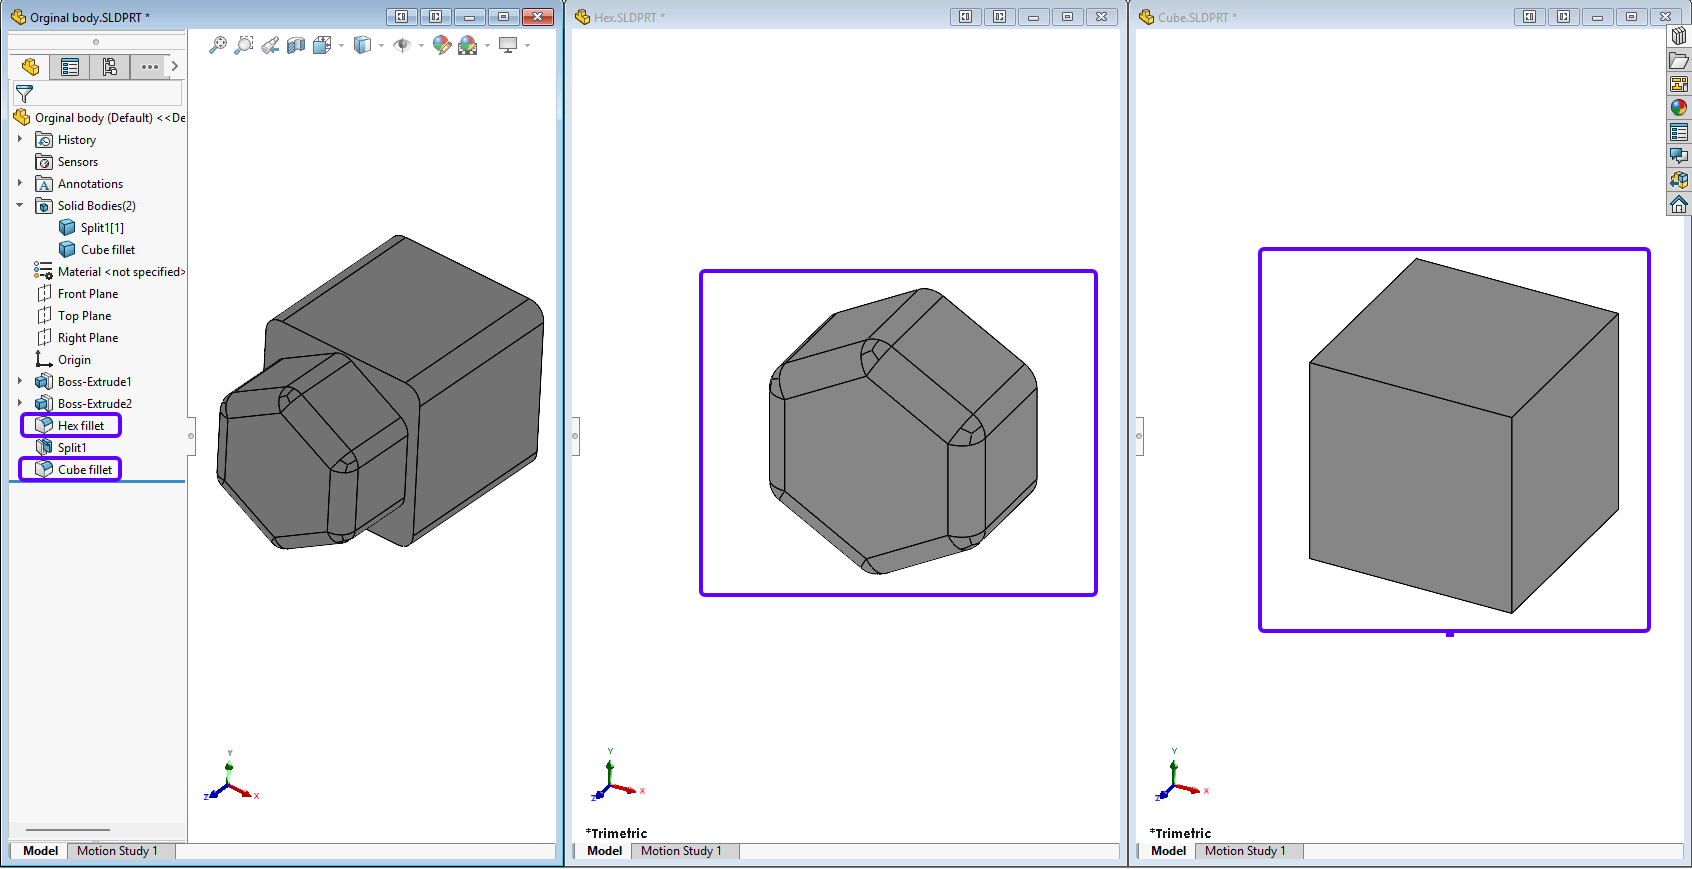
Showing the difference between adding a feature in the original part before and after the split feature.
If you don’t save the bodies out during the Split command, and you are sure you wish to do some further work on the model, you can use the Save Bodies command, which will enable you to save your bodies out to individual files just like the Split command can, but after the fact. You can even save the bodies out to an assembly at the same time, where it will position them in the same positions relative to each other in the original part file.
How to use the Save Bodies command
The Save Bodies command is here: Insert > Features > Save Bodies, as shown in the SOLIDWORKS help Save Bodies feature. This command works similarly to the split; you need to select the bodies you wish to save by ticking the correct lines, give the bodies names and file location to save by double-clicking the file column, then additionally we will also save the bodies out as an assembly by clicking Browse and giving the assembly a name.
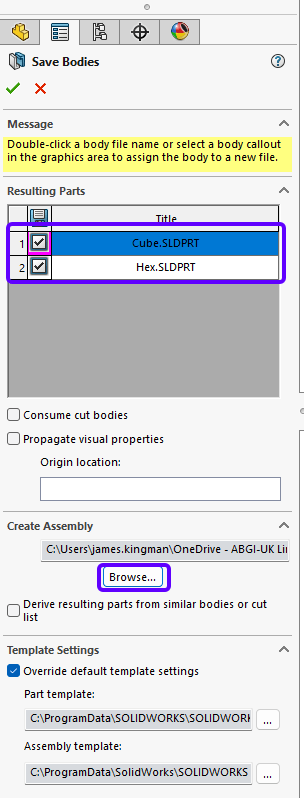
Using the Save Bodies property manager.
The result: instead of three files, we get four files: the original part file, two new part files, and an assembly.
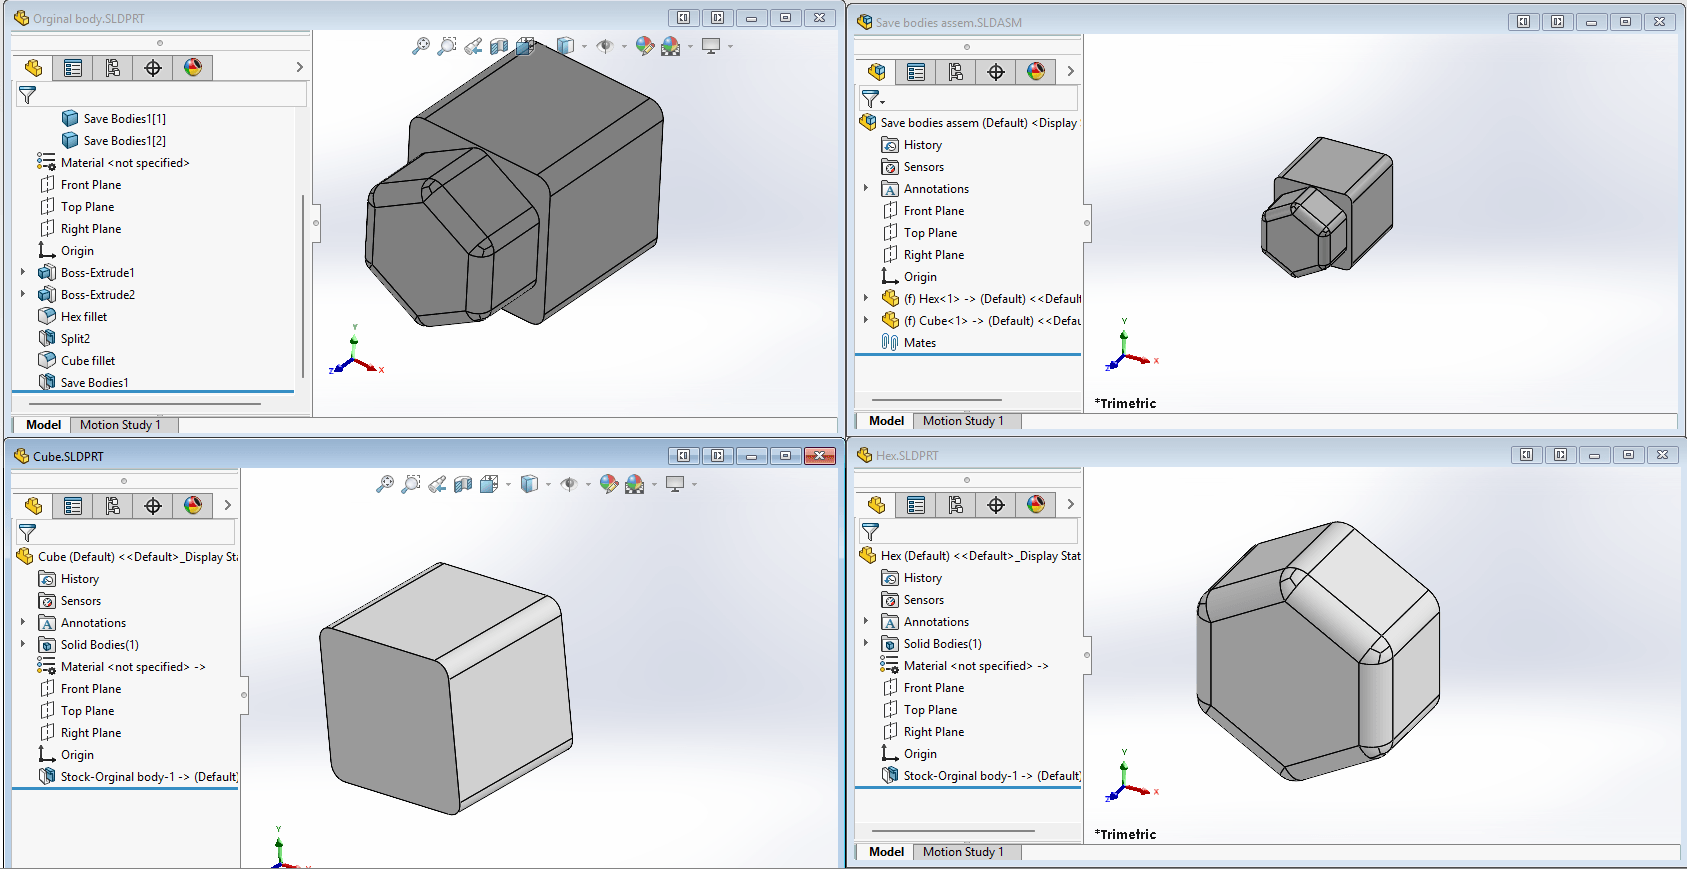
The result of the Save Bodies command, including the assembly made from the two bodies.
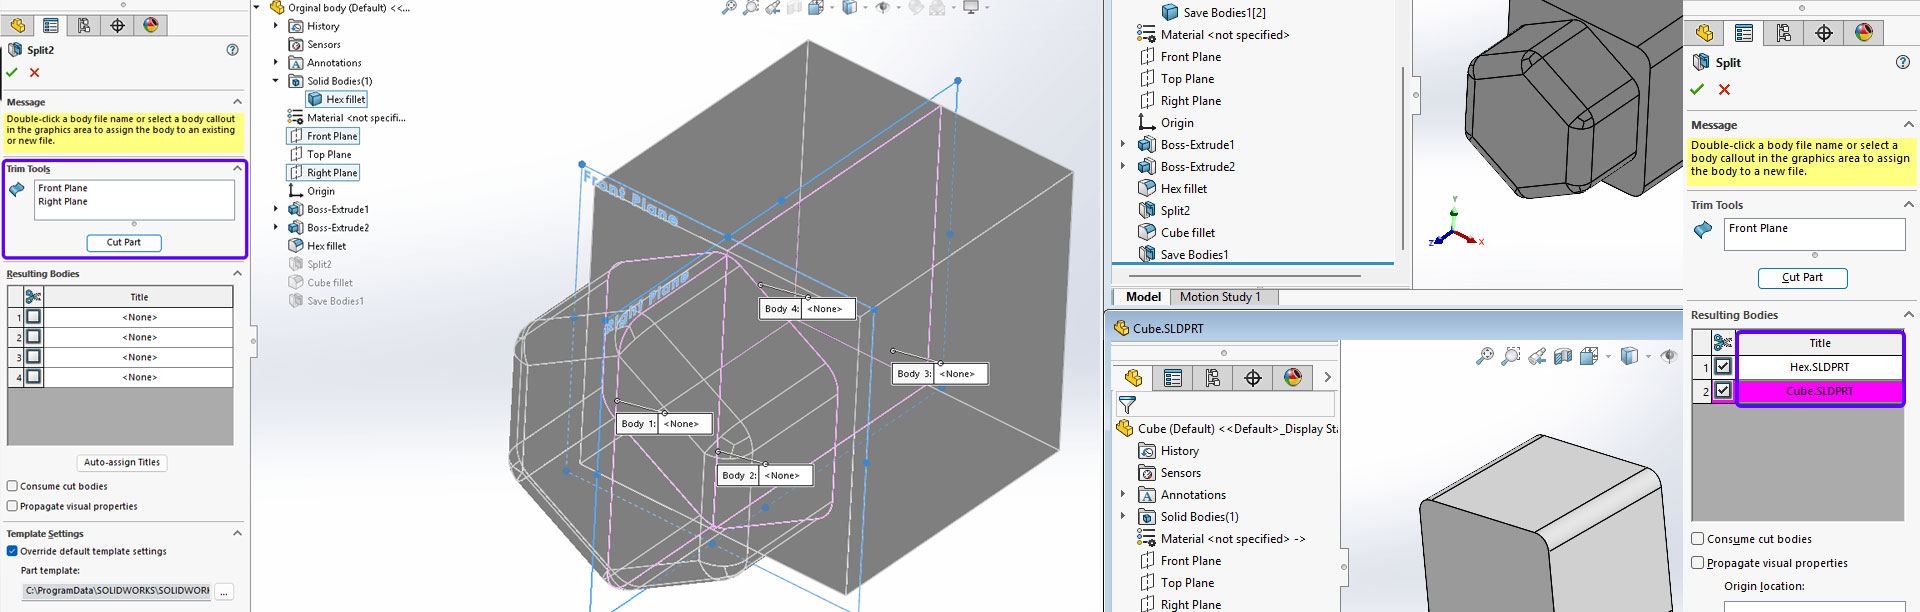
It’s possible to use the split tool with more than one trim tool at a time, for example. I can use the right plane at the same time as the front plane to create four separate bodies. This will create 4 separate bodies instead of two.
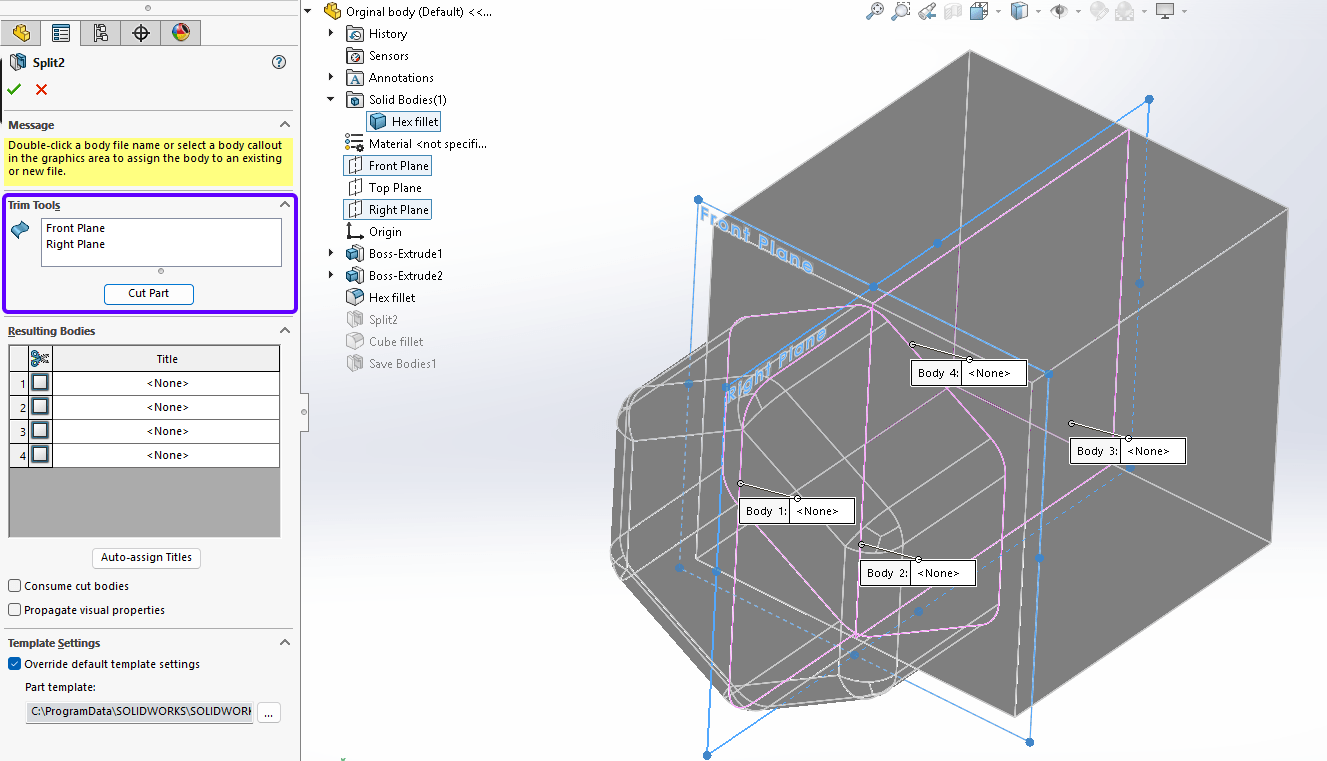
Editing the split feature to use two planes as trim tools to create four bodies from one.
Be aware that if you make changes to the split feature, i.e add more slit you will need to change the Save Bodies command to include the additional bodies if you wish to have them in your assembly or as separate part files. Or you could end up with the below. Showing only two of the now four split bodies.
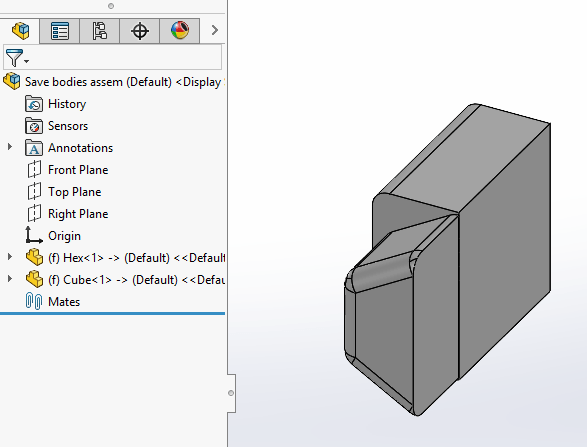
The result of not updating the Save Bodies command. Only two bodies shown in the assembly.
Conclusion
The split feature can be used to cut a part up. You can save the resulting bodies at the same time or use the Save Bodies command to do so, so that you can make edits to all the bodies first. Save Bodies also allows you to create an assembly at the same time from all the bodies. This tool can help you in your design and save you time by making all the files for you. So now we know how to use the SOLIDWORKS split feature and the Save Bodies command. What will you design?
Before you go: Our news and resources pages are full of helpful guides, tips, tricks and tutorials – you can take a look at them here. If you’d like to take it a step further, we also offer a full range of official SOLIDWORKS training courses online and in the classroom – why not take a look?
 |
About the author: This guide was written by SOLIDWORKS Applications Engineer, James Kingman. James has been with the Visiativ Technical Support Team since 2024. |
|||
|
|
||||