How to: Use Tab and Slot in a SOLIDWORKS Assembly
17 February 2026
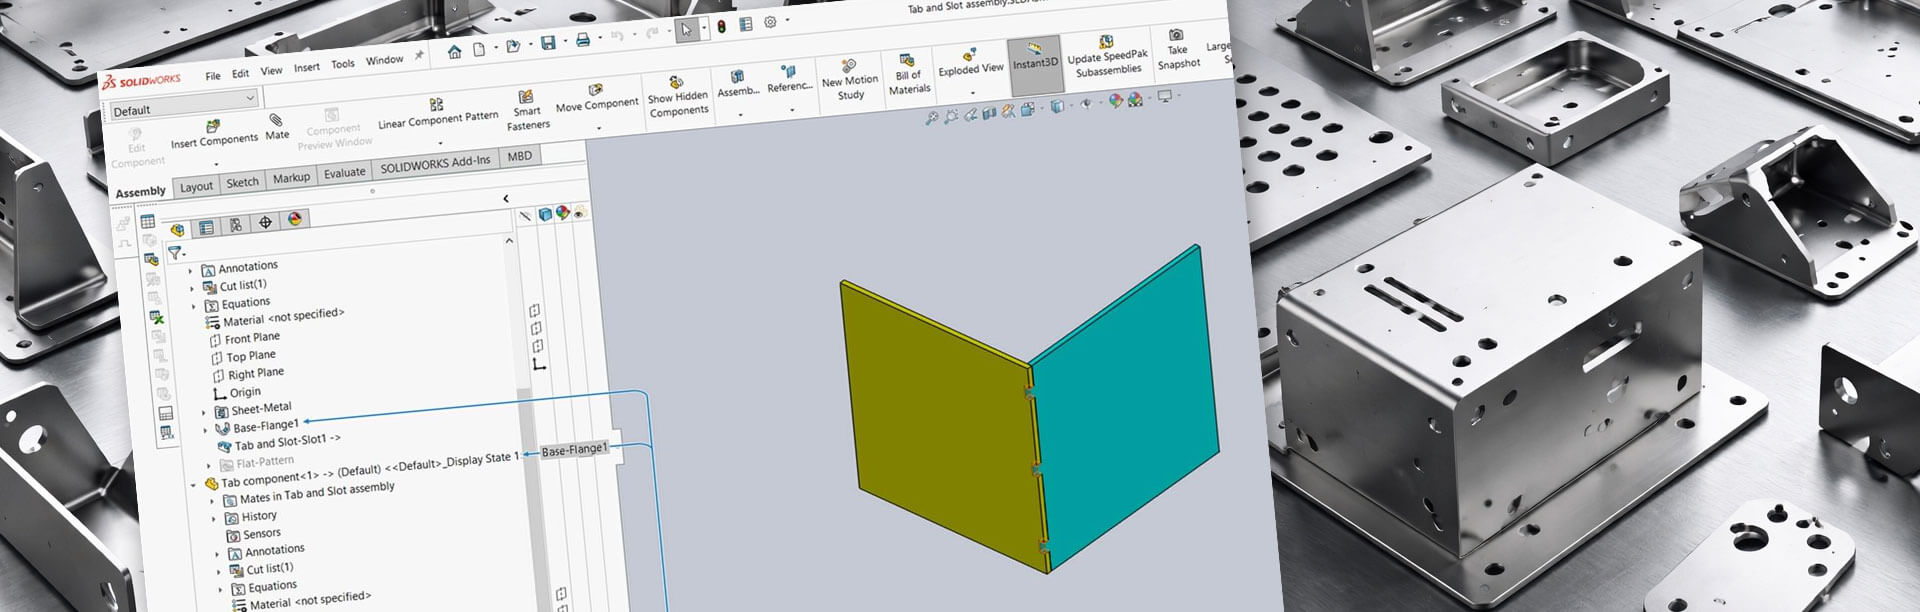
The SOLIDWORKS Sheet Metal Tab and Slot feature lets you quickly create interlocking tabs on one body and matching slots or holes on another. This is especially helpful for positioning parts accurately before welding.
While this feature is often associated with sheet metal parts, it also works with non-sheet metal parts. Applying it at the part level is fairly straightforward, but we’re often asked how to use it within an assembly.
Visiativ SOLIDWORKS Applications Engineer, Jak Szura, shows you how it’s done…
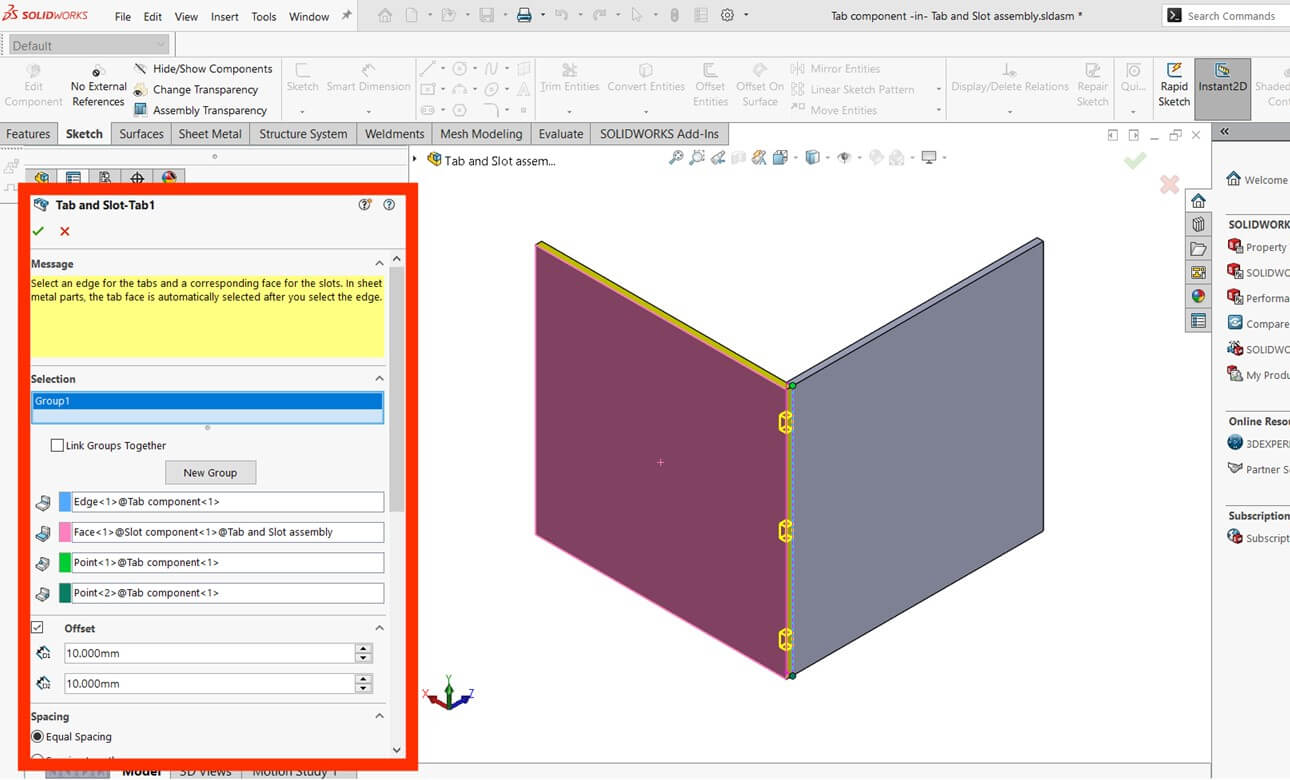
Setting Up the Assembly for Tab and Slot
Start by adding your parts to the assembly and using mates to position them correctly. If you try searching for the Tab and Slot command at this point, you’ll likely see a “No results found” message. That’s because the command isn’t available at the top assembly level.
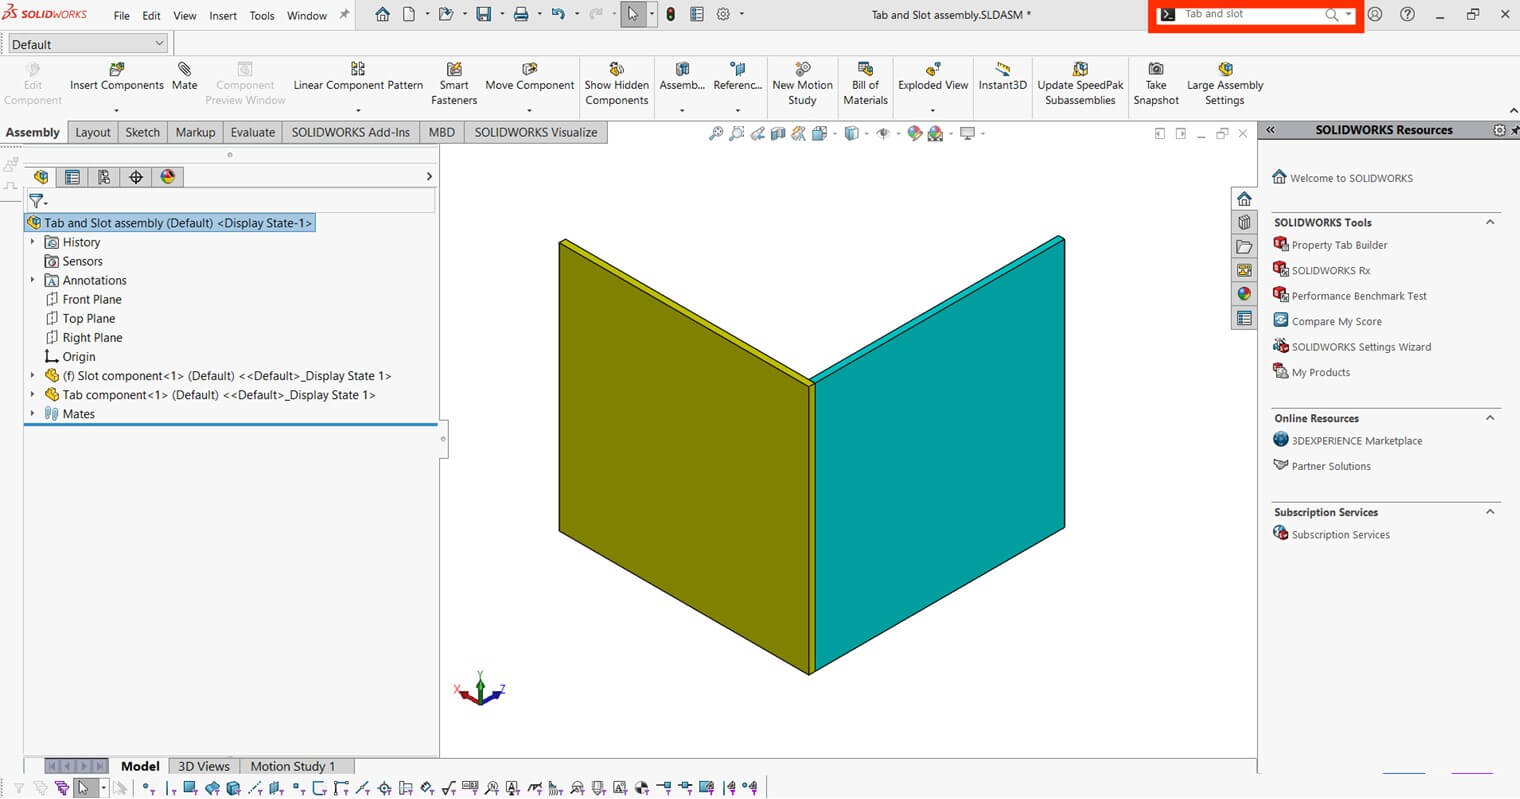
To access it, you need to edit the part that requires the tab in the context of the assembly. Right-click the component, then choose ‘Edit Part’ from the context toolbar or the Assembly tab.
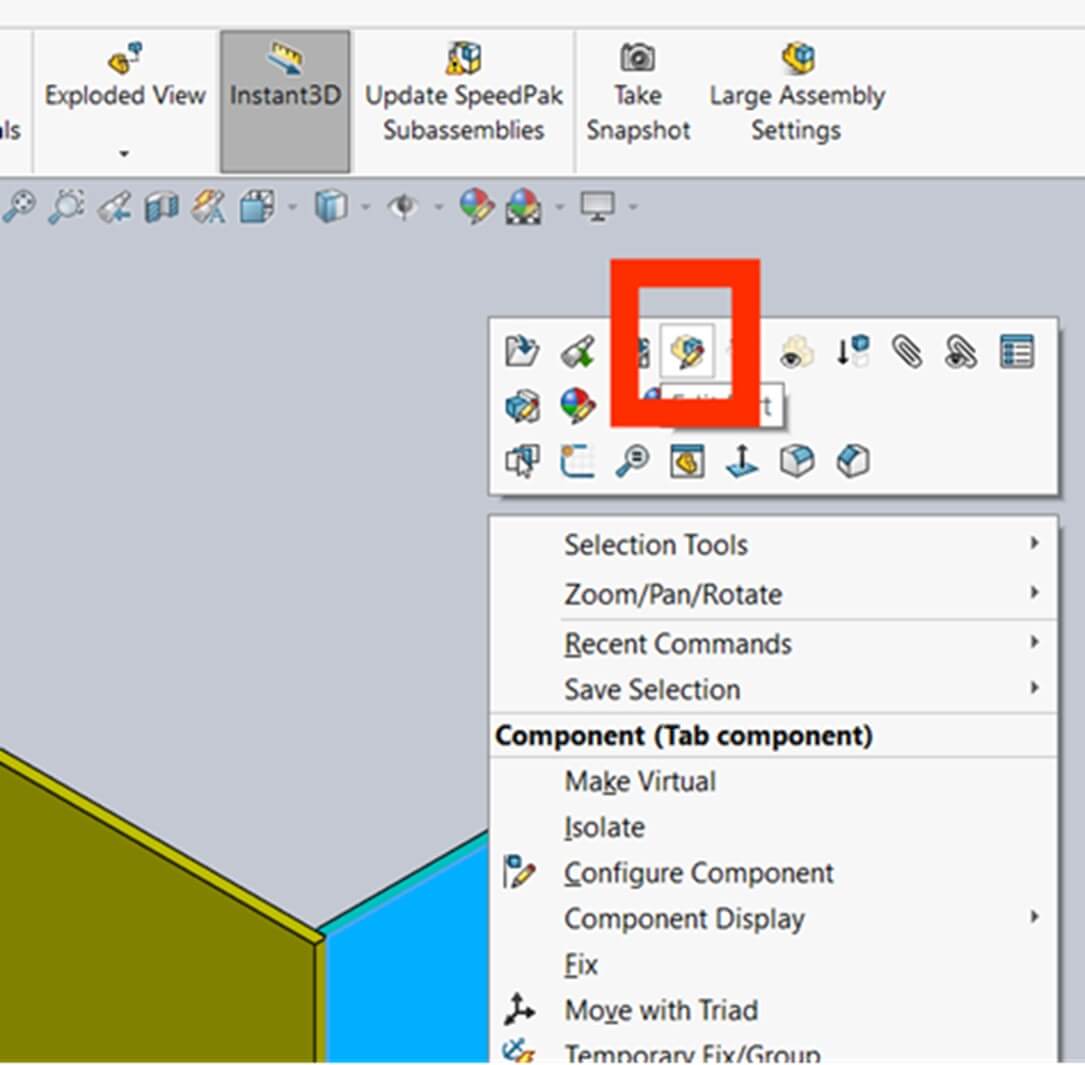
Once you’re in part edit mode, the part name turns blue in the FeatureManager Design Tree, a clear visual indicator that you’re now editing the part. You’ll now see the Tab and Slot feature available in both the Sheet Metal command manager and the command search bar.
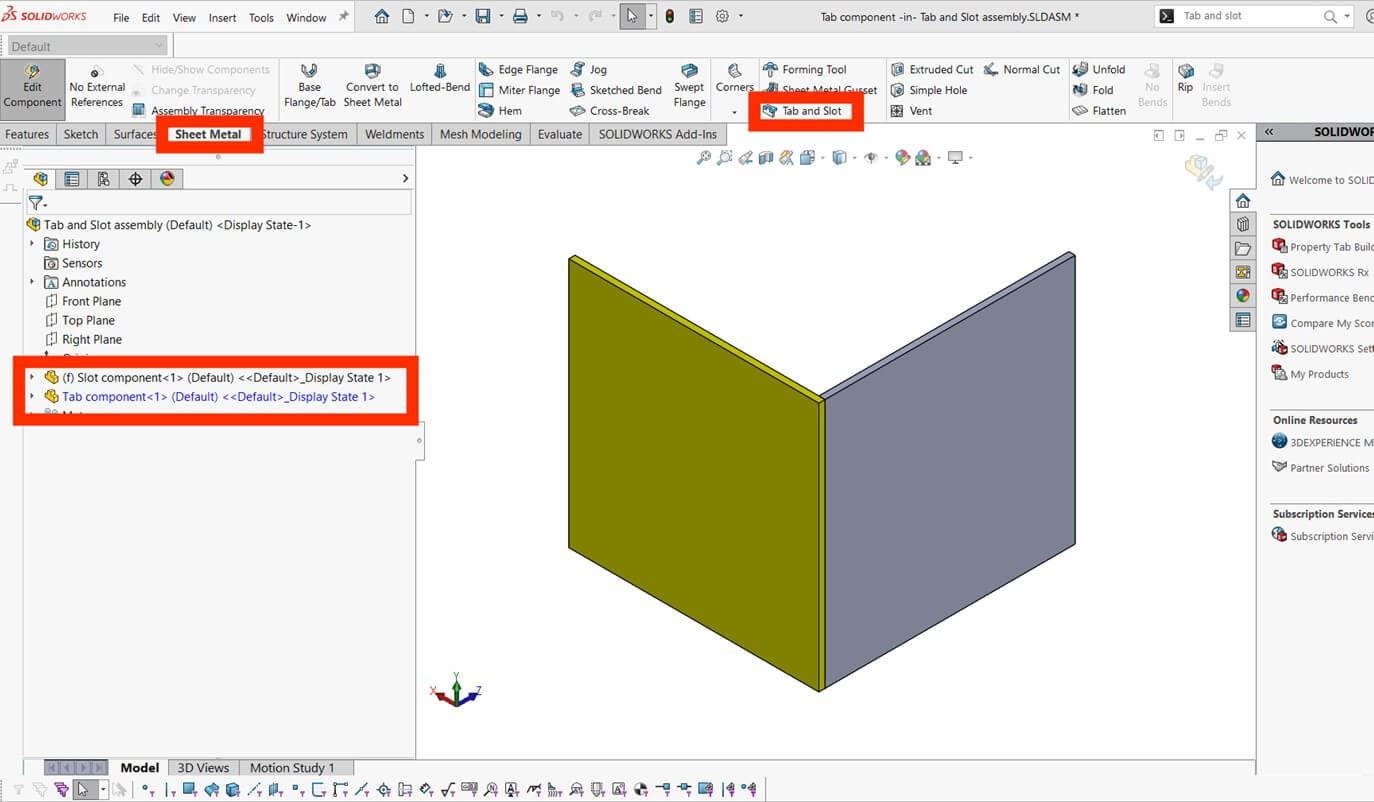
Set your Tab and Slot parameters as needed, then click ‘OK’ to apply the feature.
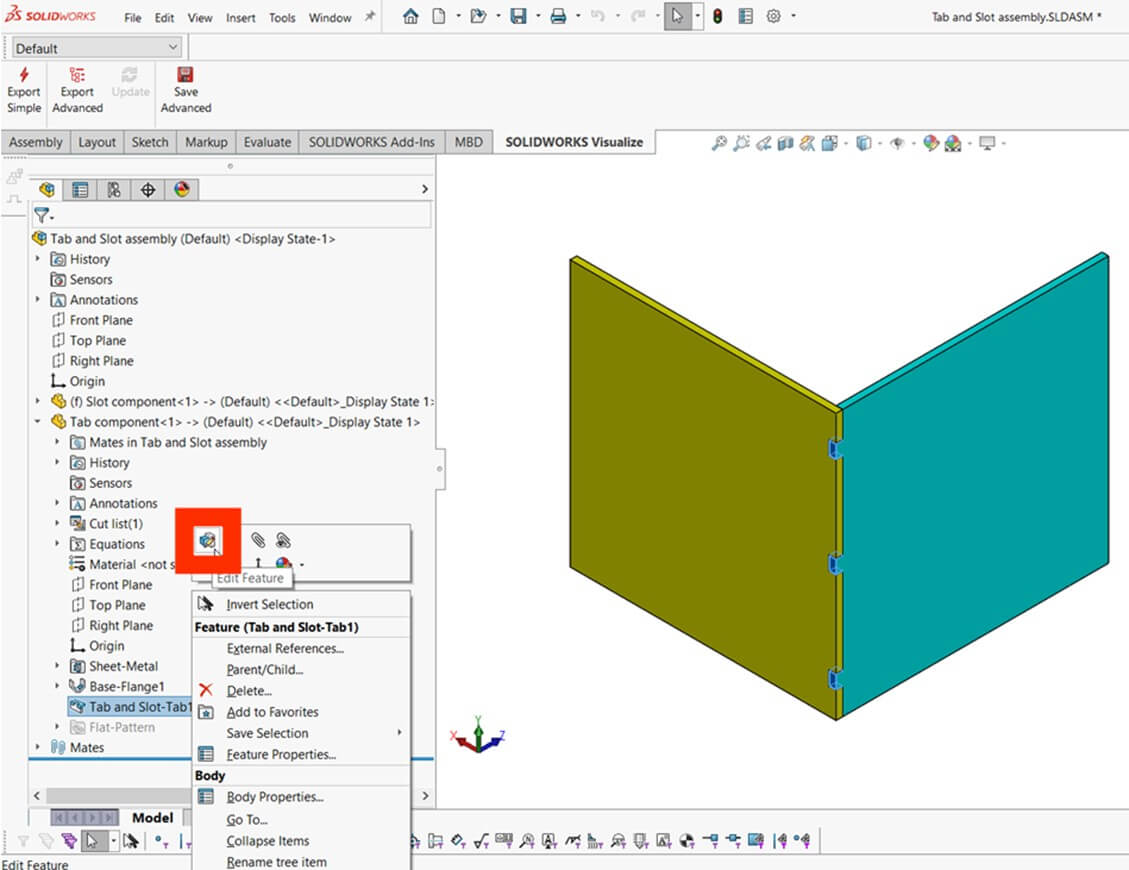
Finishing Up
When you exit part edit mode, SOLIDWORKS automatically adds an in-context feature to both the tab and slot parts. You’ll see that the Tab and Slot feature on the tab part (blue) references the slot part (yellow). The ‘->’ symbol indicates that there is an external reference.

If you need to make changes later, it’s best to edit the feature within the assembly context. Just expand the tab part, right-click the Tab and Slot feature in the tree, and select ‘Edit’ from the context toolbar.
That’s how to use the Tab and Slot feature in a SOLIDWORKS assembly!
We hope you’ve found this tutorial useful. To discover more SOLIDWORKS guides, head over to our news and resources pages now!
 |
About the author: This guide was written by SOLIDWORKS Applications Engineer, Jak Szura. Jak has been with the Visiativ Technical Support Team since 2023. |
|||
|
|
||||