How to: Use the SOLIDWORKS Shell Tool for Different Wall Thicknesses
04 December 2025
The SOLIDWORKS Shell tool offers a simple and efficient way to hollow out solid models while maintaining control over wall thickness. In this guide, we’ll look at how the SOLIDWORKS Shell tool works and how you can use the multi-thickness option to apply different wall thicknesses within a single feature.
SOLIDWORKS Shell Tool Overview:
The Shell tool is perfect for converting a solid into a thin-walled body.
Designers often model components intended to be hollow as solid bodies first to simplify the CAD design process. Having modelled your product as a solid, you can then hollow the part out using ‘standard’ modelling methods like cut extrude, a loft or surface modelling tools.
However these are not simple options especially if you require walls of different thicknesses, using these techniques can become even more complex.
But with the Shell Tool in SOLIDWORKS we can use the Multi Thickness option to vary the model all with one simple command.
Using the SOLIDWORKS Shell Tool:
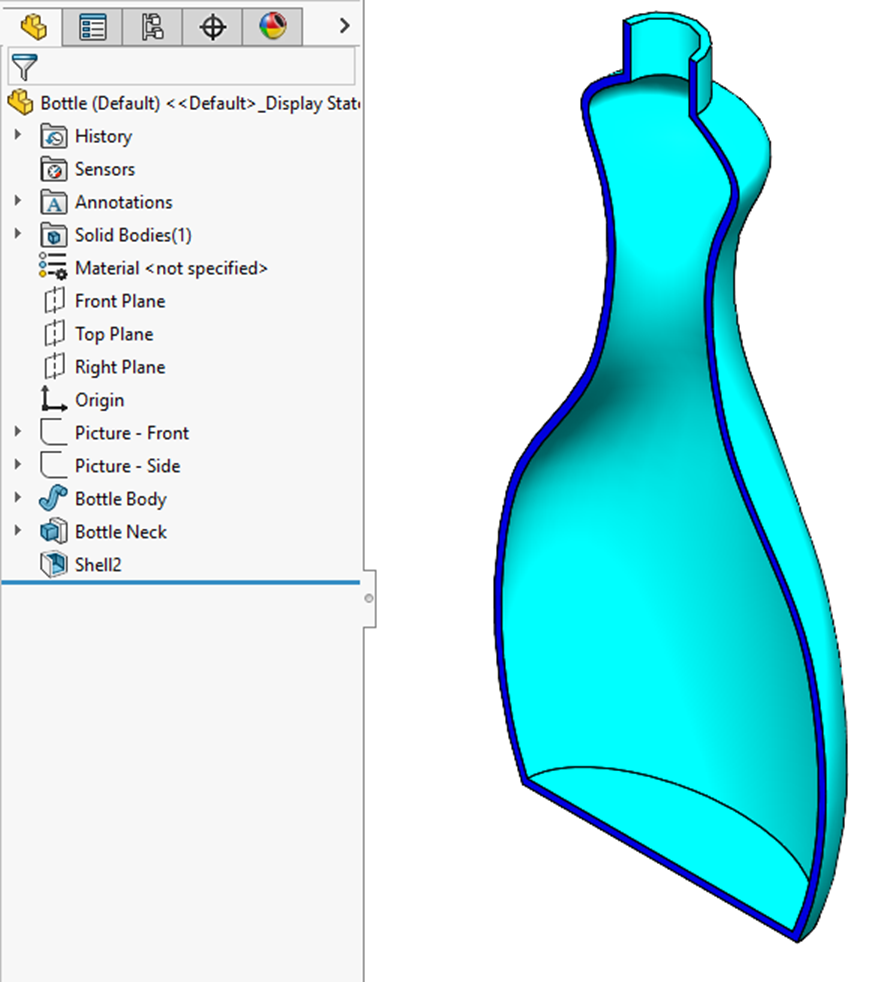
Let’s use this bottle (shown in section – with transparency – for clarity) as an example:
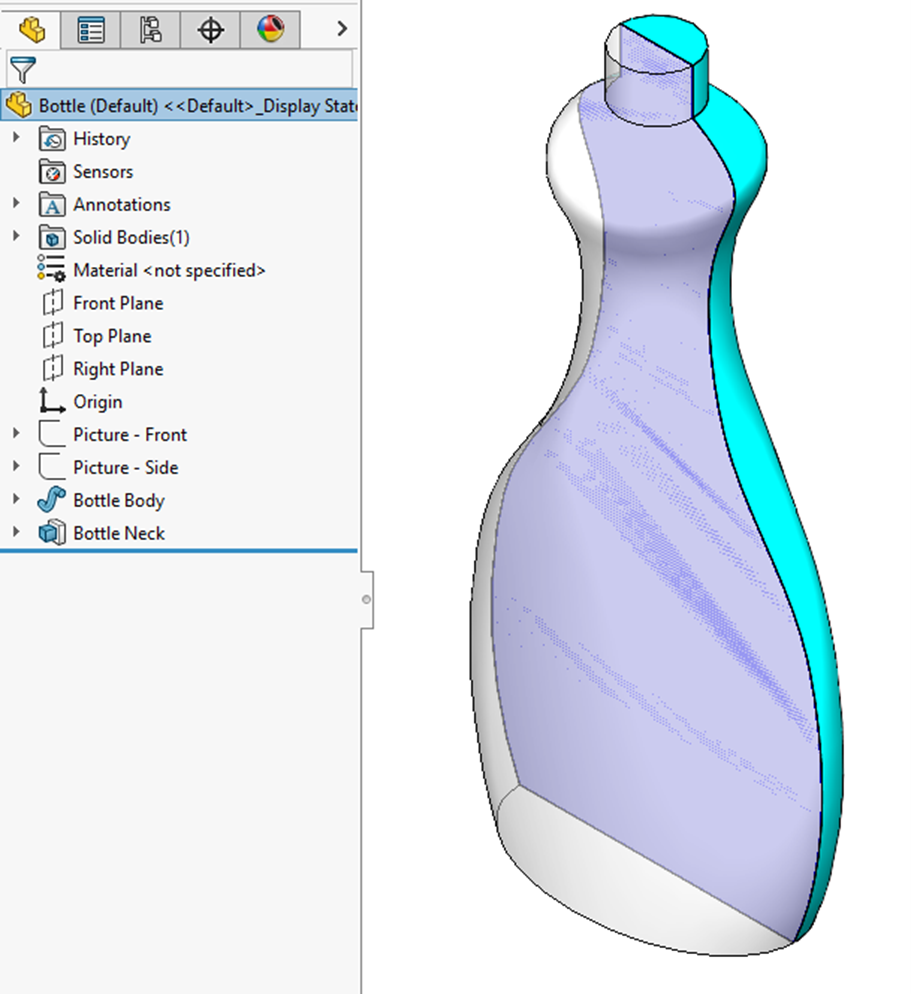
The part has been modelled as a solid, however this obviously needs to be hollowed out.
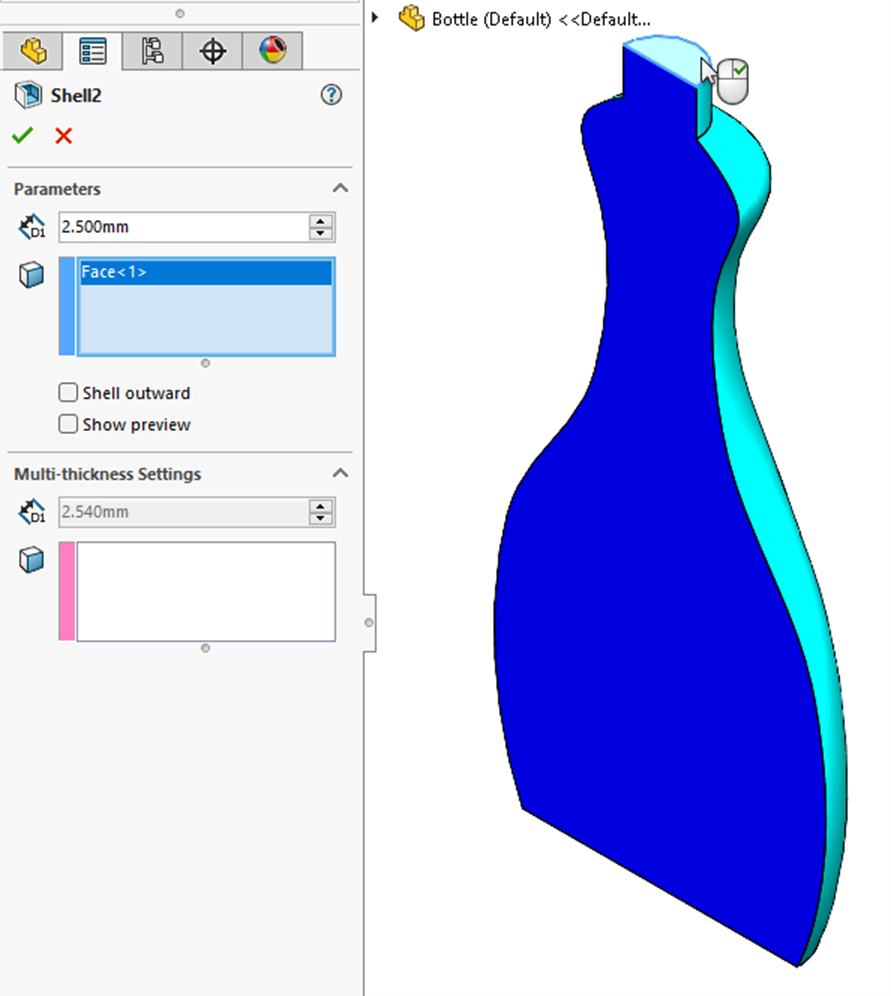
If we apply a simple shell the results would look like this:

It’s now hollow, however of little practical use as the neck of the bottle needs to be open. You can achieve this by activating the ‘faces to remove’ selection box and selecting the faces that need to be removed:
Resulting in a usable bottle:
Applying Multiple wall thicknesses:
While we now have a usable bottle, the neck is still too thin and we’d definitely like to have a thicker base to the bottle. Applying differing wall thicknesses can be done as part of the original application of the shell feature. It’s not necessary to recreate the shell then edit it to apply the thicknesses.
However for the purposes of our tutorial we’ll go in and modify the shell that we’ve previously created:
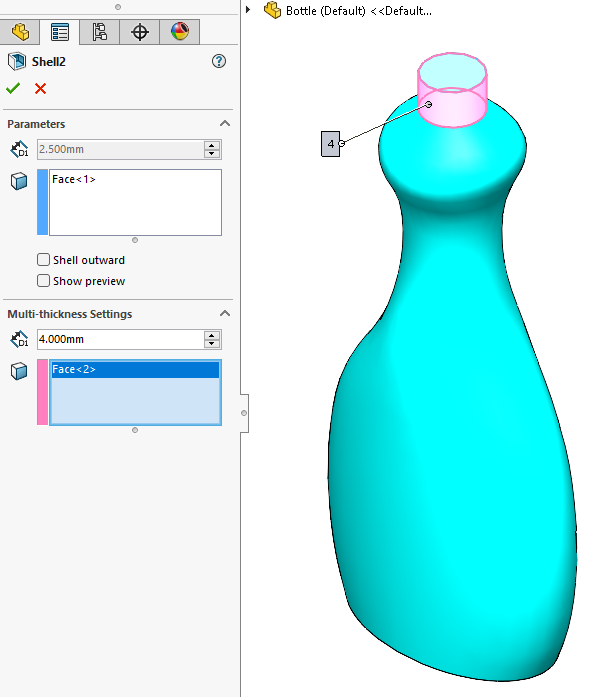
Taking another look into the Shell feature reveals a ‘Multi-thickness Settings’ group box. Here you can see it’s possible to select multiple faces and each one can have an individual (or the same) thickness applied. In this instance the neck will be increased to 4mm & the base to 6mm, while the body remains 2.5mm.
Step 1:
Activate the ‘Multi-thickness faces’ selection box, select the face of the bottle neck, and specify a thickness of 4mm:
Step 2:
Select the bottom face of the bottle and specify a thickness of 6mm:
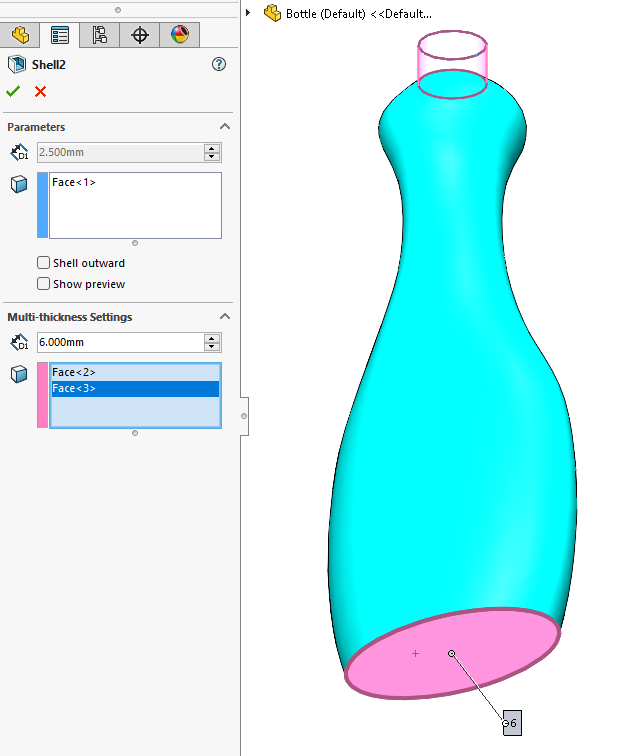
The result:
A bottle with a 4mm thick neck, and a 6mm thick base:
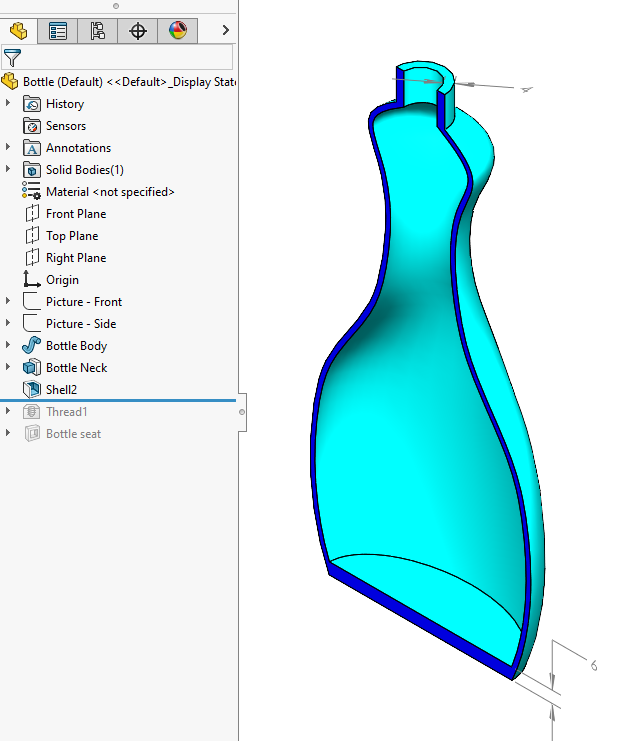
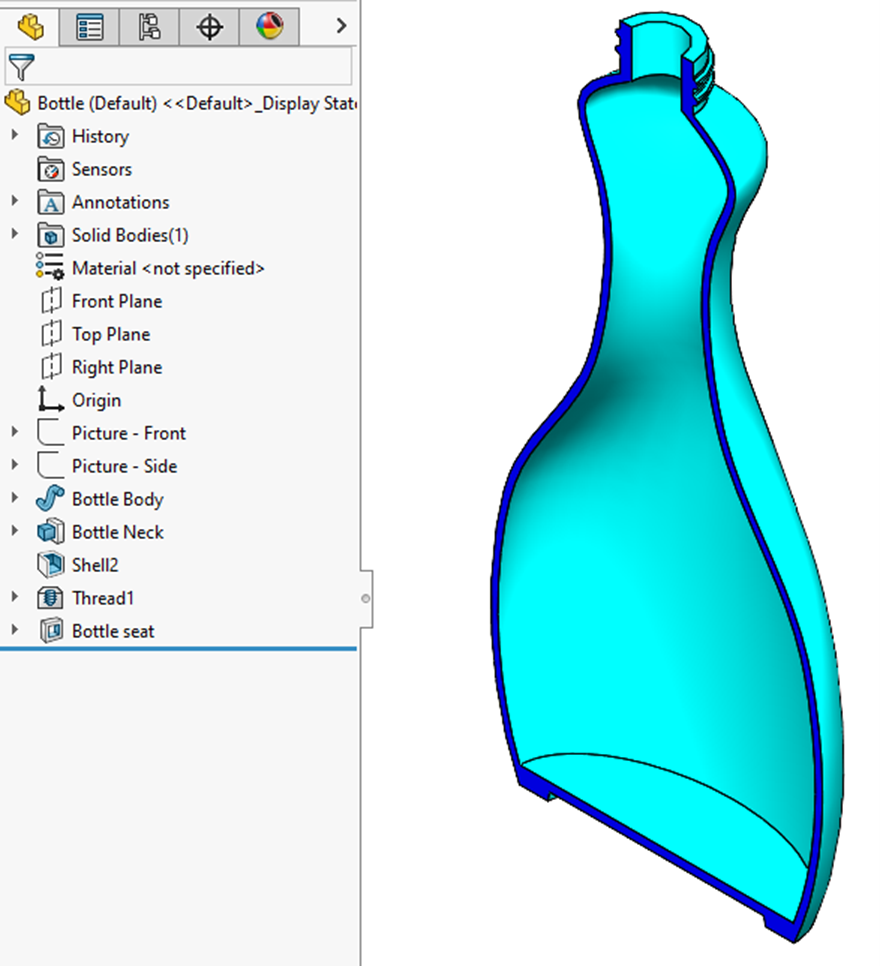
Finally:
We’ve added the finishing touches, a thread at the neck and a seat to the base:
Using the Shell tool with multi-thickness settings allows you to create practical, manufacturable hollow parts without resorting to more complex modelling techniques. With just one feature, you control wall thickness exactly where you need it. This keeps your models clean, flexible and easy to update.