
How to: Repair SOLIDWORKS Installations
08 December 2025
Sometimes your SOLIDWORKS install may become unstable for one reason or another. Perhaps a critical file has been modified or deleted. Maybe there is a missing or corrupted registry key, or your install was unintentionally interrupted due to loss of power. Whatever the reason, this guide from SOLIDWORKS Engineer, James Kingman, will walk you through the steps required to get rid of those pesky error messages.
Note: These instructions assume that your operating system is Windows 11. I’ll try to point out any potential difference along the way if you’re using an older operating system – James.
How to repair SOLIDWORKS installations
Step one…
locate your “Installed Apps” in windows setting. Note: This may be called Apps & Features or Programs and Features, depending on the year version of windows being run.
The easiest way to do this is:
Click on the start menu and type “add or remove programs”.
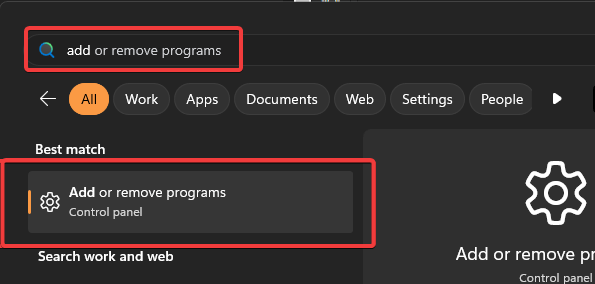 |
Click on Add or Remove Programs, or navigate to this through the settings or control panel menus depending on windows version installed.
Step two…
Now search for the version of SOLIDWORKS your wish to repair. Scroll down the list, or type in the search box “SOLIDWORKS” followed by the year version. Once found click on the 3 dots at the end of the row and click modify. (if using an older version of windows select to program from the list and click on change at the top of the table)
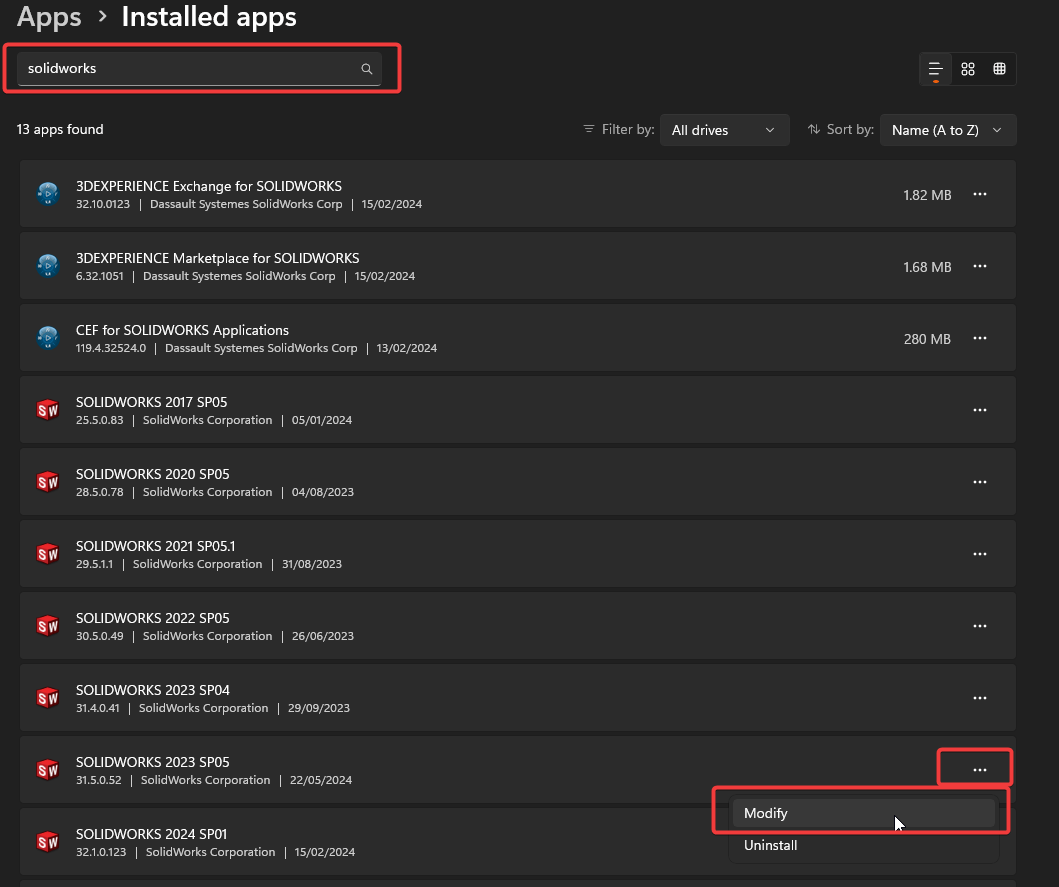
The SOLIDWORKS installation manager window will appear (please note you will need the correct windows user right to perform this task, i.e. admin user level privileges to run software installers)
Step three…
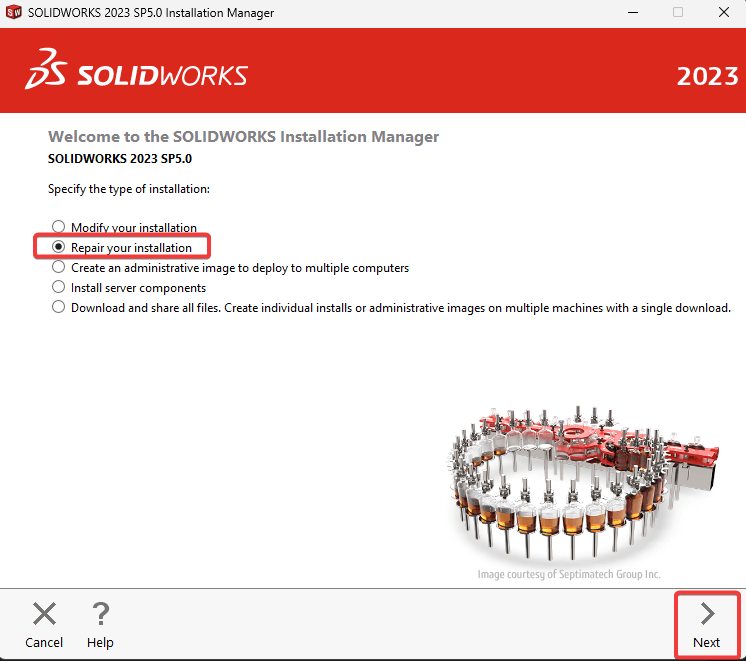
Select “Repair Your Installation” from the option given. Then click on “Next”
Step four…
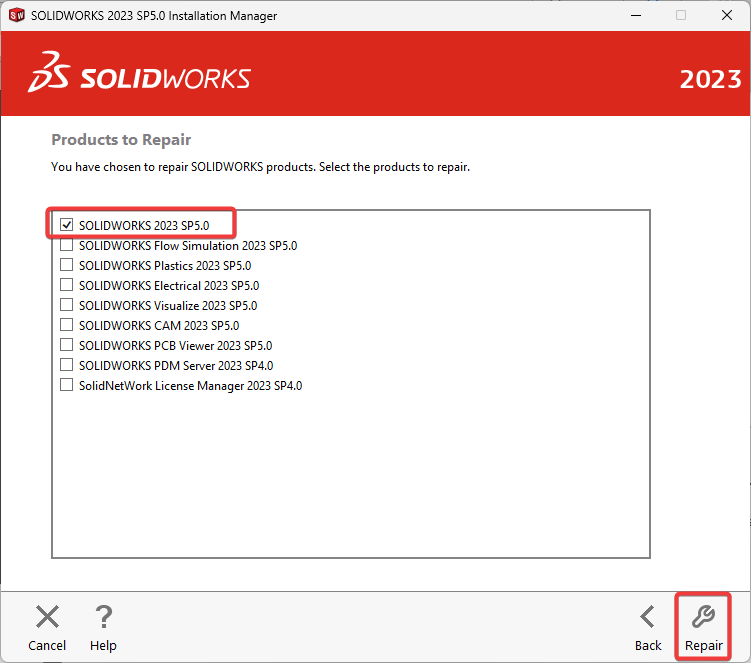
The next page will ask you which SOLIDWORKS software you wish to run a repair on. Tick or untick as appropriate. Then click on “Repair”.
Now wait until the process is complete. It’s not advisable to cancel or interrupt this process once started. You’ll see the screen below whilst the repair is completed.

Step five…
Once the process is complete you’ll be presented with a confirmation message. You can now press “OK” to close the installer.

That’s How to Repair SOLIDWORKS Installations!
Hopefully this has resolved your issues, and you can carry on! If this hasn’t resolved your issues, please refer to the SOLIDWORKS help files.
Visiativ customers requiring assistance can contact our technical support engineers, who’ll be happy to help.
 |
About the author: This post was written by SOLIDWORKS Applications Engineer and Electrical Specialist, James Kingman. James has been with the Visiativ Technical Support Team since 2023. |
|---|