How to: Calculate Internal Volume of SOLIDWORKS Parts
18 December 2025
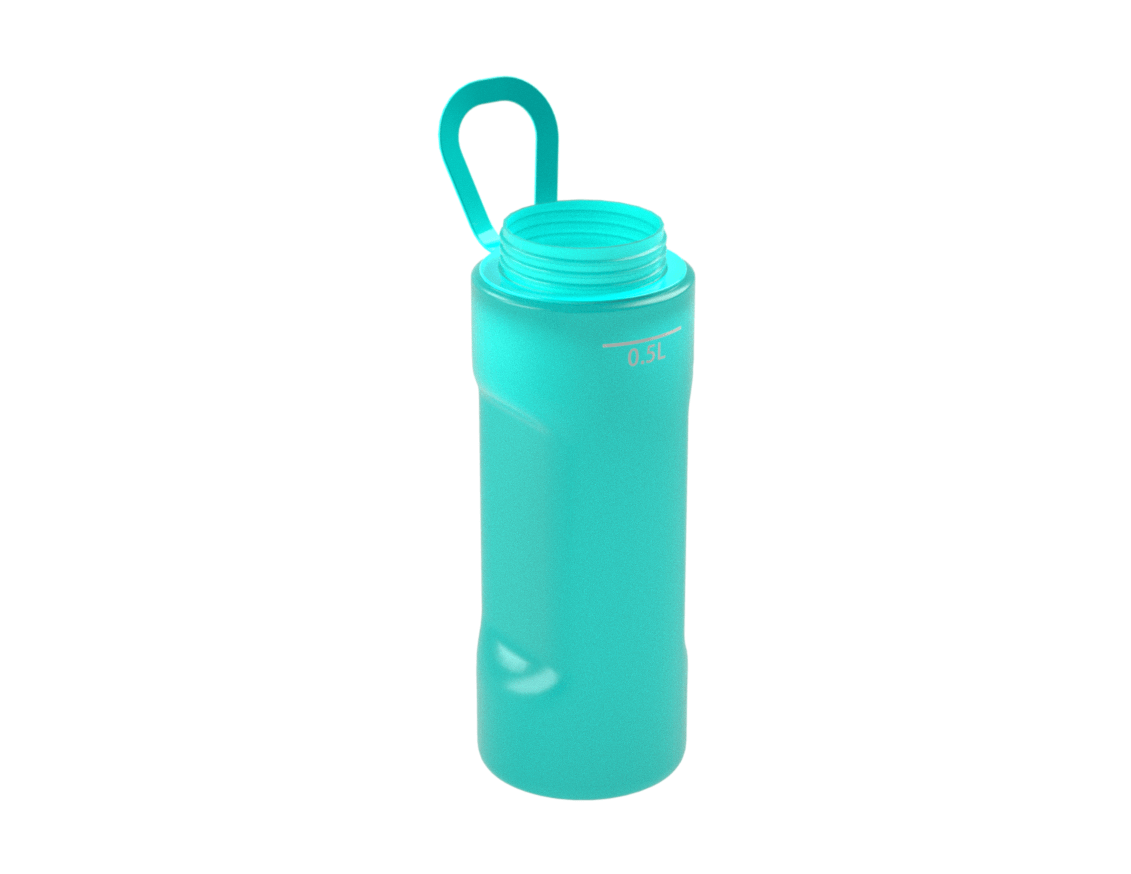
Calculating the internal volume of SOLIDWORKS parts is often tricky when the part has irregular or complex surfaces. Luckily, SOLIDWORKS has a tool that can help us with this. Below, I’ll demonstrate how to calculate the volume of a reusable water bottle up to a specific fill line using the Intersect tool. This will allow us to add a fill level mark for 0.5L.
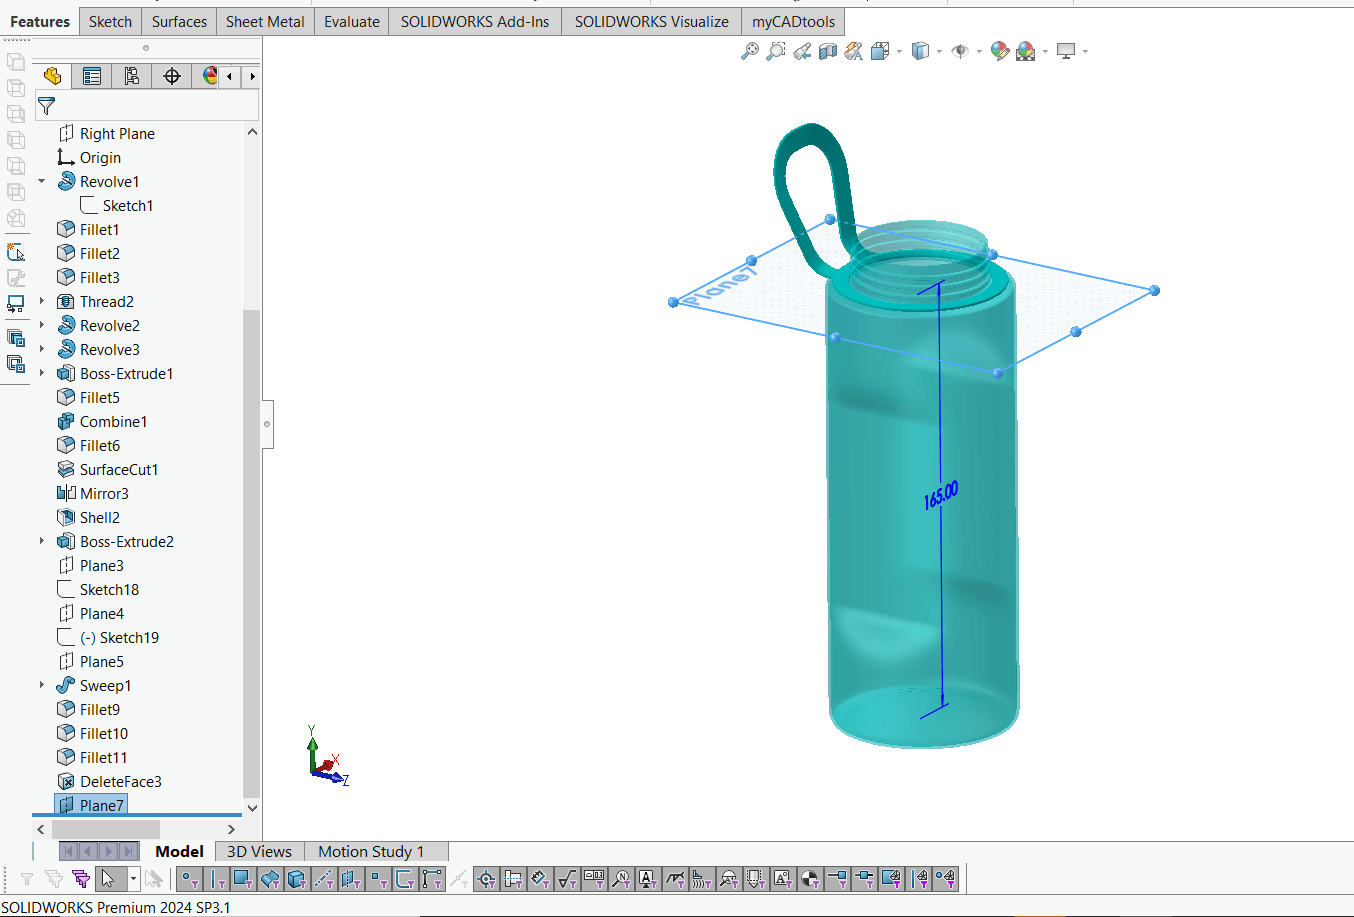
1: Create a reference plane to represent the fill level.
Step one in calculating the internal volume of SOLIDWORKS parts is creating a reference plane to represent the fill level. Here I’ve offset from the top plane by 165mm.
2: Select “Intersect” from the “Features” command manager and check on the option “Create internal regions”.
Next, select the water bottle body and the plane we created for the fill level, then select “Intersect”.
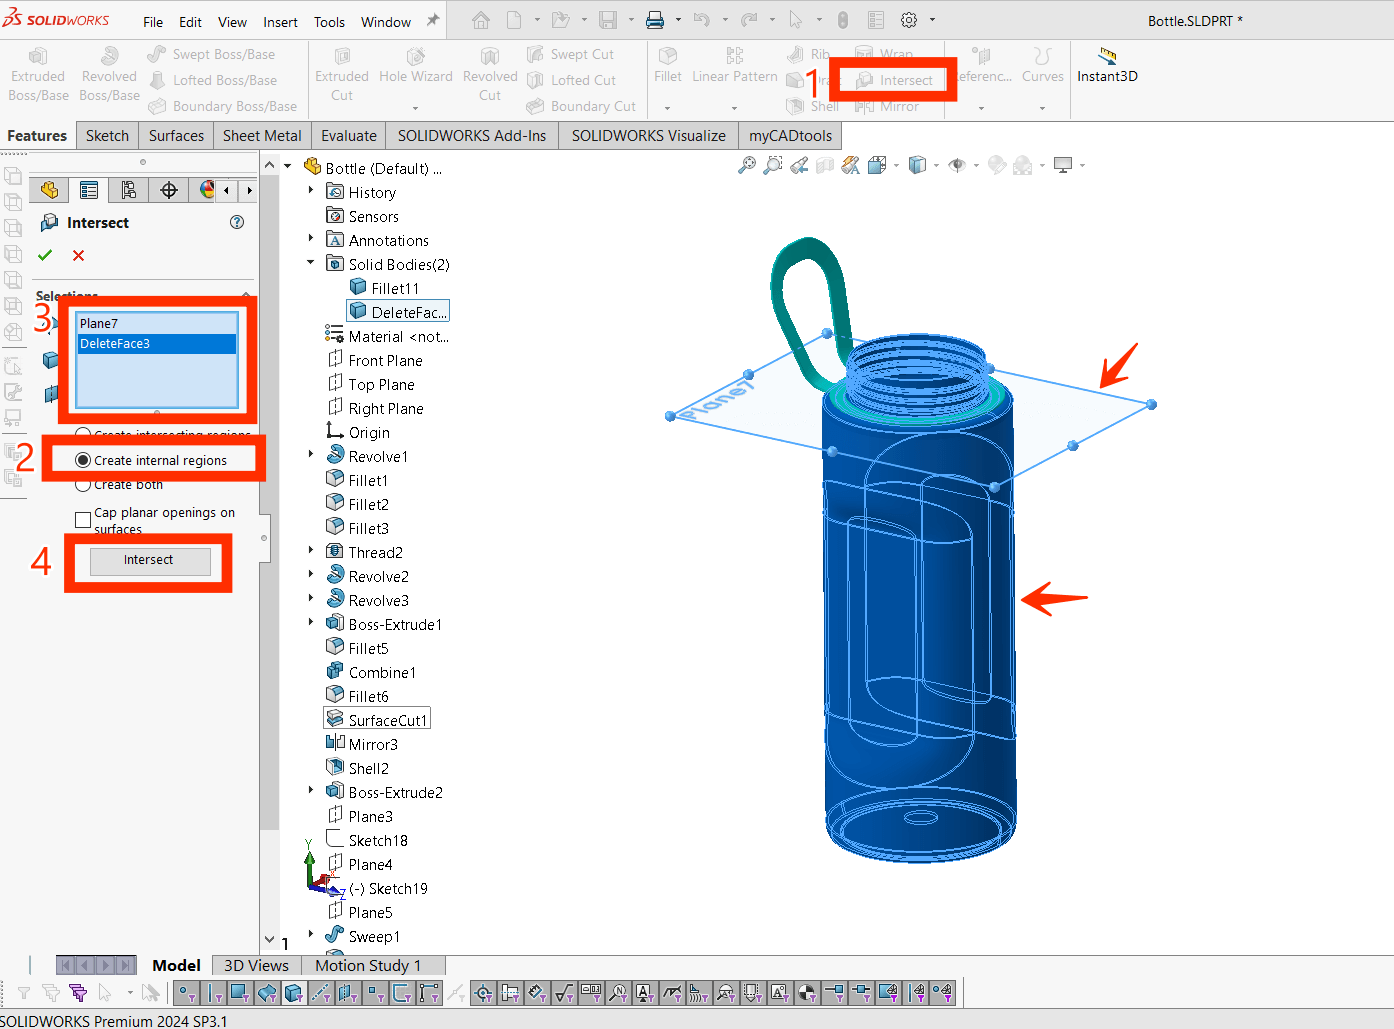
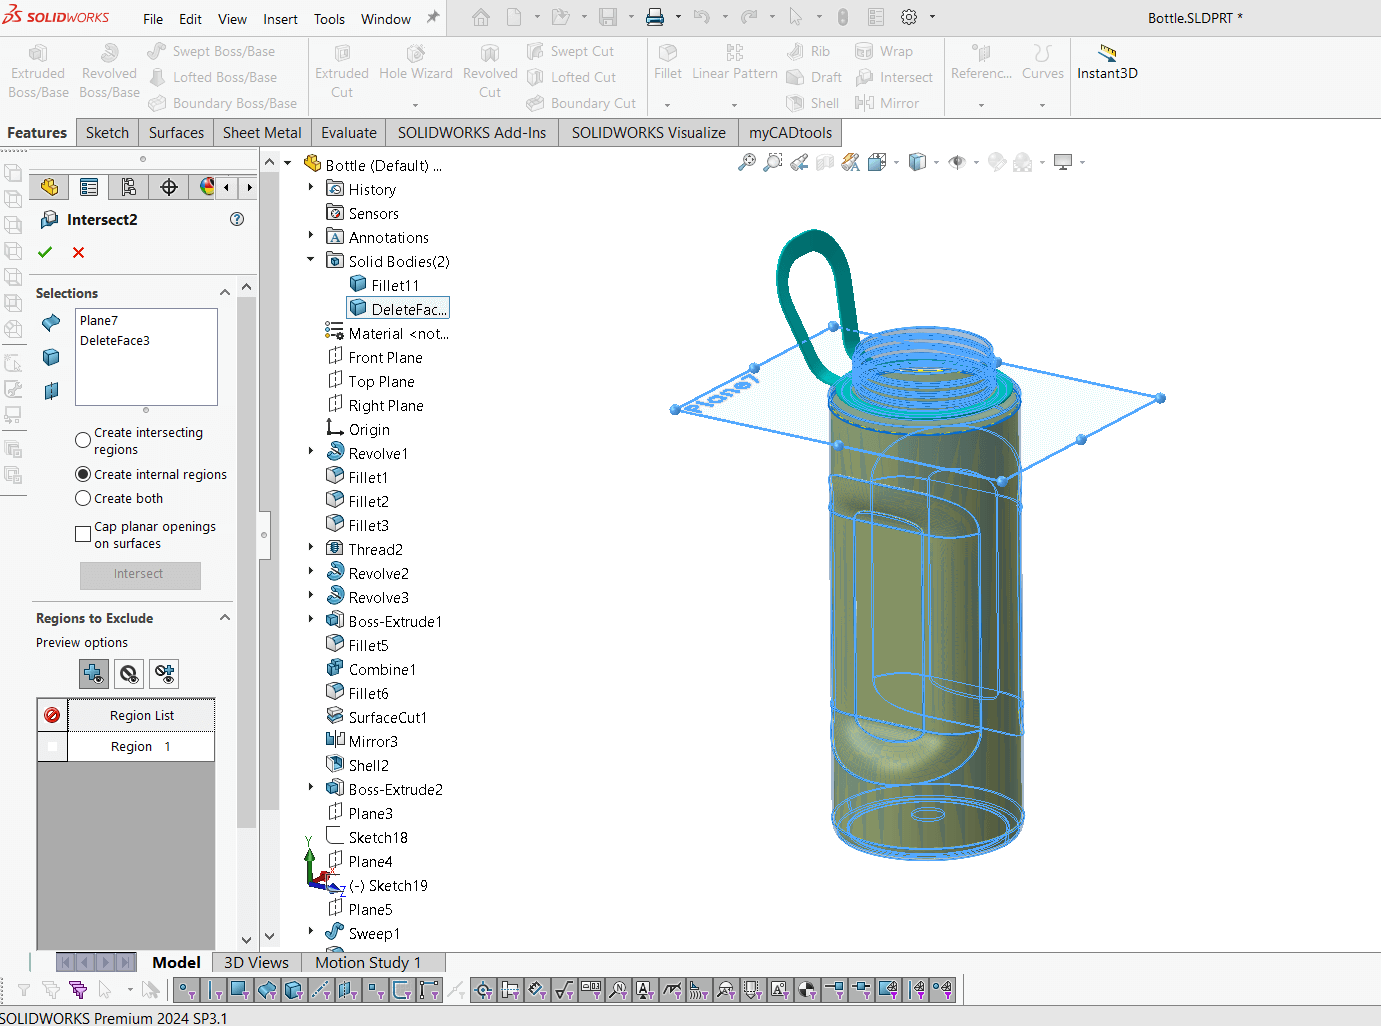
We then see a preview of the internal region created by the intersecting geometry. Hit “OK” to create a solid body of the internal region. We’ll use this to calculate the volume.
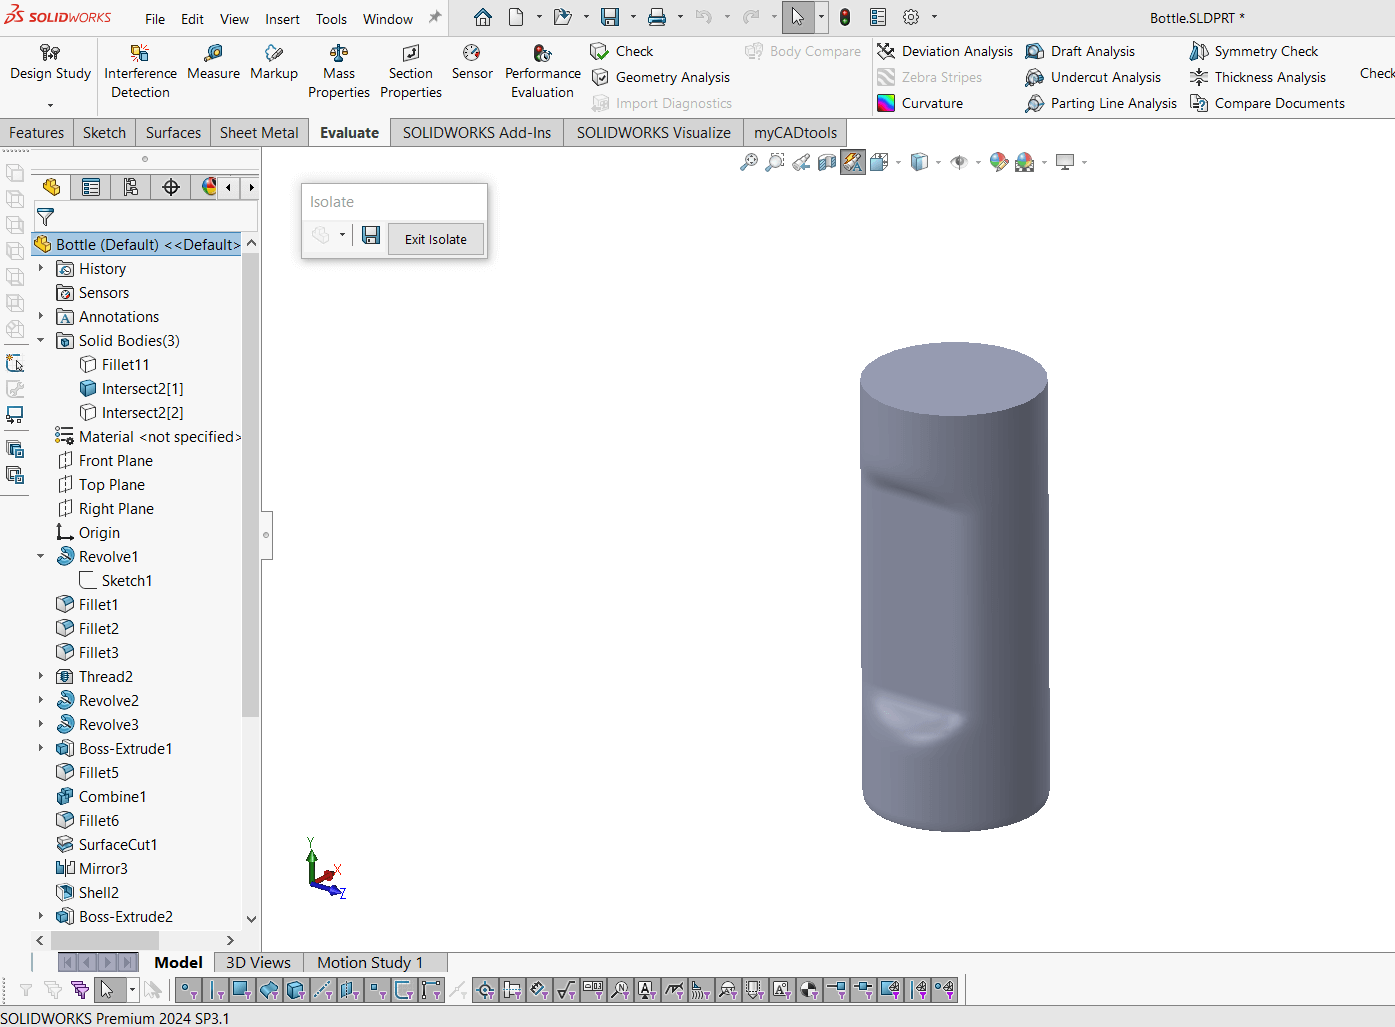
3: Right-click on the internal region body from the graphics window or feature tree and select “Isolate”.
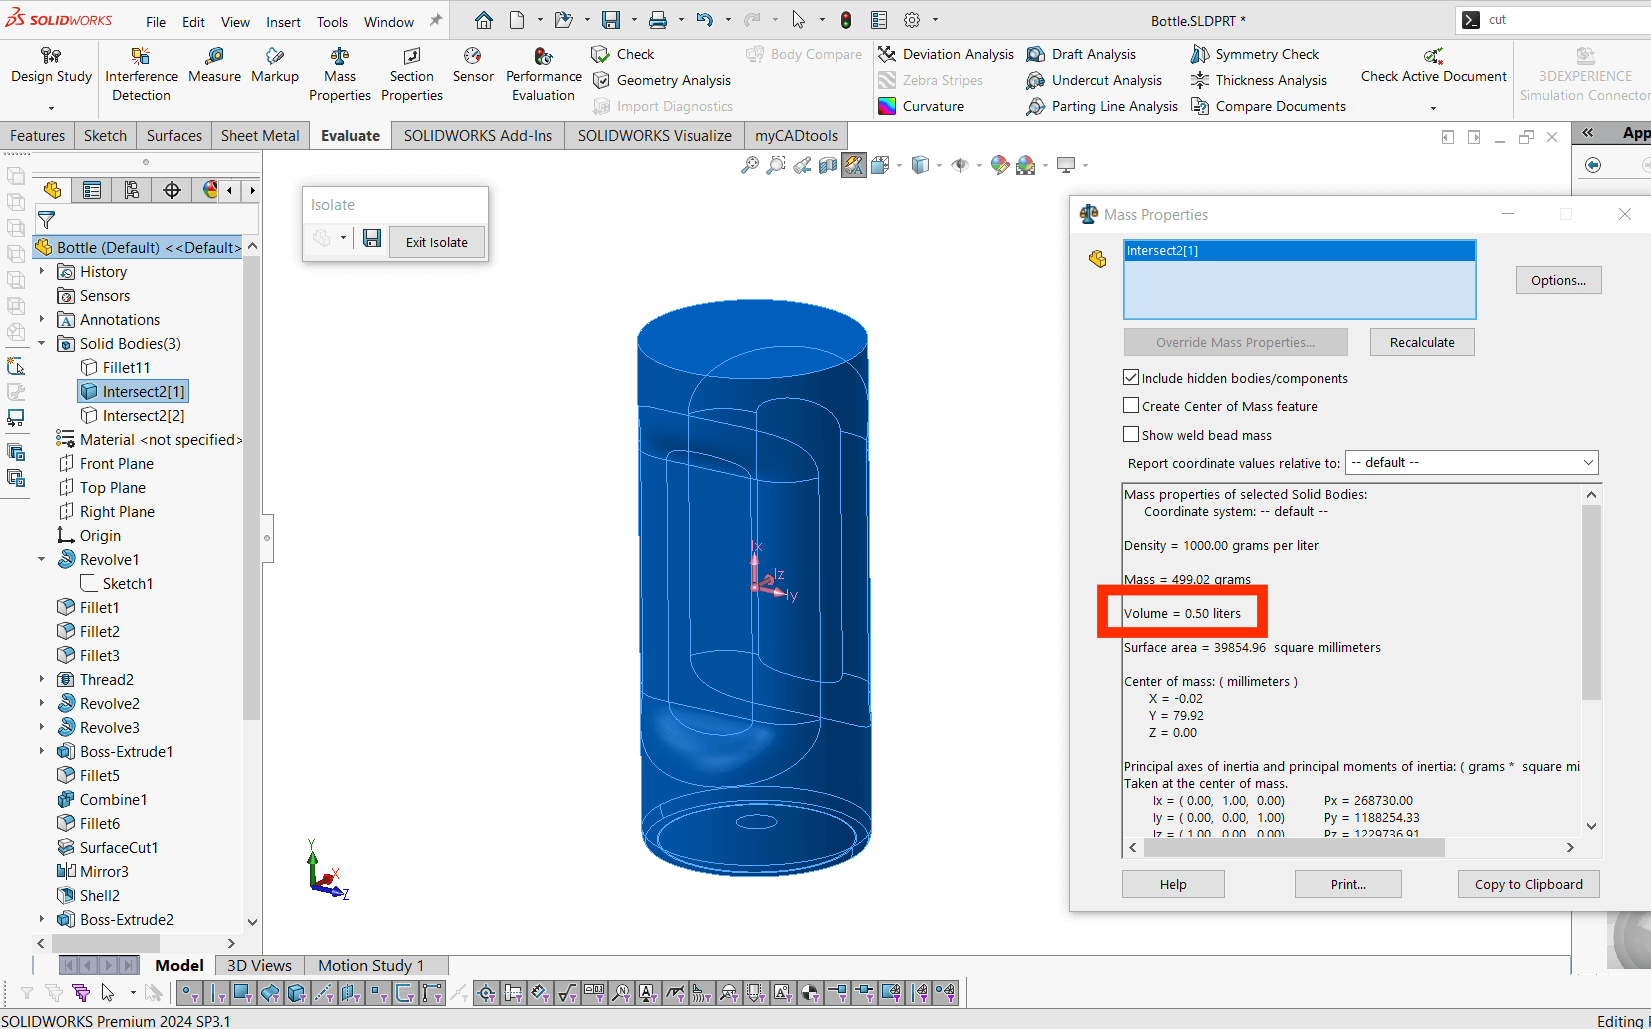
Next, select Evaluate > Mass Properties and select the isolated body. Use the “Option” button if you would like to customise the units per volume.
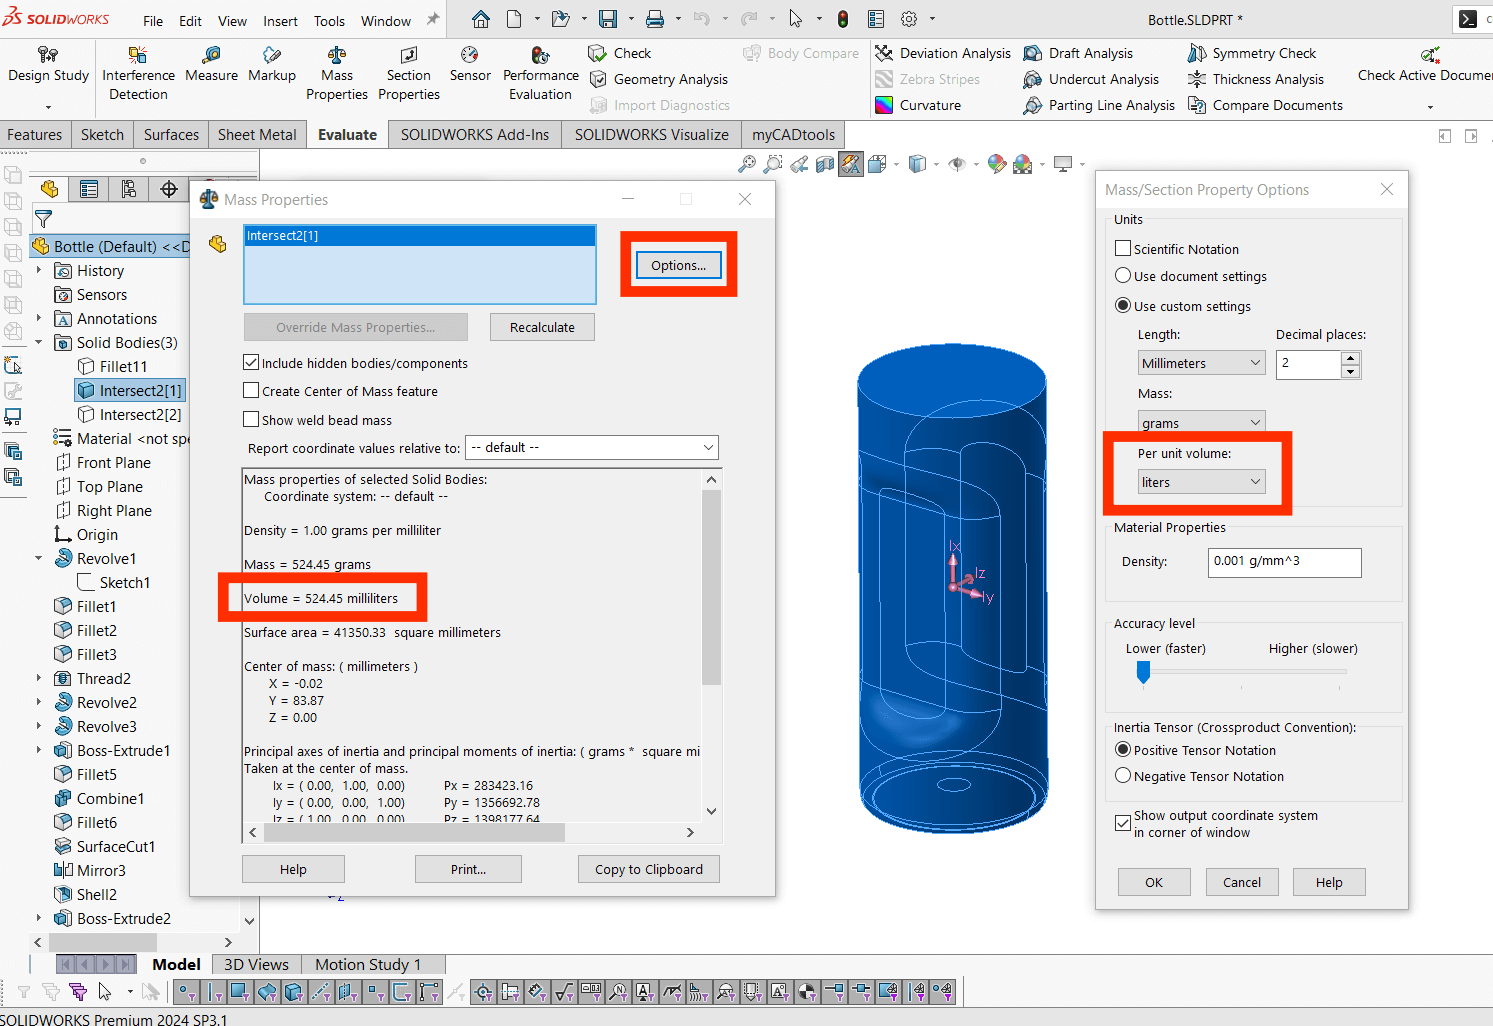
Adjust the fill level by increasing or decreasing the offset distance set in the reference plane created for the fill level until you have the desired volume.
Use the reference plane to create a fill line in the correct location.

There you have it, you’ve calculated the internal volume of SOLIDWORKS parts and created a fill line. We hope you found this guide helpful, you can find more tips, tricks and guides on our News and Resources page.
 |
About the Author: This tutorial was written by SOLIDWORKS Applications Engineer Jak Szura. Jak has been with the Visiativ Technical Support Team since 2023 |
|---|