How To: Activate & Use SOLIDWORKS SimulationXpress
07 August 2025
SOLIDWORKS SimulationXpress is an introductory first pass finite element analysis (FEA) tool that allows you to perform basic linear static analyses on single-body parts and is available to all users with a SOLIDWORKS Standard or Professional software package.
To find it, simply click SimulationXpress Analysis Wizard (Tools menu) or go to Tools > SimulationXpress.
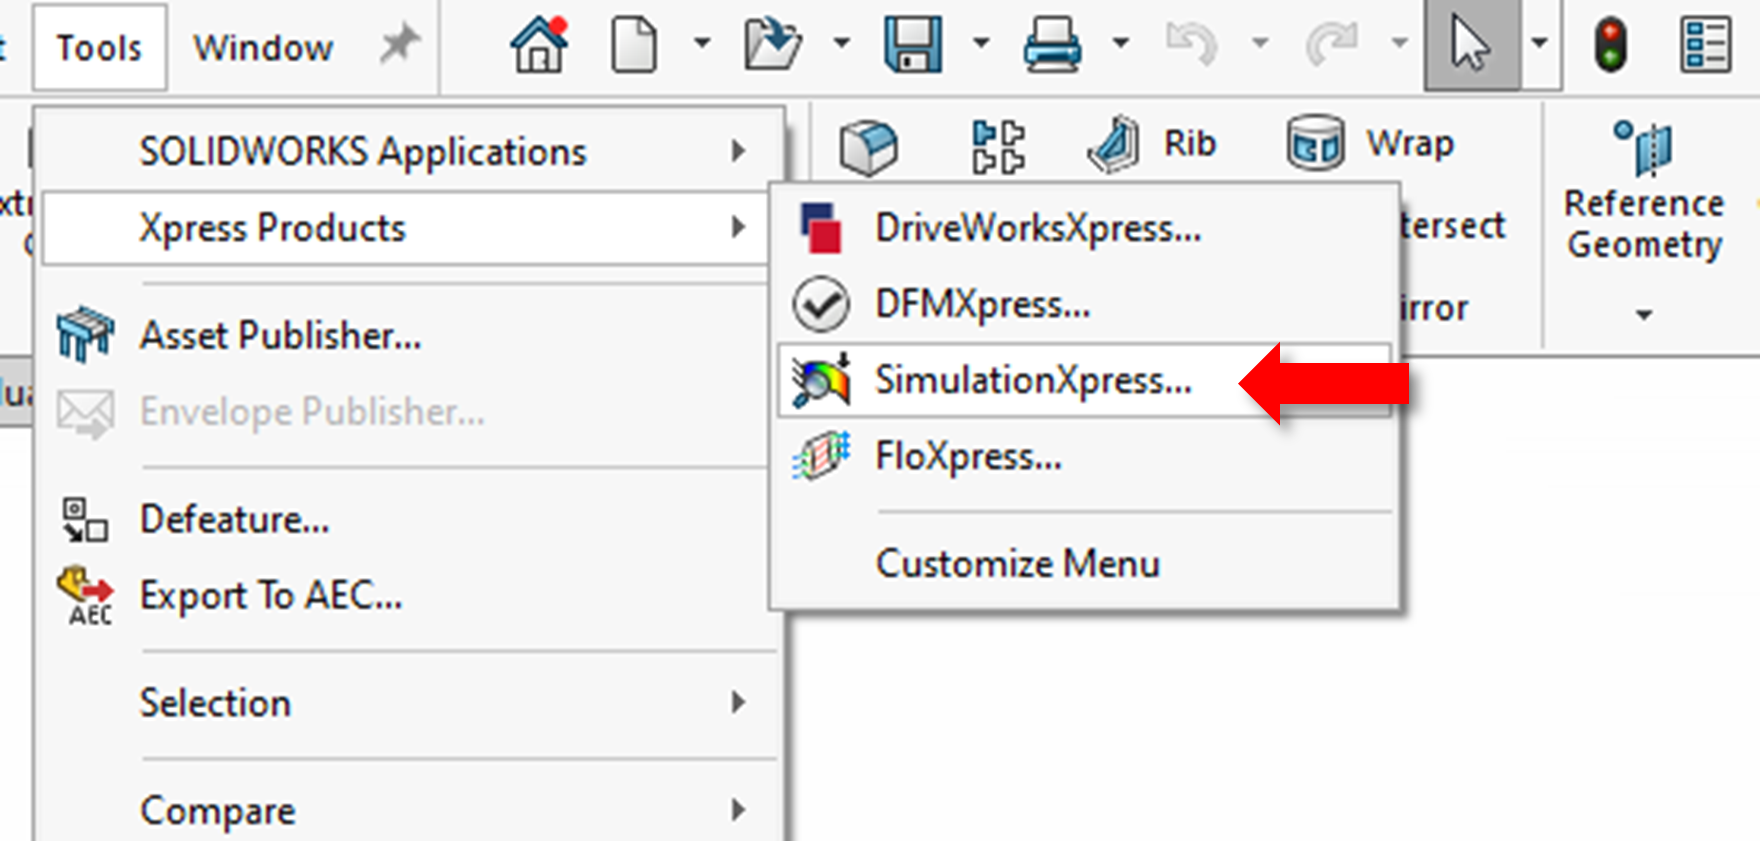
Although the installation includes the tool, you still need to activate it. When you load it for the first time, the following screen appears.
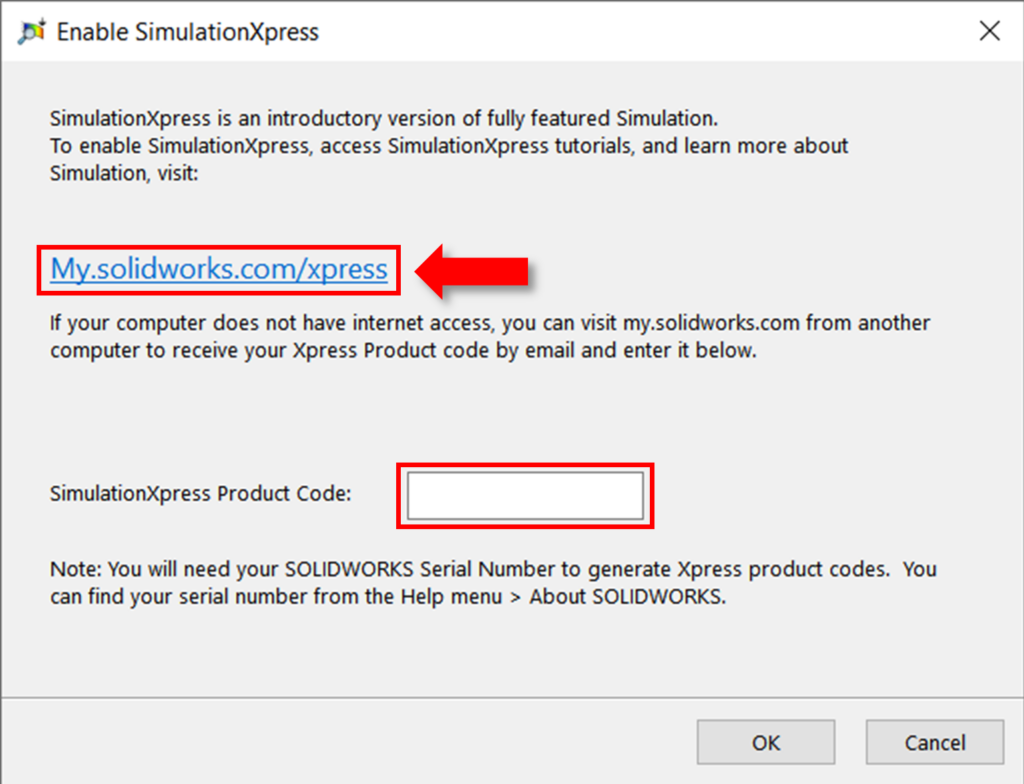
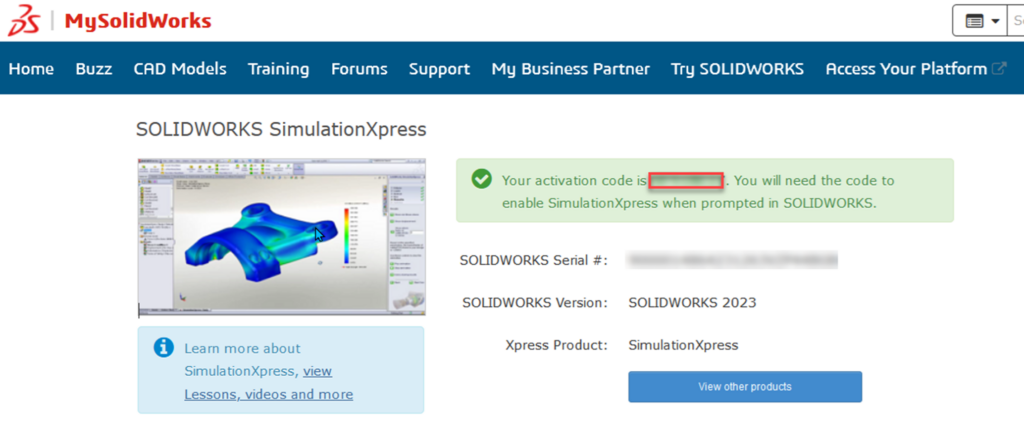
To activate the tool, click the provided link to visit the SOLIDWORKS website. Once you log into your customer portal account, the system generates a code..
Enter this code into the window below the link on the activation screen (as shown in image 2). You can then start your study!
Using SimulationXpress
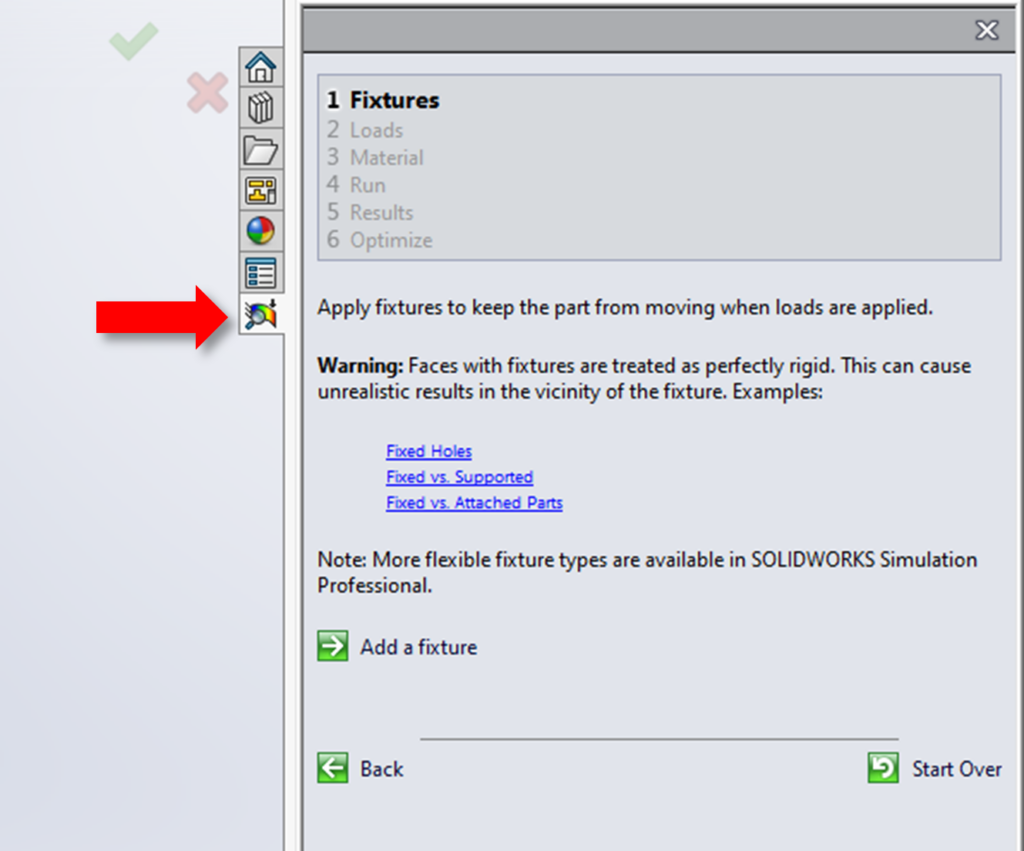
After you activate the product, SimulationXpress opens the wizard in the task pane on the right side of the interface.
The wizard walks you through the setup and execution of the study step by step. Even if you’re new to running an FEA study, it explains the basics clearly, making it an excellent tool for beginners.
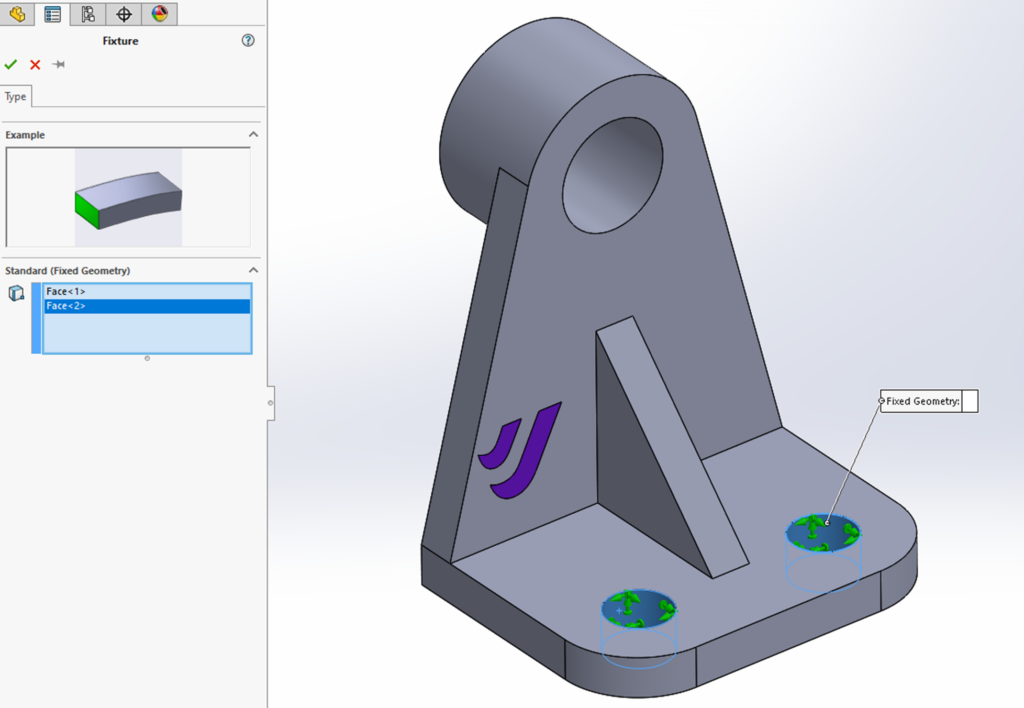
1: Fixtures
To begin your analysis, you will need to determine where to secure the geometry on your model. This step is crucial as without fixtures, the model would “float off into space” as per Newton’s third law of motion, which states that every action has an equal and opposite reaction.
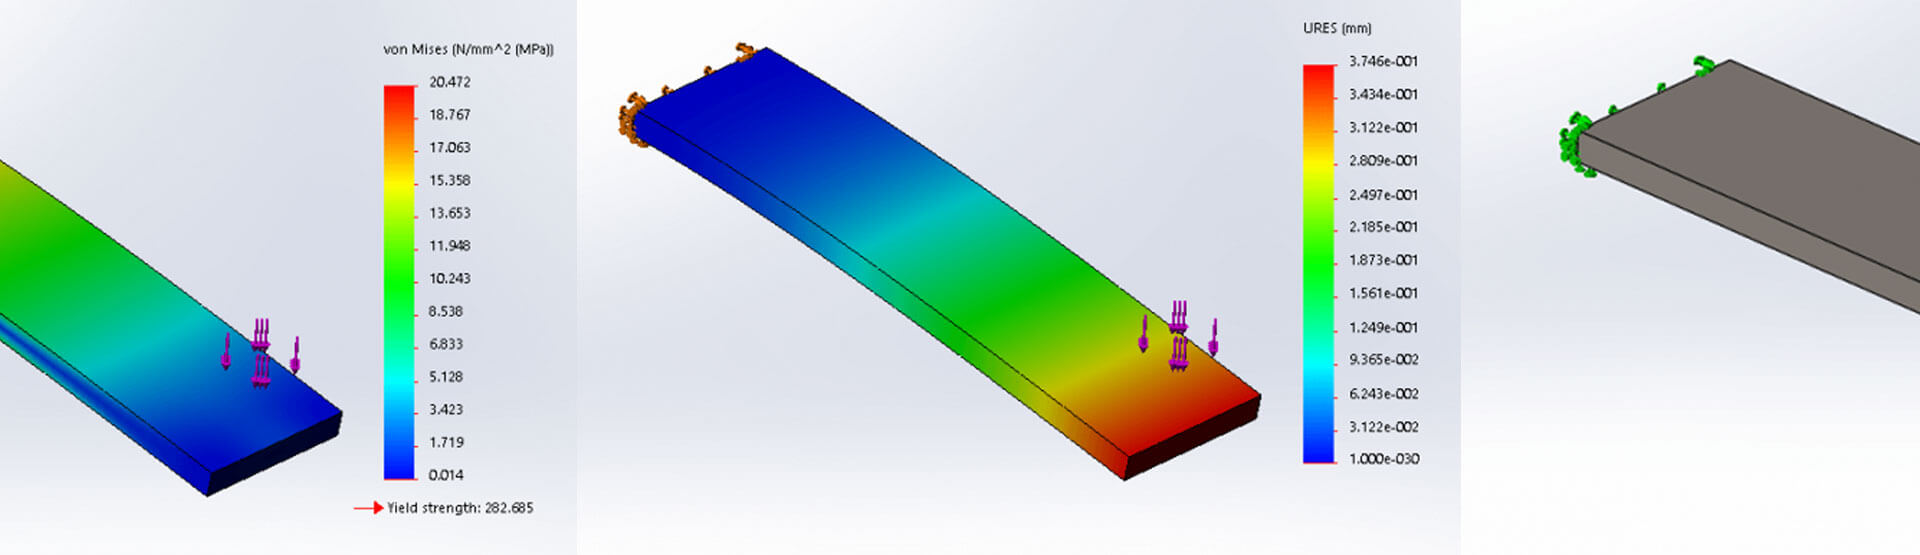
You must make at least one selection. In Image 4, I’ve selected the holes on the base of the bracket. The green arrows mark these faces, indicating that the constraints restrict all six degrees of freedom (DOF) and fix the geometry.
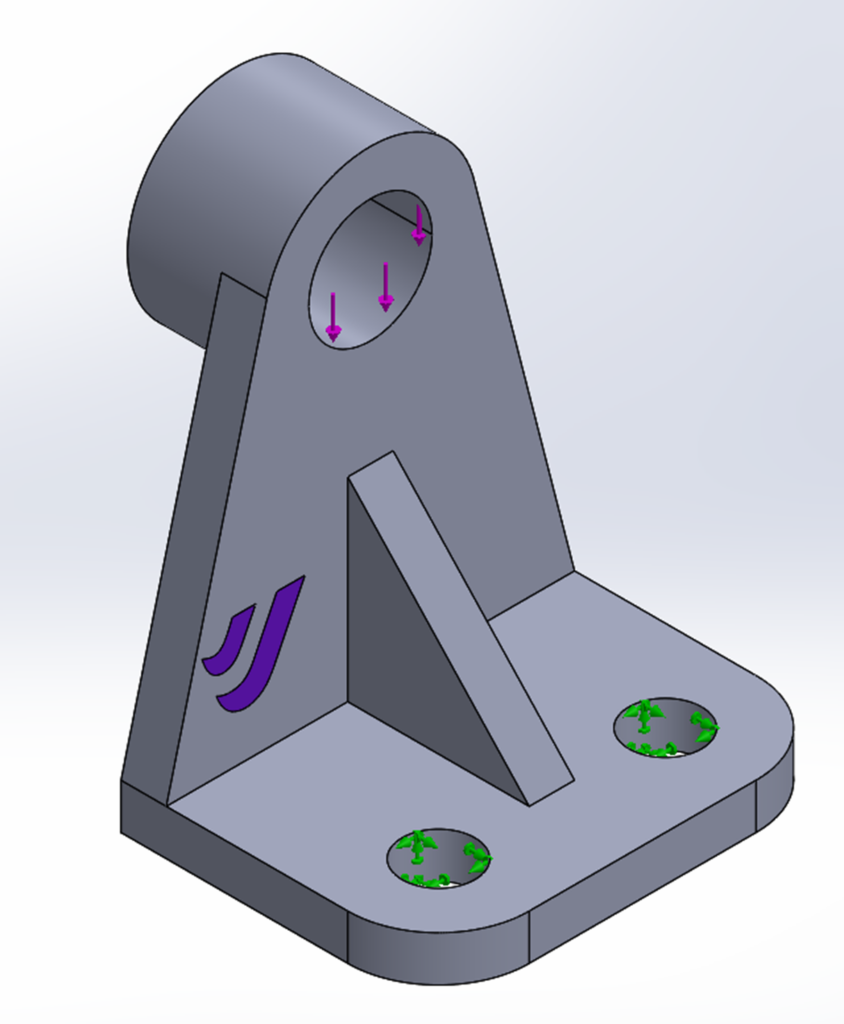
2: Loads
The next step is to apply a force or pressure to a particular area on the model. In both cases, a face is the only selection available.
(Tip: Use the Split tool command to specify the exact area where you want to apply the load.) The software then displays purple arrows on the selected face to show the area and direction of the applied load.)
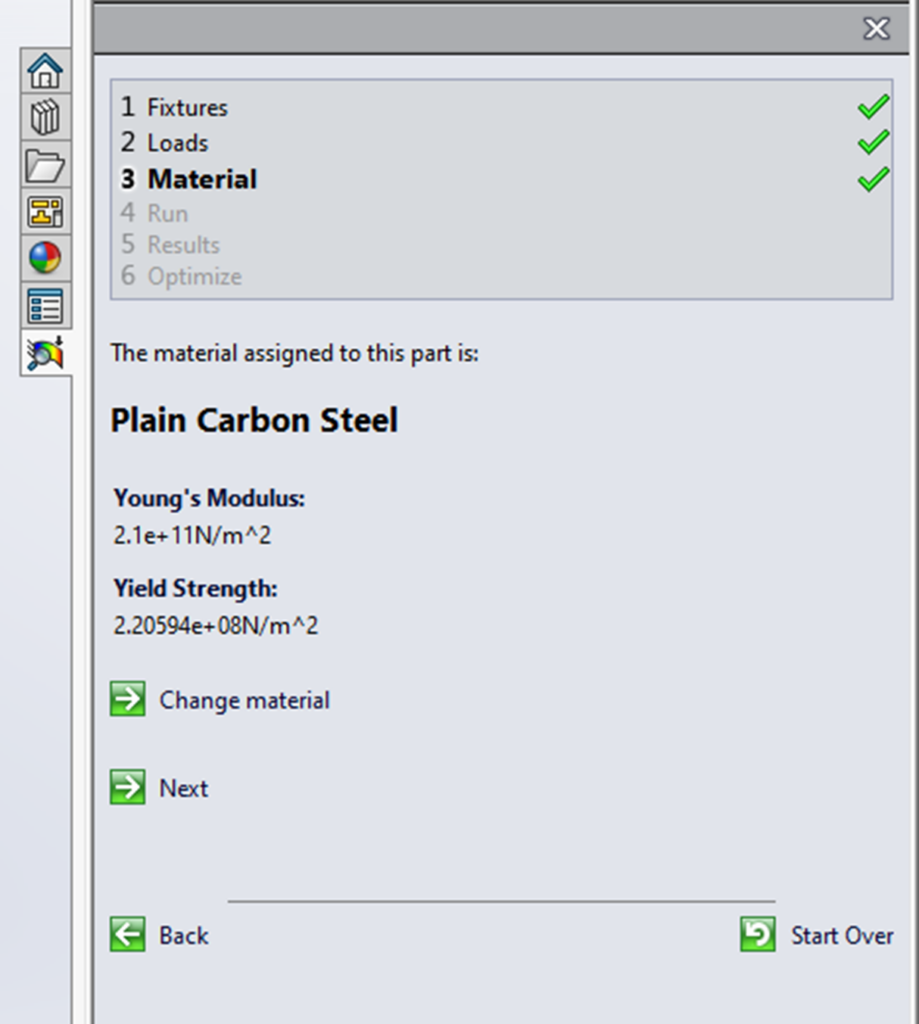
3: Material
To ensure accurate calculations of stress and displacement, the study needs material properties like elastic modulus and yield strength.
Therefore, you must assign a material to the part or body for the study to proceed. Note that SimulationXpress supports only linear static analysis, so it does not account for non-linear (plastic) deformation.
Helpful link: What is Linear Static Analysis?
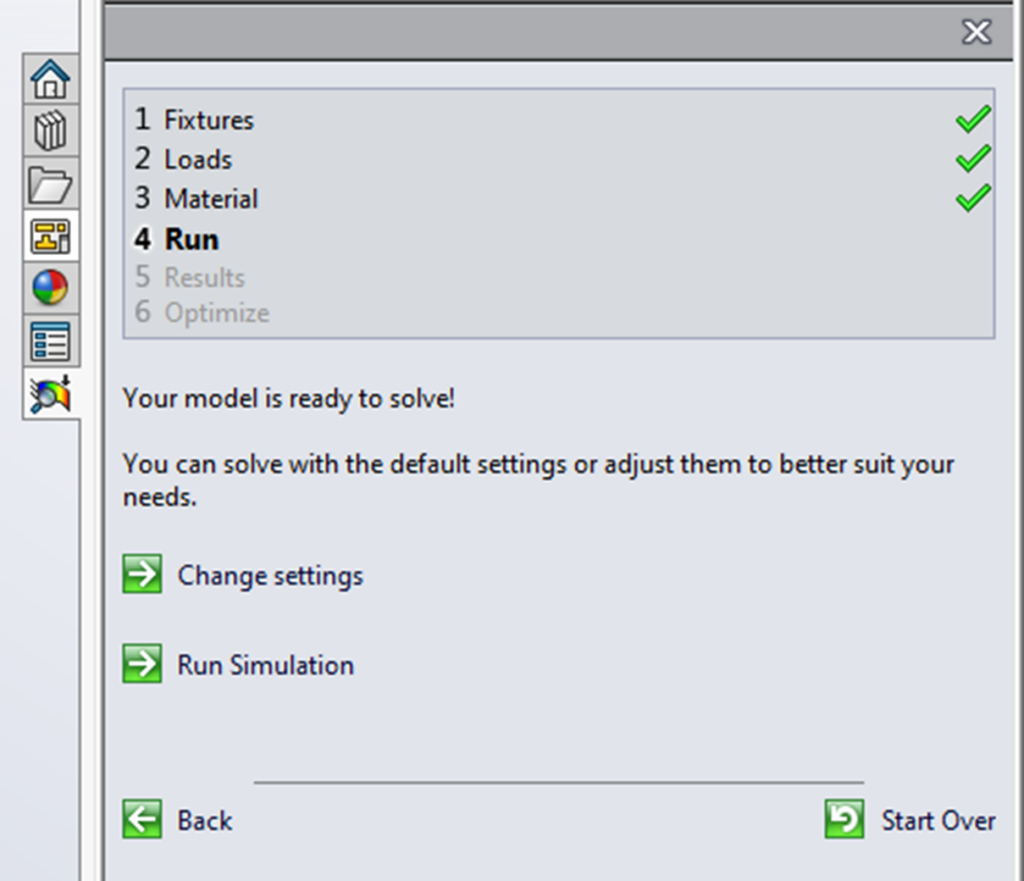
4: Run
Before solving the study, you can adjust the mesh settings.
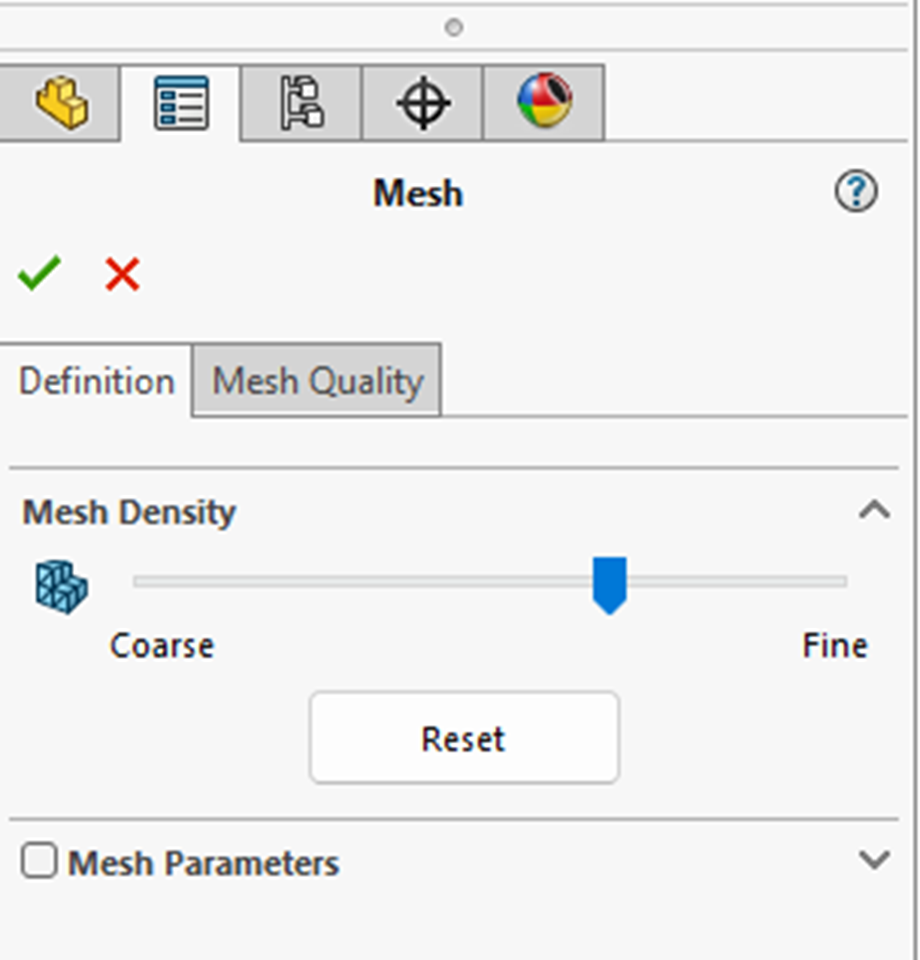
The precision of the solution is influenced by the mesh density, with default settings typically offering an accurate deformation solution and a fairly accurate stress distribution.
While a finer mesh can enhance stress results in specific areas, it may also significantly increase the simulation’s runtime.
Once you’ve made your selection, you’re ready to run the study.
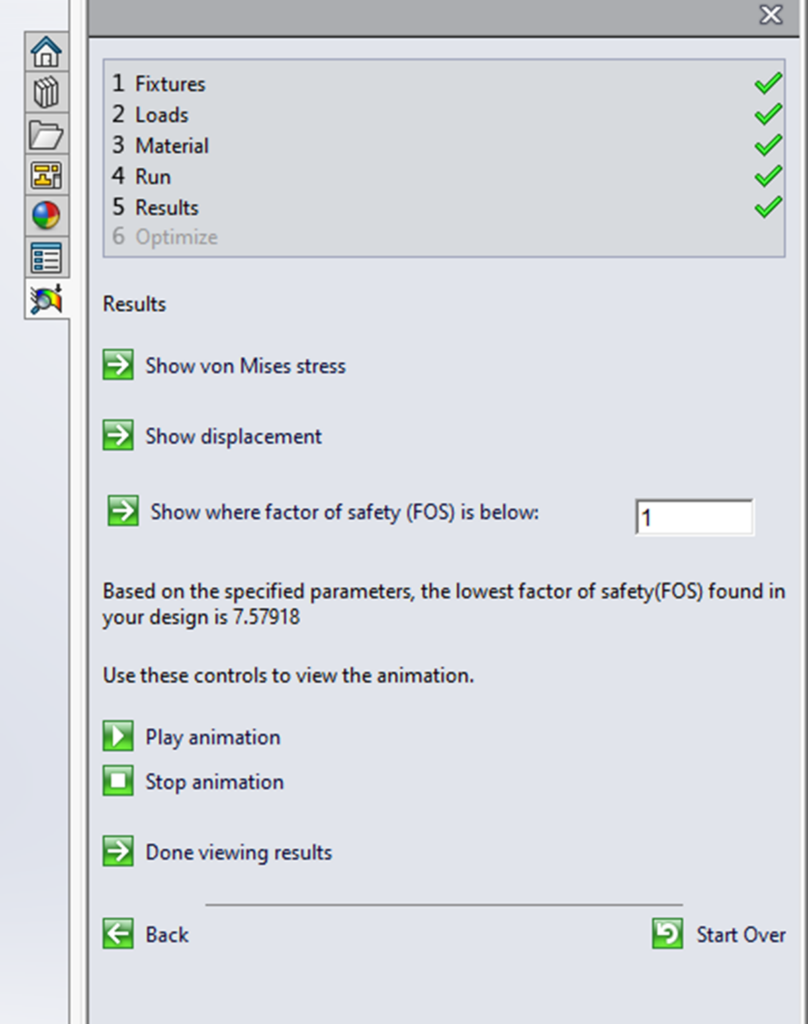
5: Results
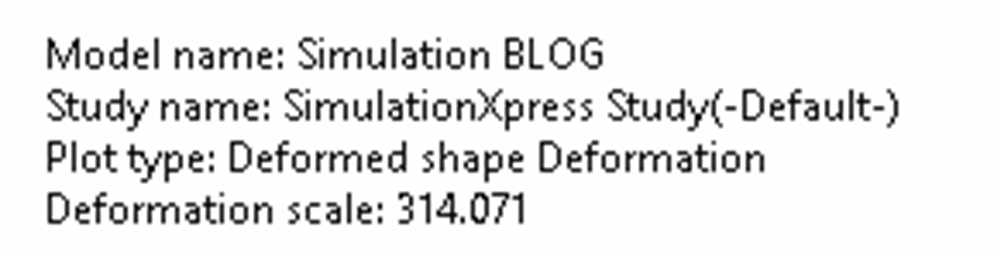
Once the study has been solved, the geometry’s displacement is automatically animated. Keep in mind that the deformation is typically exaggerated to make the results more visible. You can view and adjust this scale in the top left corner of the graphics window.
You also have two options; to continue, or to go back and edit the study parameters. By choosing to continue, you are then able to view the stress, displacement and factor of safety of the studied geometry, as seen below. The following link will provide additional guidance on viewing results.
Helpful link: Viewing SimulationXpress Results
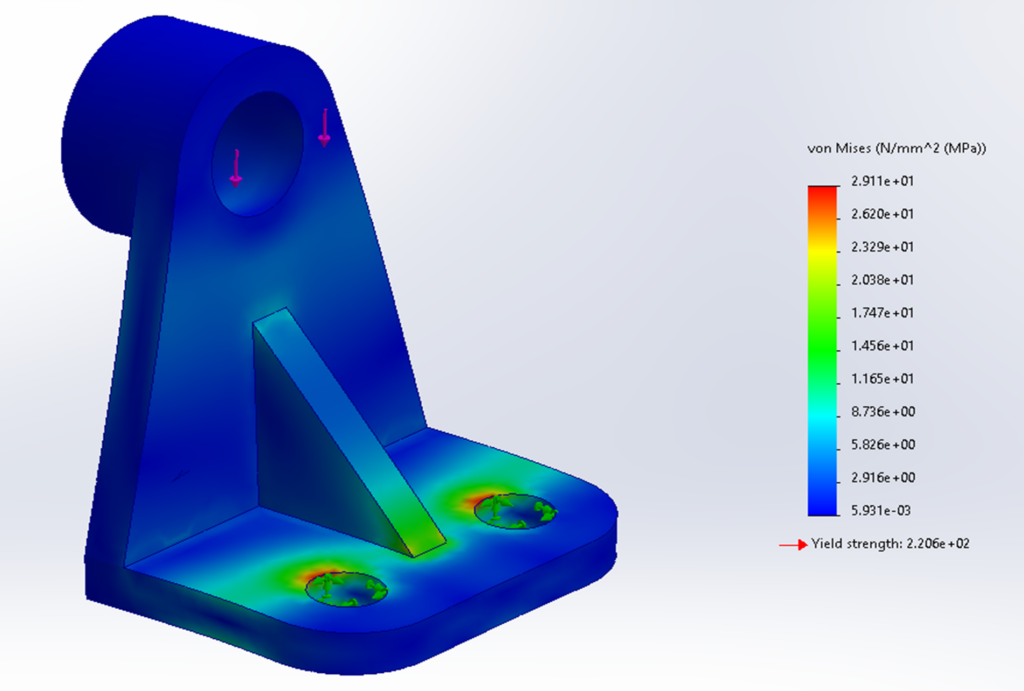
Stress Plot
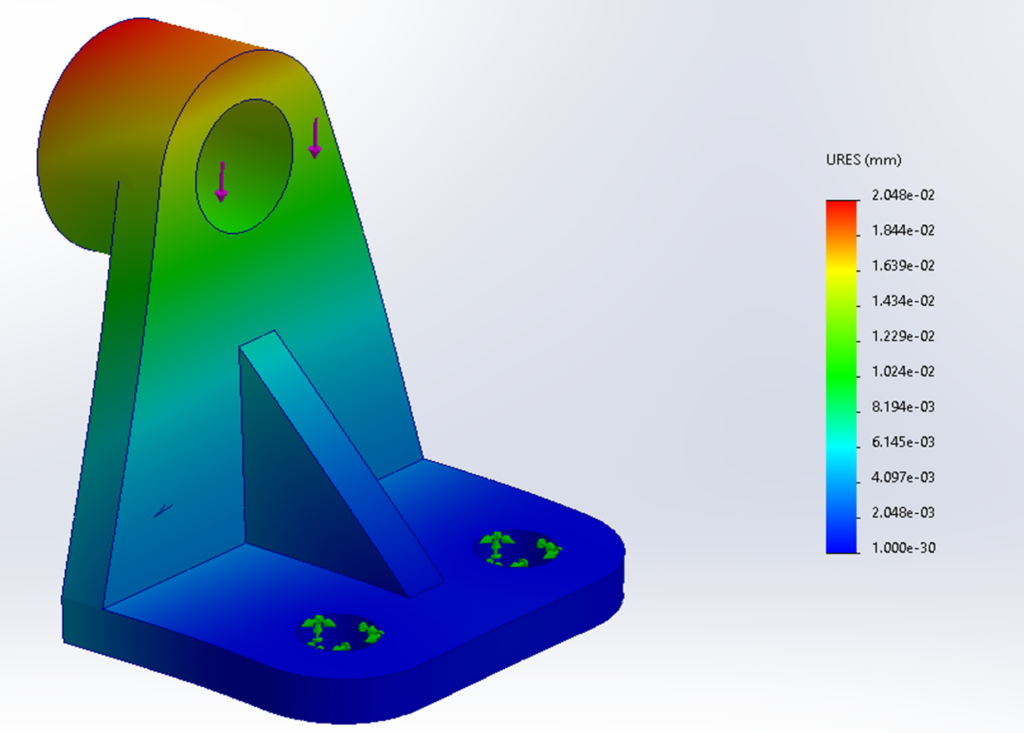
Displacement Plot
After reviewing the results, you can automatically create a report of the study using Microsoft Word.
Alternatively, you can export the file to eDrawings, allowing someone without SOLIDWORKS to open and examine the study results in 3D.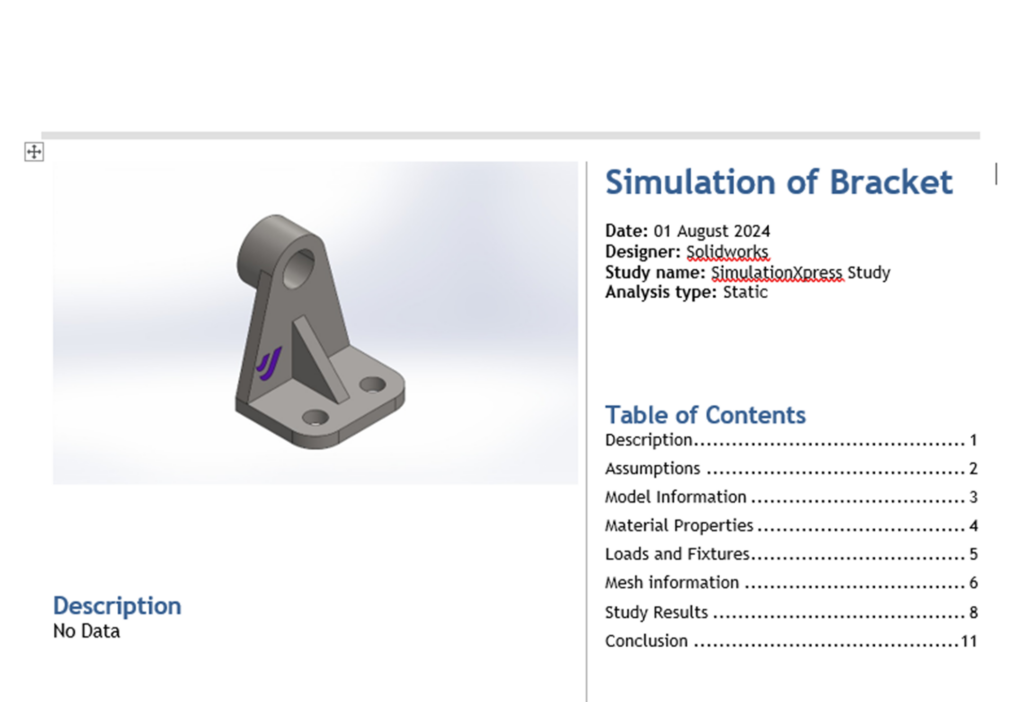
This tool is excellent for calculating the impact of different loads on a design and evaluating your model’s performance, reducing the need for physical prototypes. For more advanced geometry studies, additional simulation packages are available. For instance, SOLIDWORKS Premium allows you to conduct studies on assemblies.
However, please remember that all simulation results are approximate and should be verified with real-life data. The comprehensive SOLIDWORKS Simulation Professional and Premium packages offer greater detail, flexibility, and accuracy.
If you liked this blog please check out our others here!

|
About the Author: This tutorial was written by SOLIDWORKS Applications Engineer, Cameron Piper. Cameron has been with the Visiativ Technical Support Team since 2021. |
|||
|
|
View Cameron Piper’s LinkedIn Profile here.
|
|||