How to: Fill a SOLIDWORKS Mold Cavity
23 October 2025
Why use Mold Cavity tools?
SOLIDWORKS offers various integrated tools that are designed to support users during the Mold tooling creation process helping with the development of complex assemblies and tooling. These 3D Mold tool models serve as a cost-effective and efficient solution for producing precise injection mouldings.
SOLIDWORKS Mold tools are versatile, allowing users to design a variety of parts across different materials. This toolset seamlessly integrates product design, Mold design and design validation within a single CAD package. This streamlines workflows, minimises errors and reduces costs.
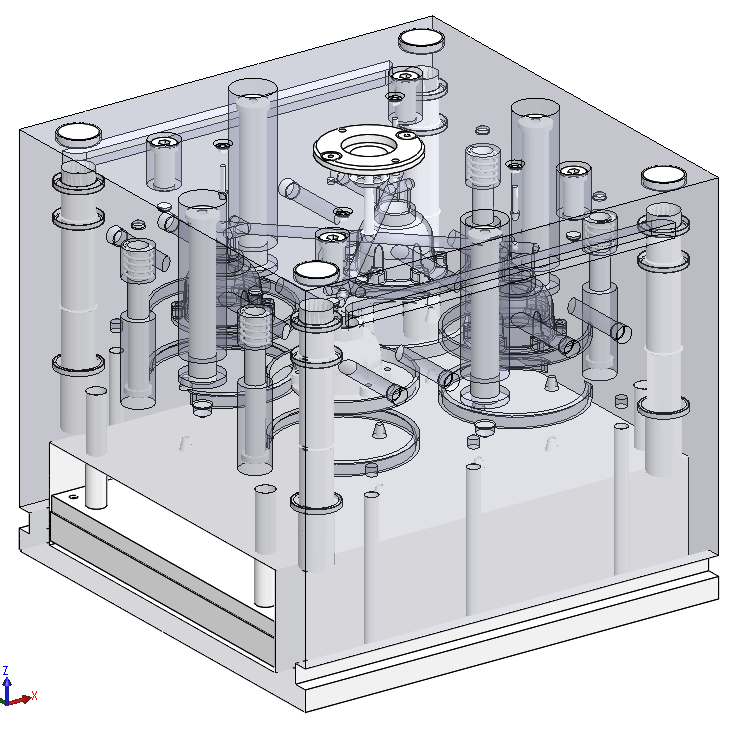
Here we will demonstrate how SOLIDWORKS and its Mold Cavity tools can assist users in enhancing their designs. For instance, users might need to validate a pre-existing Mold assembly, even when they have limited information about its operation.
They may need to test whether the Mold produces the desired part accurately. Using SOLIDWORKS simplifies this validation process, even for complex parts.
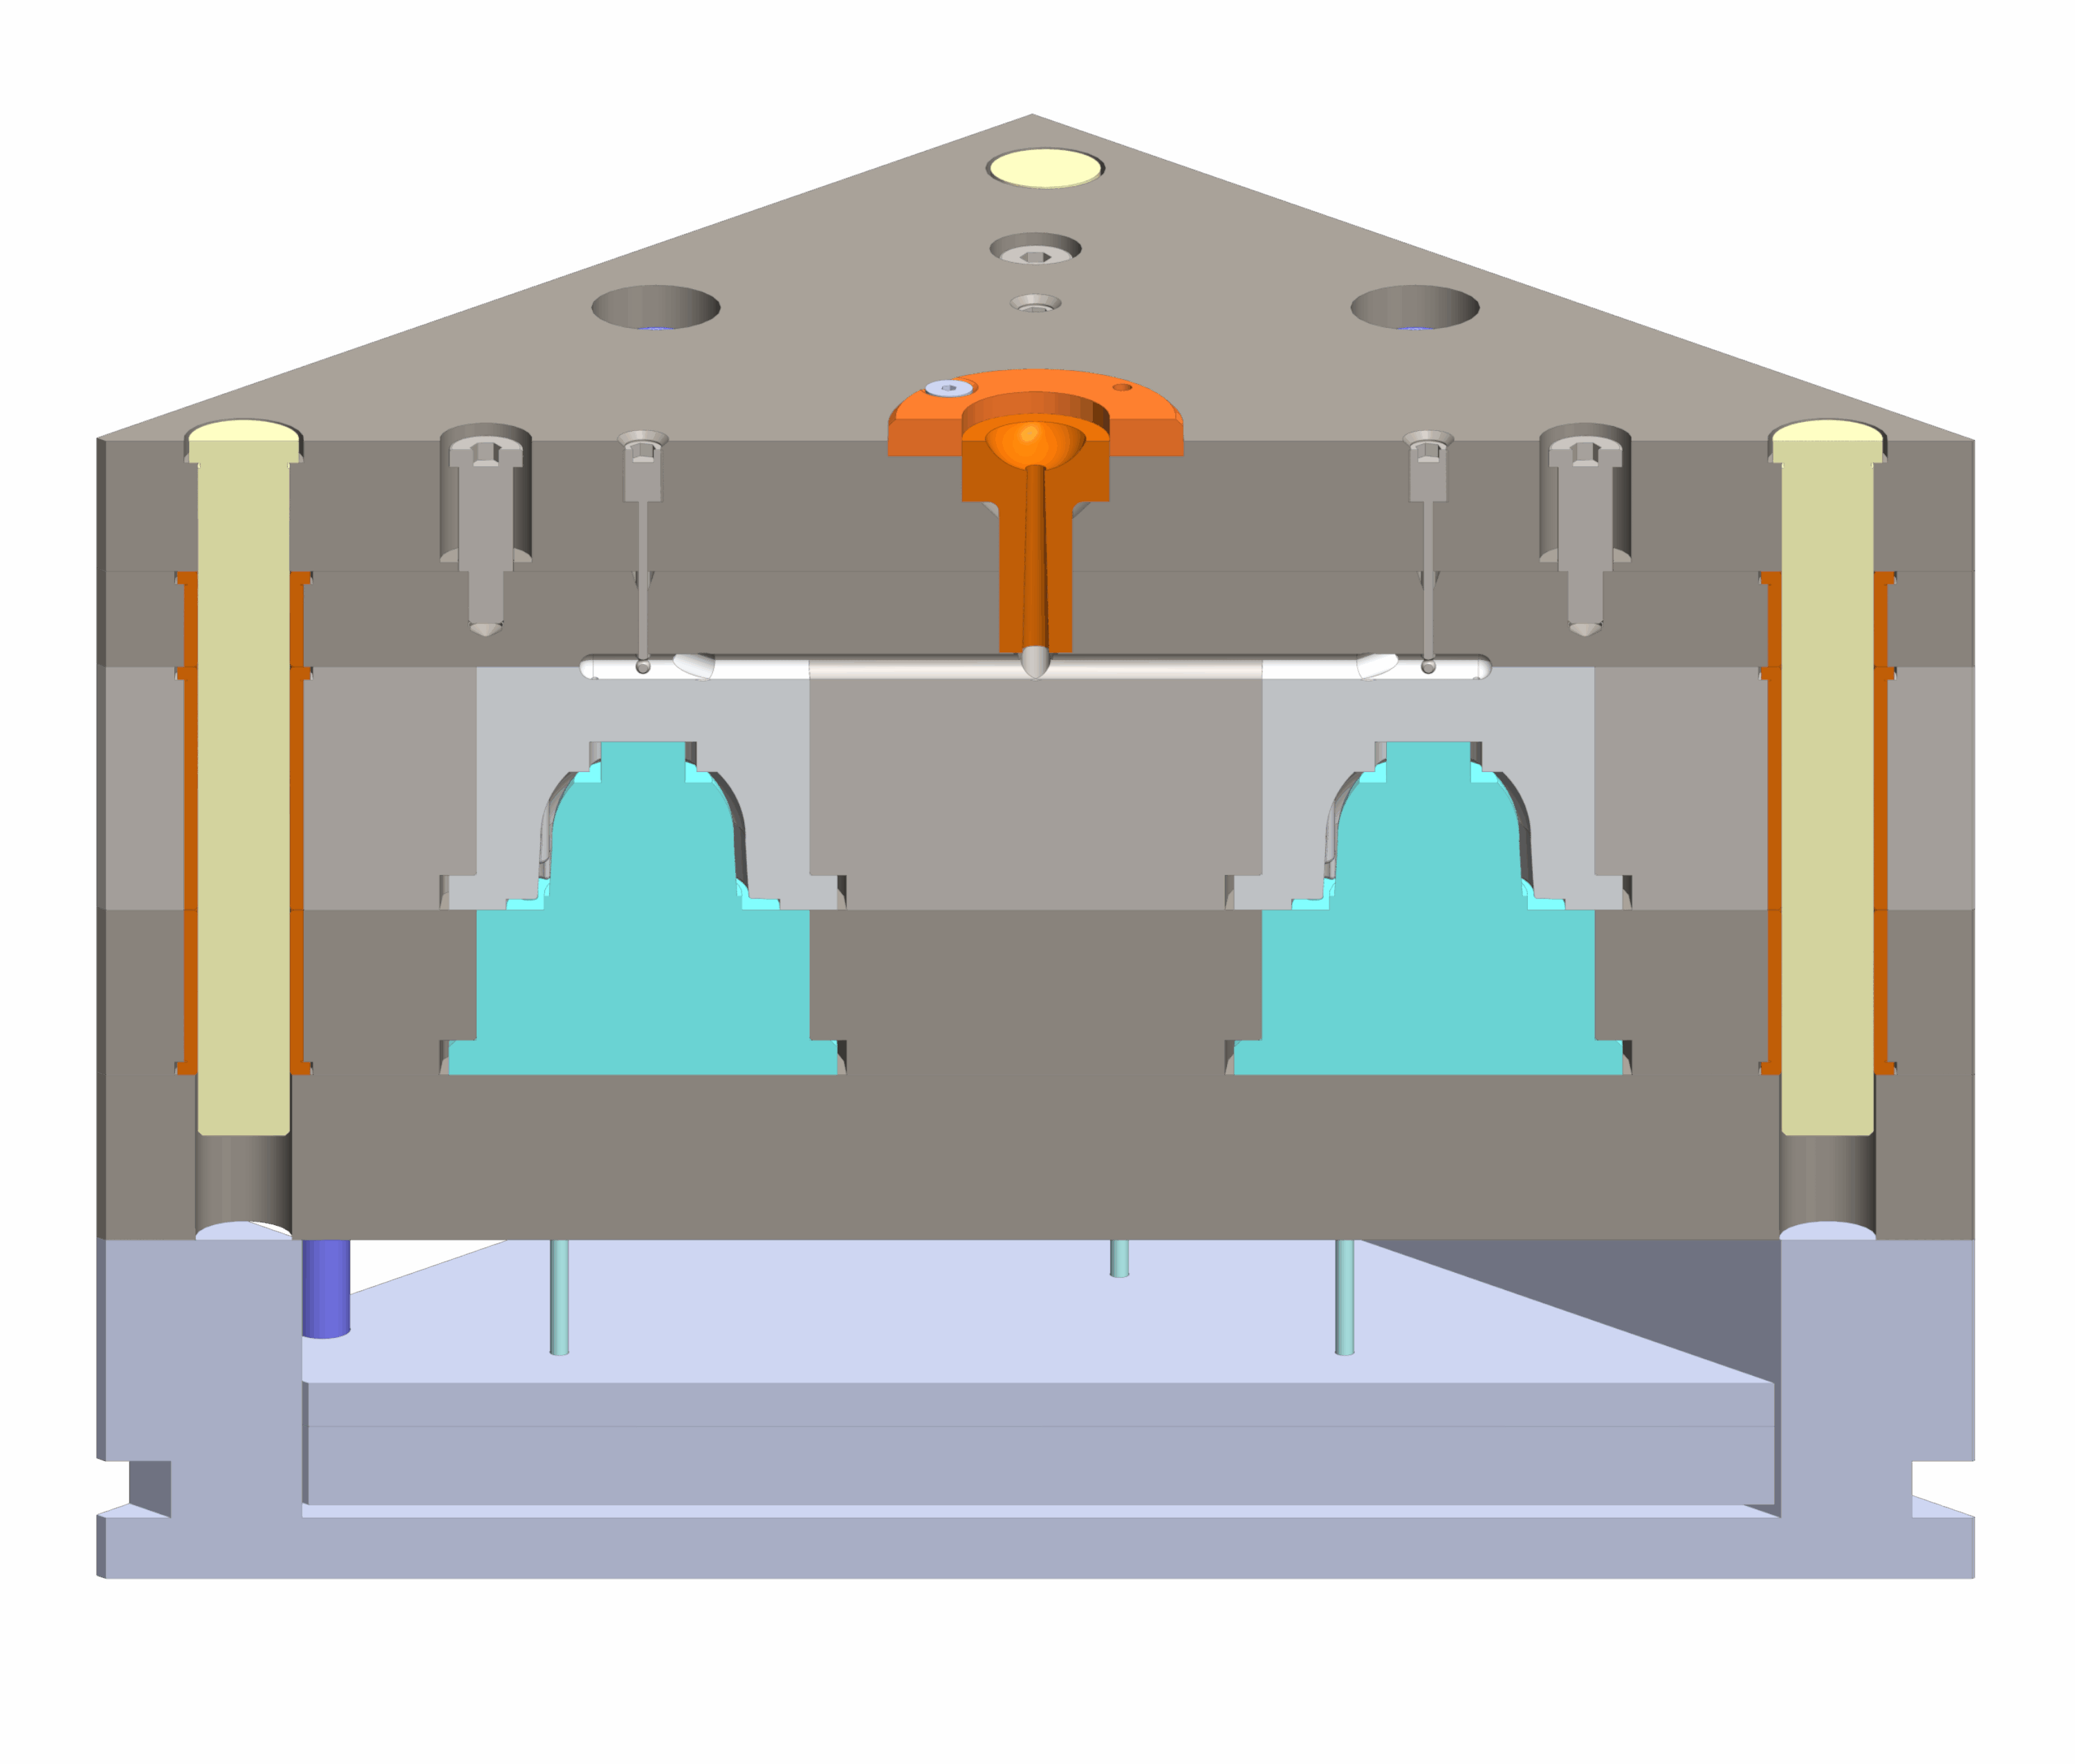
Let’s explore how to fill the cavity of a complex Mold assembly to ensure the resulting part meets the design specifications.
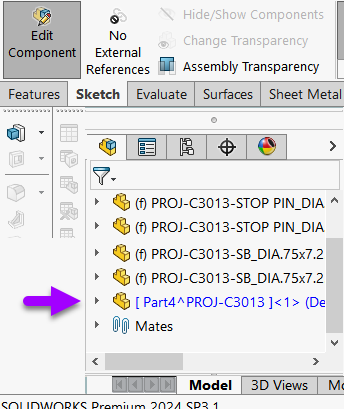
Inserting a Virtual Part
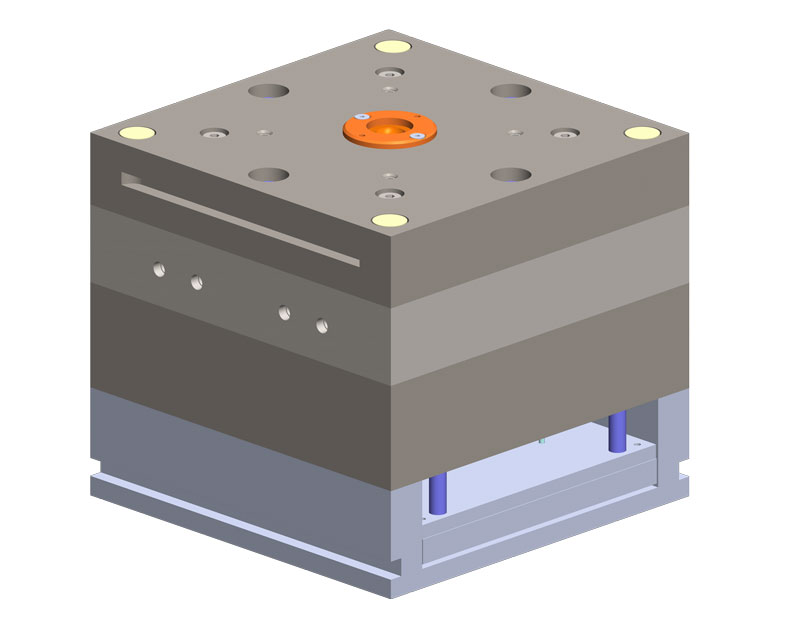
Open the Mold cavity tooling in SOLIDWORKS.
Go to: Insert > Components > New Part.
 |
Select a reference plane i.e. Top plane.
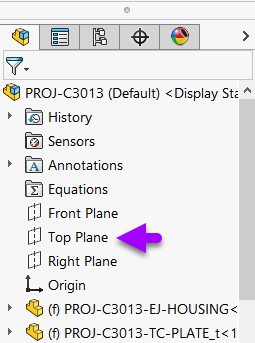 |
You’ll see the new component in the feature tree.
 |
Exit out of the sketch command but continue editing the component.
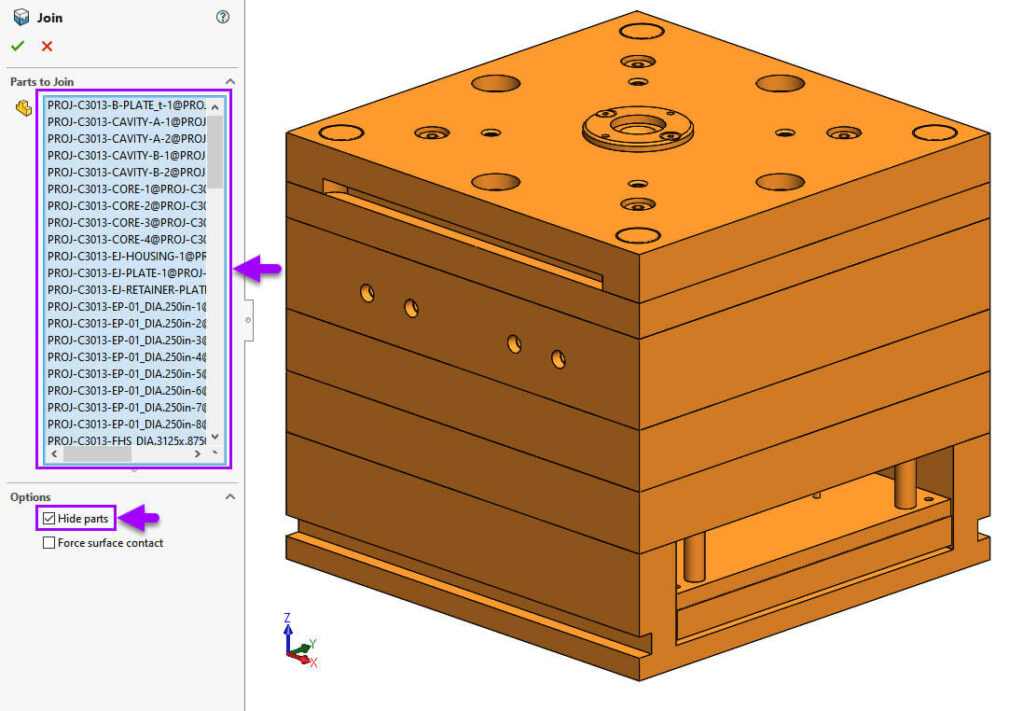
Using the Join Feature
The “Join” feature can combine multiple parts from the assembly together to form the new part. Join removes any surfaces sharing the same space, then merges the selected bodies into a single volume. The help files provide an overview: here.
Go to: Insert > Features > Join.
 |
Group-select all parts within the assembly. Check “Hide parts” and then click the green tick to “OK” the feature.
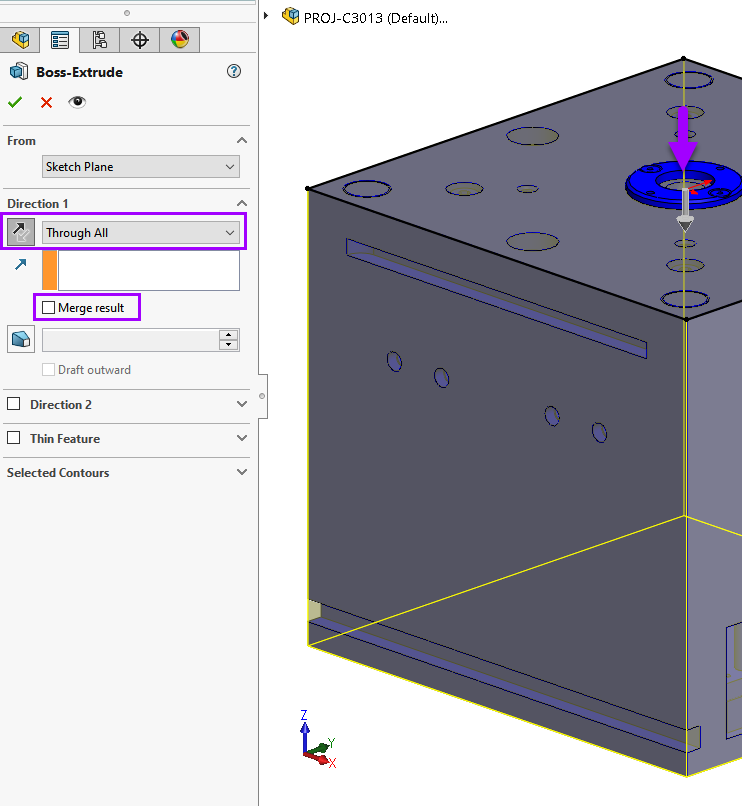
Continue editing the part. Create a new sketch on the top surface and then convert the outside edges of the top face.

Insert a new “Through All” Extrude feature into the part. Ensure the “Merge result” box is NOT checked and accept the feature with the green tick.
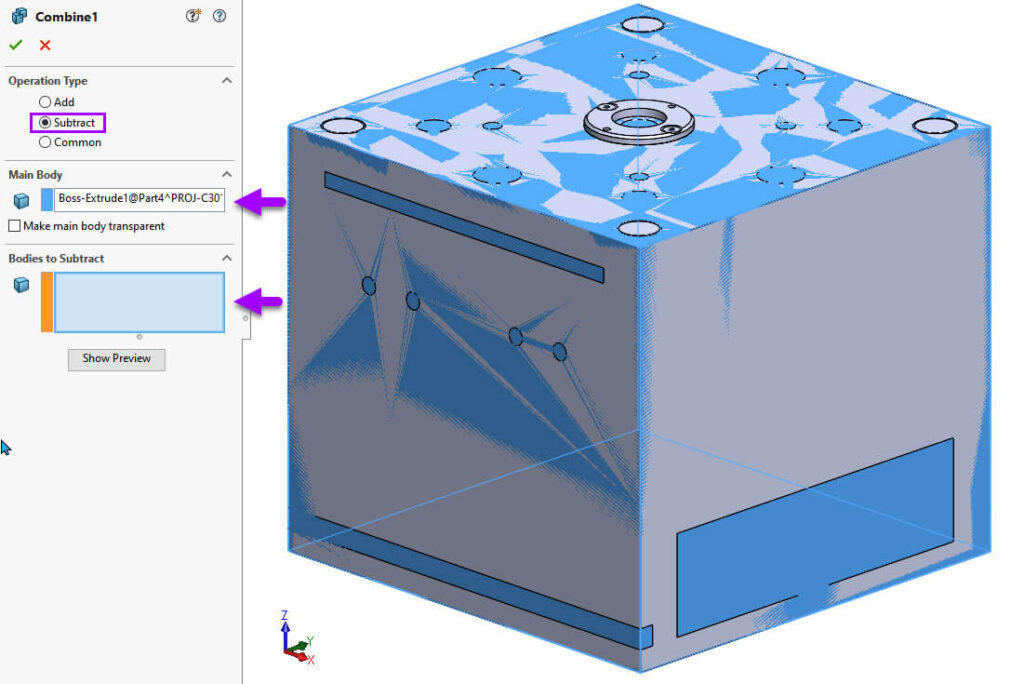
Using the Combine Feature
The Combine Feature has different options to choose from to fill a mold cavity: Add, Subtract and Common. Each provides its own unique result of how bodies will affect each other. The official SOLIDWORKS help files provide an overview: here.
The “Combine” feature can be found under: Insert > Features > Combine.
Check “Subtract”. Choose the “Boss-Extrude” as the main body and then combine with the “Join Body”.
|
|

By using SOLIDWORKS Mold Cavity tools, designers can simplify even the most complex Mold cavity design processes while maintaining accuracy and efficiency. The integrated features allow users to create, test and validate their Mold assemblies within a single environment, reducing errors and saving valuable time.
 |
About the author: This guide was written by SOLIDWORKS Applications Engineer, Graeme Billingsley. Graeme has been with the Visiativ Technical Support Team since 2022. |
|||
|
|
||||